Browserless
Browerless Web Scraping: NodeJs in Selenium
Headlesschrome is important in web scraping. This article is talking about the most detailed steps to do web scraping with NodeJS and Selenium through Browserless.
Aug 14, 2024Carlos Rivera
Does Selenium Work Well?
Selenium is a popular open source web automation framework that is primarily used for browser test automation. Besides, it can also be used to solve dynamic web scraping problems.
Selenium has 3 main components:
- Selenium IDE: A browser plugin that provides a faster and easier way to create, execute, and debug Selenium scripts.
- Selenium WebDriver: A set of portable APIs that help you write automated tests in any programming language that runs on a browser.
- Selenium Grid: Automation tool for distributing and scaling testing across multiple browsers, operating systems, and platforms.
Is Browserless Good for Web Scraping?
What is Browserless?
Nstbrowserless is a cloud-based headlesschrome service that executes web operations and runs automation scripts without requiring a graphical interface. It is particularly useful for automating tasks like web scraping and other automated processes.
Is Browserless good for web scraping?
Yes, absolutely! Nstbrowserless can achieve complex web scraping and any other automation task in the cloud. It will free up the local service and storage of your devices. Nstbrowserless works with an anti-detect browser and headlesschrome feature. It's no longer to be anxious about being detected and facing web blocking.
Combining Browserless and Selenium enhances web automation by allowing Selenium to run test scripts in a cloud-based, headlesschrome environment provided by Browserless. This setup is efficient for large-scale tasks like web scraping, as it eliminates the need for a physical browser while still handling dynamic content and user interactions.
Do you have any wonderful ideas and doubts about web scraping and Browserless?
Let's see what other developers are sharing on Discord and Telegram!
What Are the Advantages of Selenium Web Scraping?
- Handling Dynamic Content: Selenium can interact with JavaScript-heavy websites. It allows you to scrape content that is dynamically loaded after the initial page load.
- Browser Automation: Selenium can simulate real user interactions with websites, such as clicking buttons, filling out forms, and navigating pages, making it ideal for scraping data from websites that require user interaction.
- Multi-browser Support: Selenium supports a variety of browsers (Chrome, Firefox, Safari), so you can do a test and scrape in different environments.
- Programming Language Flexibility: Selenium is compatible with a variety of programming languages, including Python, Java, C#, and JavaScript, which help developers the flexibility to choose their preferred language.
- Bypassing Anti-scraping Measures: Selenium’s ability to mimic real user behavior makes it effective at bypassing some anti-scraping measures designed to prevent automated scraping, such as CAPTCHA and rate limiting.
- Real-time Data Collection: With Selenium, you can scrape and collect data in real-time, which is useful for time-sensitive applications.
- Extensive Community and Documentation: Selenium has a large and active community along with extensive documentation to help troubleshoot issues and increase the efficiency of your web scraping projects.
How to Use NodeJS in Selenium?
By using Node.js in Selenium, developers can control headlesschrome to perform various operations, such as web scraping, automated testing, generating screenshots, etc.
This combination takes advantage of the efficient, non-blocking features of Node.js and the browser capabilities of headlesschrome to achieve efficient automation and data processing.
Step 1. Installation
Enter the following command in the terminal:
Shell
npm install selenium-webdriverIf the terminal reports an error, please check whether your computer has a node environment:
Shell
node --versionYou don't have a node environment? Please install the latest version of the node environment first.
Step 2. Run Browser with NodeJS in Selenium
Selenium is known for its powerful browser automation capabilities. It supports most major browsers, including Chrome, Firefox, Edge, Opera, Safari, and Internet Explorer.
Since Chrome is the most popular and powerful among them, you will use it in this tutorial.
JavaScript
import { Builder, Browser } from 'selenium-webdriver';

async function run() {
    const driver = new Builder()
      .forBrowser(Browser.CHROME)
      .build();
    await await driver.get('https://www.yahoo.com/');
}
You can also add any personalization you want. Let's make our scripts a headlesschrome:
JavaScript
import { Builder, Browser } from 'selenium-webdriver';
import chrome from 'selenium-webdriver/chrome';

const options = new chrome.Options();
options.addArguments('--remote-allow-origins=*');
options.addArguments('--headless');

async function run() {
    const driver = new Builder()
      .setChromeOptions(option)
      .forBrowser(Browser.CHROME)
      .build();
    await await driver.get('https://www.yahoo.com/');
}
Now, you can visit any website!
Step 3. Scrape the website
Once you have the complete HTML of the web page, you can proceed to extract the required data. In this case, let’s parse the title and content of all the news on the page.
To accomplish this task, you must follow these steps:
- Analyze the DOM of the web page using DevTools.
- Implement an effective node selection strategy to locate the news.
- Extract the required data and store it in a JavaScript array/object.
DevTools is an invaluable tool in web scraping. It helps you inspect the currently loaded HTML, CSS, and JavaScript. You can also get information about the network requests made to the page and their corresponding load time.
CSS selectors and XPath expressions are the most reliable node selection strategies. You can use any of them to locate the elements, but in this tutorial, for simplicity, we will use CSS selectors.
Let’s use DevTools to find the right CSS selector. Open the target web page in your browser and right-click on the product element > Inspect to open DevTools.
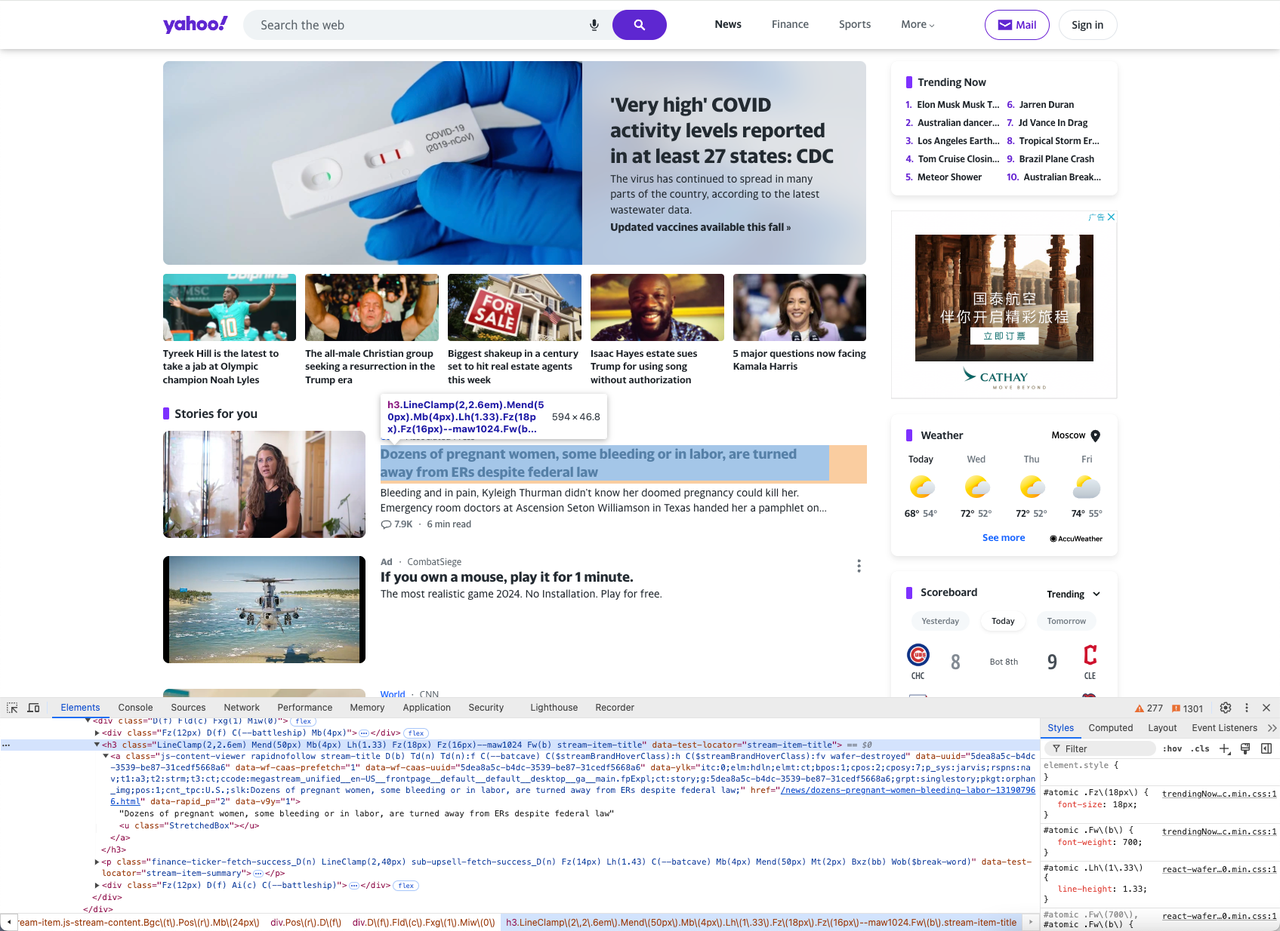
You can see that the structure of each news title is composed of an h3 tag and a tag, and we can use the selector h3[data-test-locator="stream-item-title"] to locate them.
We use the same method to find the selector p[data-test-locator="stream-item-summary"] for the news content.
Define the CSS selector using the above information and locate the product using the findElements() and findElement() methods.
In addition, use the getText() method to extract the inner text of the HTML node, and finally store the extracted name and price in an array.
JavaScript
const titlesArray = [];
const contentArray = [];

const newsTitles = await driver.findElements(By.css('h3[data-test-locator="stream-item-title"]'));
const newsContents = await driver.findElements(By.css('p[data-test-locator="stream-item-summary"]'));

for (let title of newsTitles) {
    titlesArray.push(await title.getText());
}

for (let content of newsContents) {
    contentArray.push(await content.getText());
}
Step 4. Exporting data
We have obtained the web scraping data! Now, we need to export them to a CSV file.
Import the built-in Node.js fs module, which provides functions for working with the file system:
JavaScript
import fs from 'node';Then, initialize a string variable called newsData with a header row containing the column names ("title, content\n").
JavaScript
let newsData = 'title,content\n';Next, loop through the two arrays (titlesArray and contentsArray) containing the news titles and content. For each element in the array, append a line after newsData with a comma separating the title and content.
JavaScript
for (let i = 0; i < titlesArray.length; i++) {
    newsData += `${titlesArray[i]},${contentsArray[i]}\n`;
}
Use the fs.writeFile() function to write the newsData string to a file called yahooNews.csv. This function accepts three parameters: the file name, the data to be written, and a callback function to handle any errors encountered during the writing process.
JavaScript
fs.writeFile("yahooNews.csv", newsData, err => {
    if (err) {
        console.error("Error:", err);
    } else {
        console.log("Success!");
    }
});
Running our code, we will get a result similar to this:
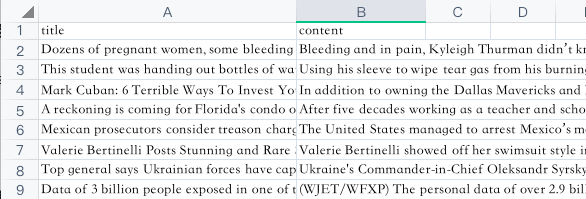
Congratulations, you have learned how to use selenium and headlesschrome: NodeJS to crawl.
How to Avoid Web Blocking When Scraping with Browserless?
Using headlesschrome mode in Browserless can automatically avoid web detection and web blocking to the greatest extent. But please combine these following strategies to get a more efficient crawling and seamless experience.
- Simulate real user behavior
The following is a sample code that uses Selenium and Node.js to simulate real user behavior. The code shows how to set User-Agent, simulate mouse operations, handle dynamic content, simulate keyboard input, and control browser behavior.
Before using it, make sure you have installed selenium-webdriver and chromedriver.
JavaScript
const { Builder, By, Key, until } = require('selenium-webdriver');
const chrome = require('selenium-webdriver/chrome');
const path = require('path');

// Start the browser
(async function example() {
  // Configure Chrome options
  let chromeOptions = new chrome.Options();
  chromeOptions.addArguments('headless'); // Use headless mode
  chromeOptions.addArguments('window-size=1280,800'); // Set the browser window size

  // Create a WebDriver instance
  let driver = await new Builder()
    .forBrowser('chrome')
    .setChromeOptions(chromeOptions)
    .build();

  try {
    // Set User-Agent and other request headers
    await driver.executeCdpCmd('Network.setUserAgentOverride', {
      userAgent: 'Your Custom User-Agent',
    });

    // Navigate to the target page
    await driver.get('https://example.com');

    // Simulate mouse movement and clicks
    let element = await driver.findElement(By.css('selector-for-clickable-element'));
    await driver.actions().move({ origin: element }).click().perform();

    // Random waiting time
    function sleep(ms) {
      return new Promise(resolve => setTimeout(resolve, ms));
    }
    await sleep(Math.random() * 5000 + 2000); // Randomly wait 2 to 7 seconds

    // Handle dynamic content and wait for a specific element to load
    await driver.wait(until.elementLocated(By.css('#dynamic-content')), 10000);

    // Simulate keyboard input
    let searchInput = await driver.findElement(By.css('#search-input'));
    await searchInput.sendKeys('Node.js', Key.RETURN);

    // Scroll randomly
    await driver.executeScript('window.scrollBy(0, window.innerHeight);');

  } finally {
    // Close the browser
    await driver.quit();
  }
})();- Use a proxy
Using a proxy server to hide your actual IP address can effectively avoid IP blocking. You can choose to rotate the proxy to use a different IP address for each request to reduce the risk of being blocked.
- Limit crawling frequency
Control the crawling frequency to avoid sending a large number of requests in a short period of time, which can reduce the chance of triggering anti-crawler mechanisms. You can set an appropriate time interval to send requests to mimic normal browsing behavior.
- Bypass CAPTCHAs
If the website uses CAPTCHA for protection, you can use a third-party CAPTCHA recognition service to automatically solve these challenges, or configure Selenium to handle CAPTCHA.
- Hide real browser fingerprinting
Some websites use browser fingerprinting to identify automated tools. Configuring different browser fingerprints or using an anti-detect browser with built-in fingerprint switching can help circumvent website detections.
- Dynamically loaded content processing
Using Browserless combined with Selenium to process dynamically loaded content (such as AJAX requests) can ensure that all dynamically rendered data on the web page is captured, not just static content.
Using Selenium for Other Web Operations
1. Locate elements
Selenium itself provides a variety of methods for finding page elements, including:
- Find by tag name: Search by the tag name of the element, such as
<input>or<button>, suitable for extensive searches. - Find by HTML class name: Search using the CSS class name of the element, such as
.class-name, suitable for quickly locating elements with specific class names. - Find by ID: Search by the unique ID of the element, such as
#element-id, which is particularly effective for quickly and accurately finding specific elements. - Use CSS selectors: Use CSS selector syntax to find elements, and you can select elements with specific attributes, class names, or structures, such as div
> p.class-name. - Use XPath expressions: Find elements by XPath paths, allowing precise navigation of page structures, such as
//div[@id='example'].
So, in Selenium WebDriver, we can locate elements on a web page through the find_element method. You just need to add specific requirements when using it. For example:
find_element_by_id: Find an element by its unique ID.find_element_by_class_name: Find an element by its CSS class name.find_element_by_link_text: Find a hyperlink element by its link text.
2. Waiting for Elements
In certain situations, such as a slow network or browser, your script may fail or show inconsistent results.
Instead of waiting for a fixed interval, choose to wait intelligently, such as waiting for a specific node to appear or be displayed on the page. This ensures that web elements are properly loaded before interacting with them, reducing the chances of errors such as element not found and element not interactable.
The following code snippet implements the waiting strategy. The until.elementsLocated method defines the waiting condition, ensuring that WebDriver waits until the specified element is found or the maximum wait time of 5000 milliseconds (5 seconds) is reached.
JavaScript
const { Builder, By, until } =  require('selenium-webdriver');

const yourElements = await driver.wait(until.elementsLocated(By.css('.your-css-selector')), 5000);
3. Screenshot
In NodeJS, you can take screenshots by just calling a function. However, there are some considerations to ensure that the screenshots are captured correctly:
- Window size: Make sure the browser window is sized appropriately for the content you need to capture. If the window is too small, parts of the page may be cut off.
- Page loading complete: Before capturing a screenshot, verify that all asynchronous HTTP requests have been completed and the page has been fully rendered. This ensures that the screenshot accurately reflects the final state of the page.
JavaScript
import fs from 'node';
import { Builder, Browser } from 'selenium-webdriver';

async function screenshot() {
    const driver = new Builder()
      .forBrowser(Browser.CHROME)
      .build();

    await driver.get('https://www.yahoo.com/');
    const pictureData = await driver.takeScreenshot();

    fs.writeFileSync('screenshot.png', pictureData, 'base64');
}

screenshot();
4. Use Nstbrowser to complete tasks
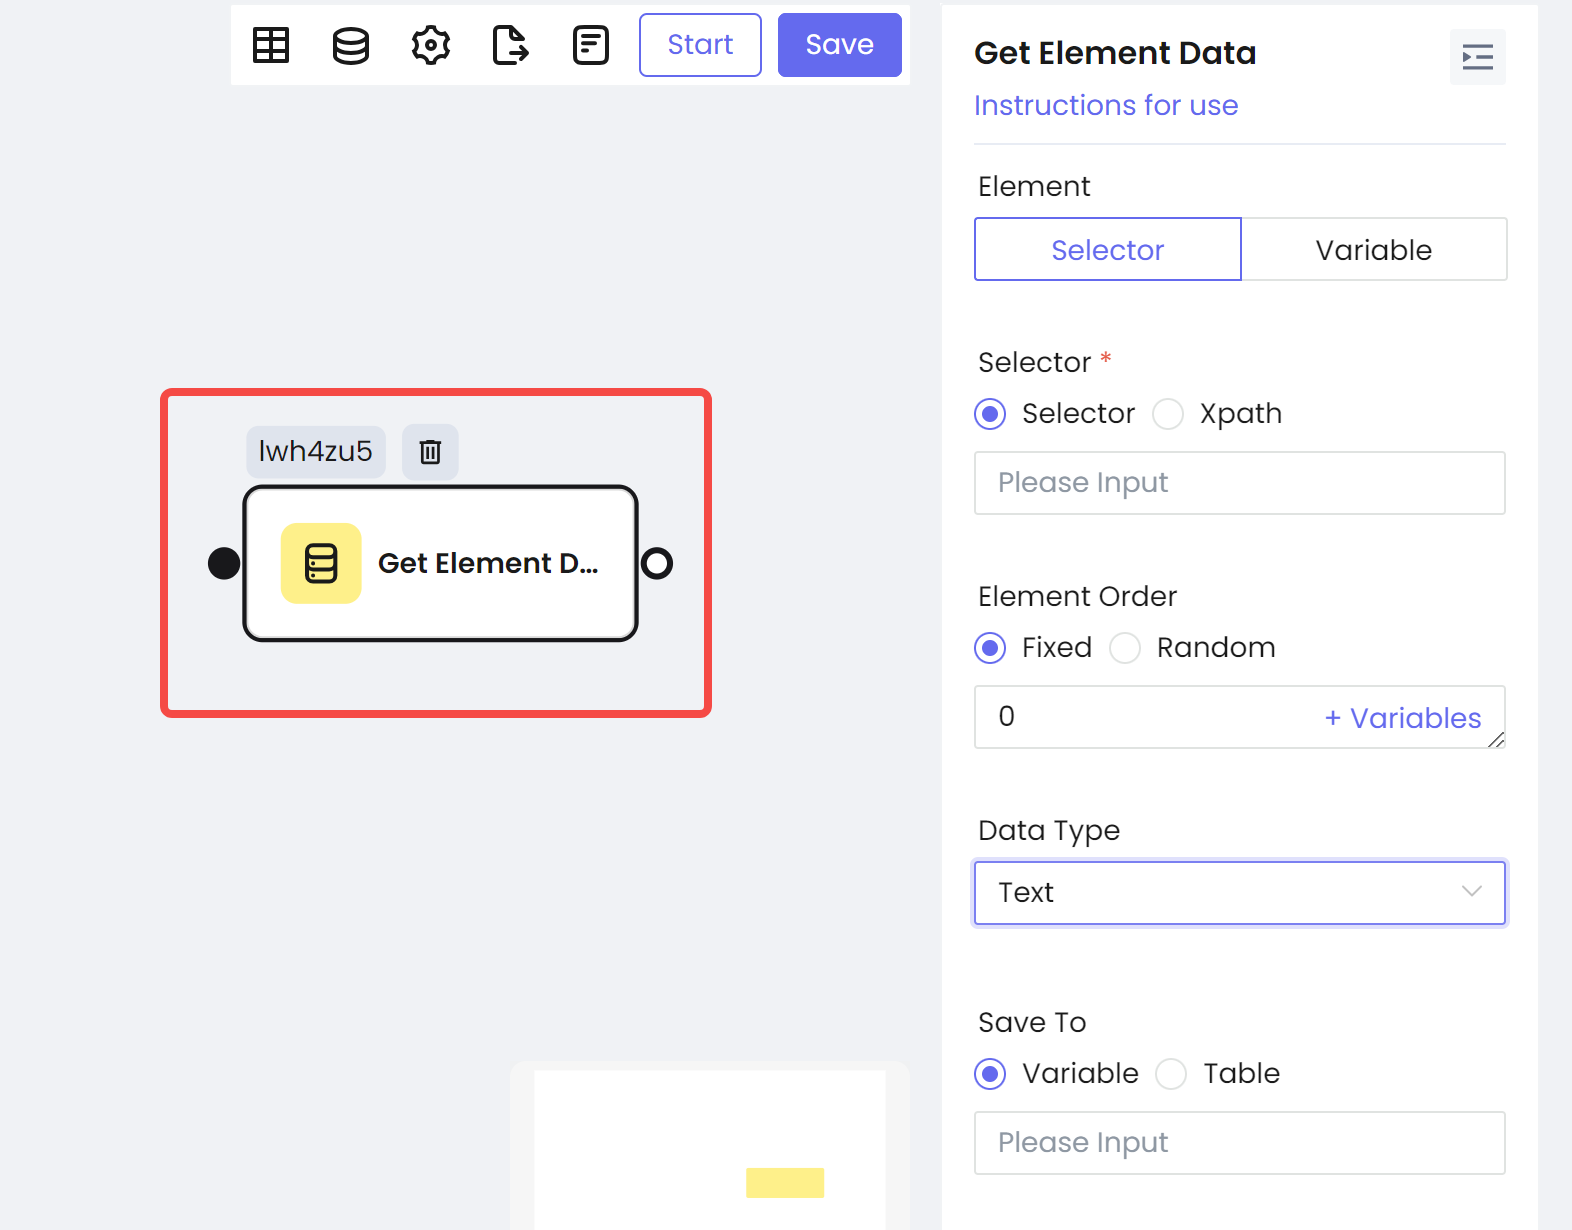
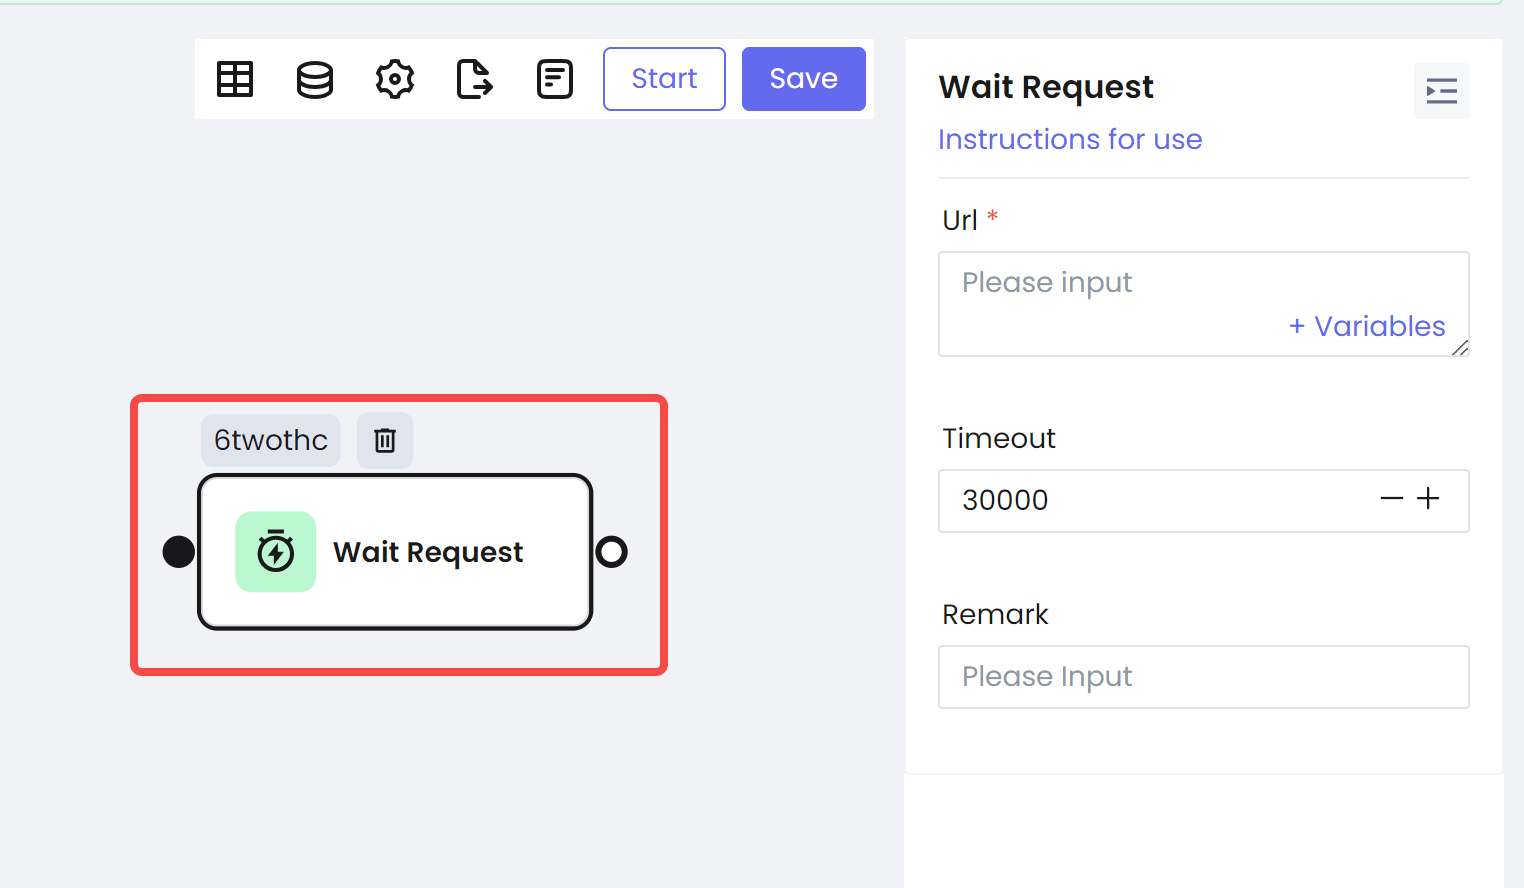
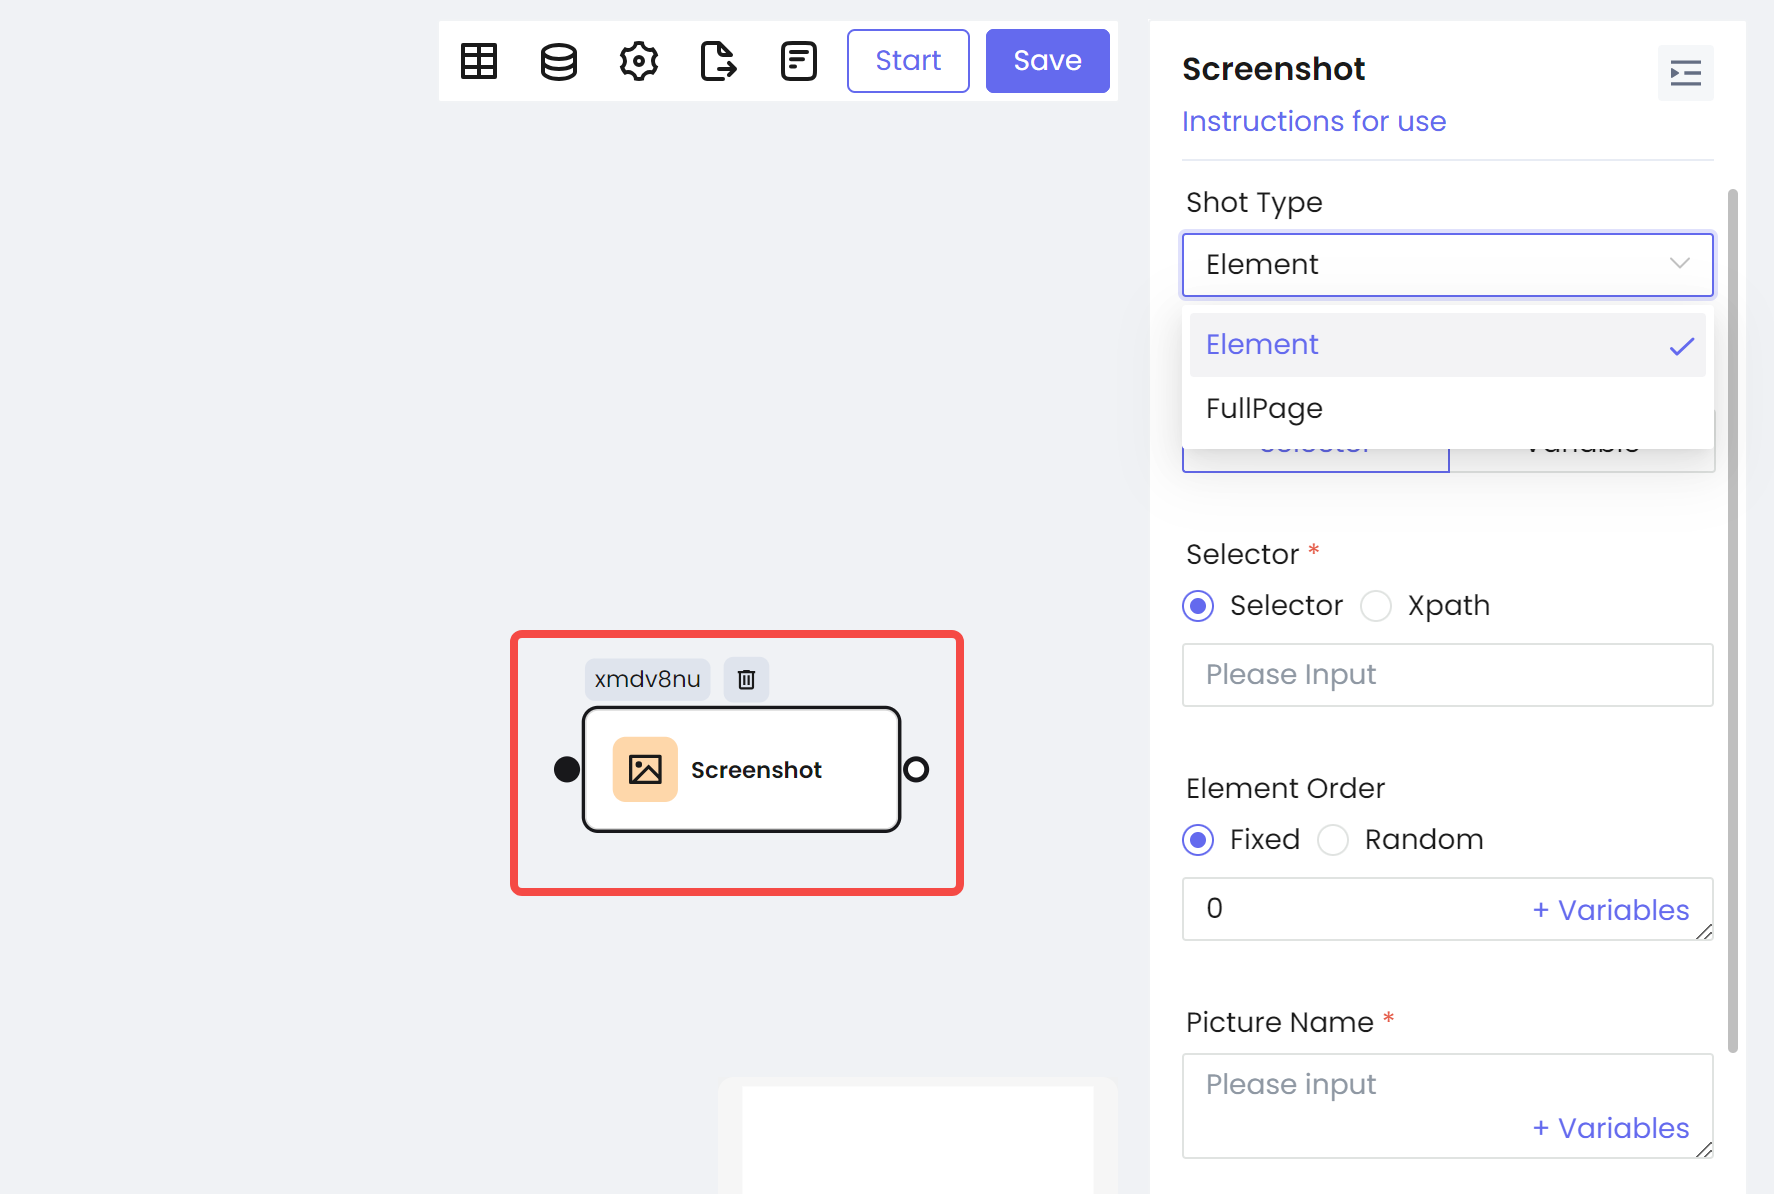
Is there an easier way to achieve all the specialized tasks? Of course, there is! Nstbrowser provides completely free RPA services. By simply configuring the workflow you need, you can easily achieve all crawling requirements.
Get Element Data
Wait Request
Screenshot
5. Execute custom JavaScript commands
One of the outstanding features of using a browser automation tool like Selenium is the ability to leverage the browser's own JavaScript engine. This means you can inject and execute custom JavaScript code in the context of the web page you are interacting with.
JavaScript
const javascript = 'window.scrollBy(100, 100)';
await driver.executeScript(javascript);
Final Thoughts
In this Selenium Node.js tutorial, you learned how to use headlesschrome with Selenium to set up a Node.js WebDriver project, scrape data from dynamic websites, interact with dynamic content, and tackle common web scraping challenges.
Now it's a nice time to build your own web scraping process! With the help of Nstbrowser RPA, everything complex will be simplified.
More


