
Browserless
How to Run Parallel Tests in Puppeteer using Browserless?
Running tests in parallel always requires access to multiple platforms and browsers, which increases our testing costs. Look how Browserless simplify the test in this blog.
Oct 15, 2024Carlos Rivera
What Is Parallel Testing?
What is parallelization?
Parallel testing is also named parallel execution. In parallel testing, we test different modules or applications on multiple browsers in parallel instead of testing them one by one.
Parallelization is different from sequential testing, where we test different modules or functionalities one after another. Even when testing an application on multiple browsers, the tests are executed sequentially on each browser. This testing method is very time-consuming.
Parallel execution helps reduce execution time and effort, thereby reducing delivery time. It proves to be particularly useful in cross-browser testing, compatibility testing, localization, and internalization testing. In situations where we have two versions of the software available and need to check their stability and compatibility, we can run both versions simultaneously and find issues at a faster pace.
Parallelization vs. Serialization - Which is better?
1. Parallelization
Parallelization means running multiple tasks at the same time, which can often significantly improve speed, especially when testing or executing tasks.
Pros:
- Faster: Parallelization allows multiple tasks to proceed at the same time, reducing the overall running time. Tasks that can run concurrently can significantly improve efficiency.
- Make full use of resources: Parallelization can maximize the advantages of multi-core CPUs and multi-threaded environments and is particularly suitable for multitasking and situations where a large number of I/O operations need to be processed (such as network requests, page loading, etc.).
- Suitable for large-scale testing: For large test suites, multiple test scenarios can be completed quickly through parallel execution.
Cons:
- High resource consumption: Parallelization will occupy more system resources (such as CPU, and memory). When too many browser instances or pages are launched, it may cause system resource exhaustion or performance degradation.
- Increased complexity: Managing the results, synchronization, and error handling of parallel tasks becomes more complicated. Shared resources in tests (such as databases, and file systems) require special attention to prevent race conditions or conflicts.
- Not suitable for tasks that depend on order: If there are dependencies between tasks (for example, task A must be completed before task B), parallelization may cause problems.
Applicable scenarios:
- Scenarios where there are a large number of independent tasks or tests that can be executed simultaneously.
- There are powerful hardware resources to support concurrent operations.
- Need to complete large-scale tasks quickly.
2. Serialization
Serialization means that tasks are executed one after another in order until all tasks are completed.
Pros:
- Low resource requirements: Since only one task is run at a time, resource usage is relatively low, system stability is higher, and resource competition and exhaustion are avoided.
- Easy to manage: The order of tasks is clear, and debugging and error handling are relatively simple. Especially when there are dependencies between tasks, serialization can ensure that tasks are executed in the expected order.
- Suitable for dependent tasks: When tasks have a sequence or dependency, serialized execution avoids race conditions.
Cons:
- Slower speed: Because only one task is executed at a time, the multi-core processing power of the system cannot be utilized, and the overall execution time will be longer than parallelization.
- Waste of resources: Even if there are more available resources, serialization still only uses a part of the resources, resulting in insufficient hardware performance.
Applicable scenarios:
- There are dependencies between tasks and they must be completed in sequence.
- Limited system resources or parallelization may lead to performance degradation.
- Task complexity is high and the error rate is high, so you need to troubleshoot the problem step by step.
In short
- If you pursue speed and there is no dependency between tasks, parallelization is better and can improve efficiency.
- If there is a dependency between tasks or system resources are limited, serialization is more secure, although the speed may be slower.
Run Parallel execution in Puppeteer using Browserless
Step1: Get the API Key
Before getting started, it's necessary to have a Browserless service. Browserless can solve complex web crawling and large-scale automation tasks, and it has now achieved fully managed cloud deployment.
Browserless adopts a browser-centric approach, provides powerful headless deployment capabilities, and provides higher performance and reliability. For more information about Browserless, you can click here to learn more.
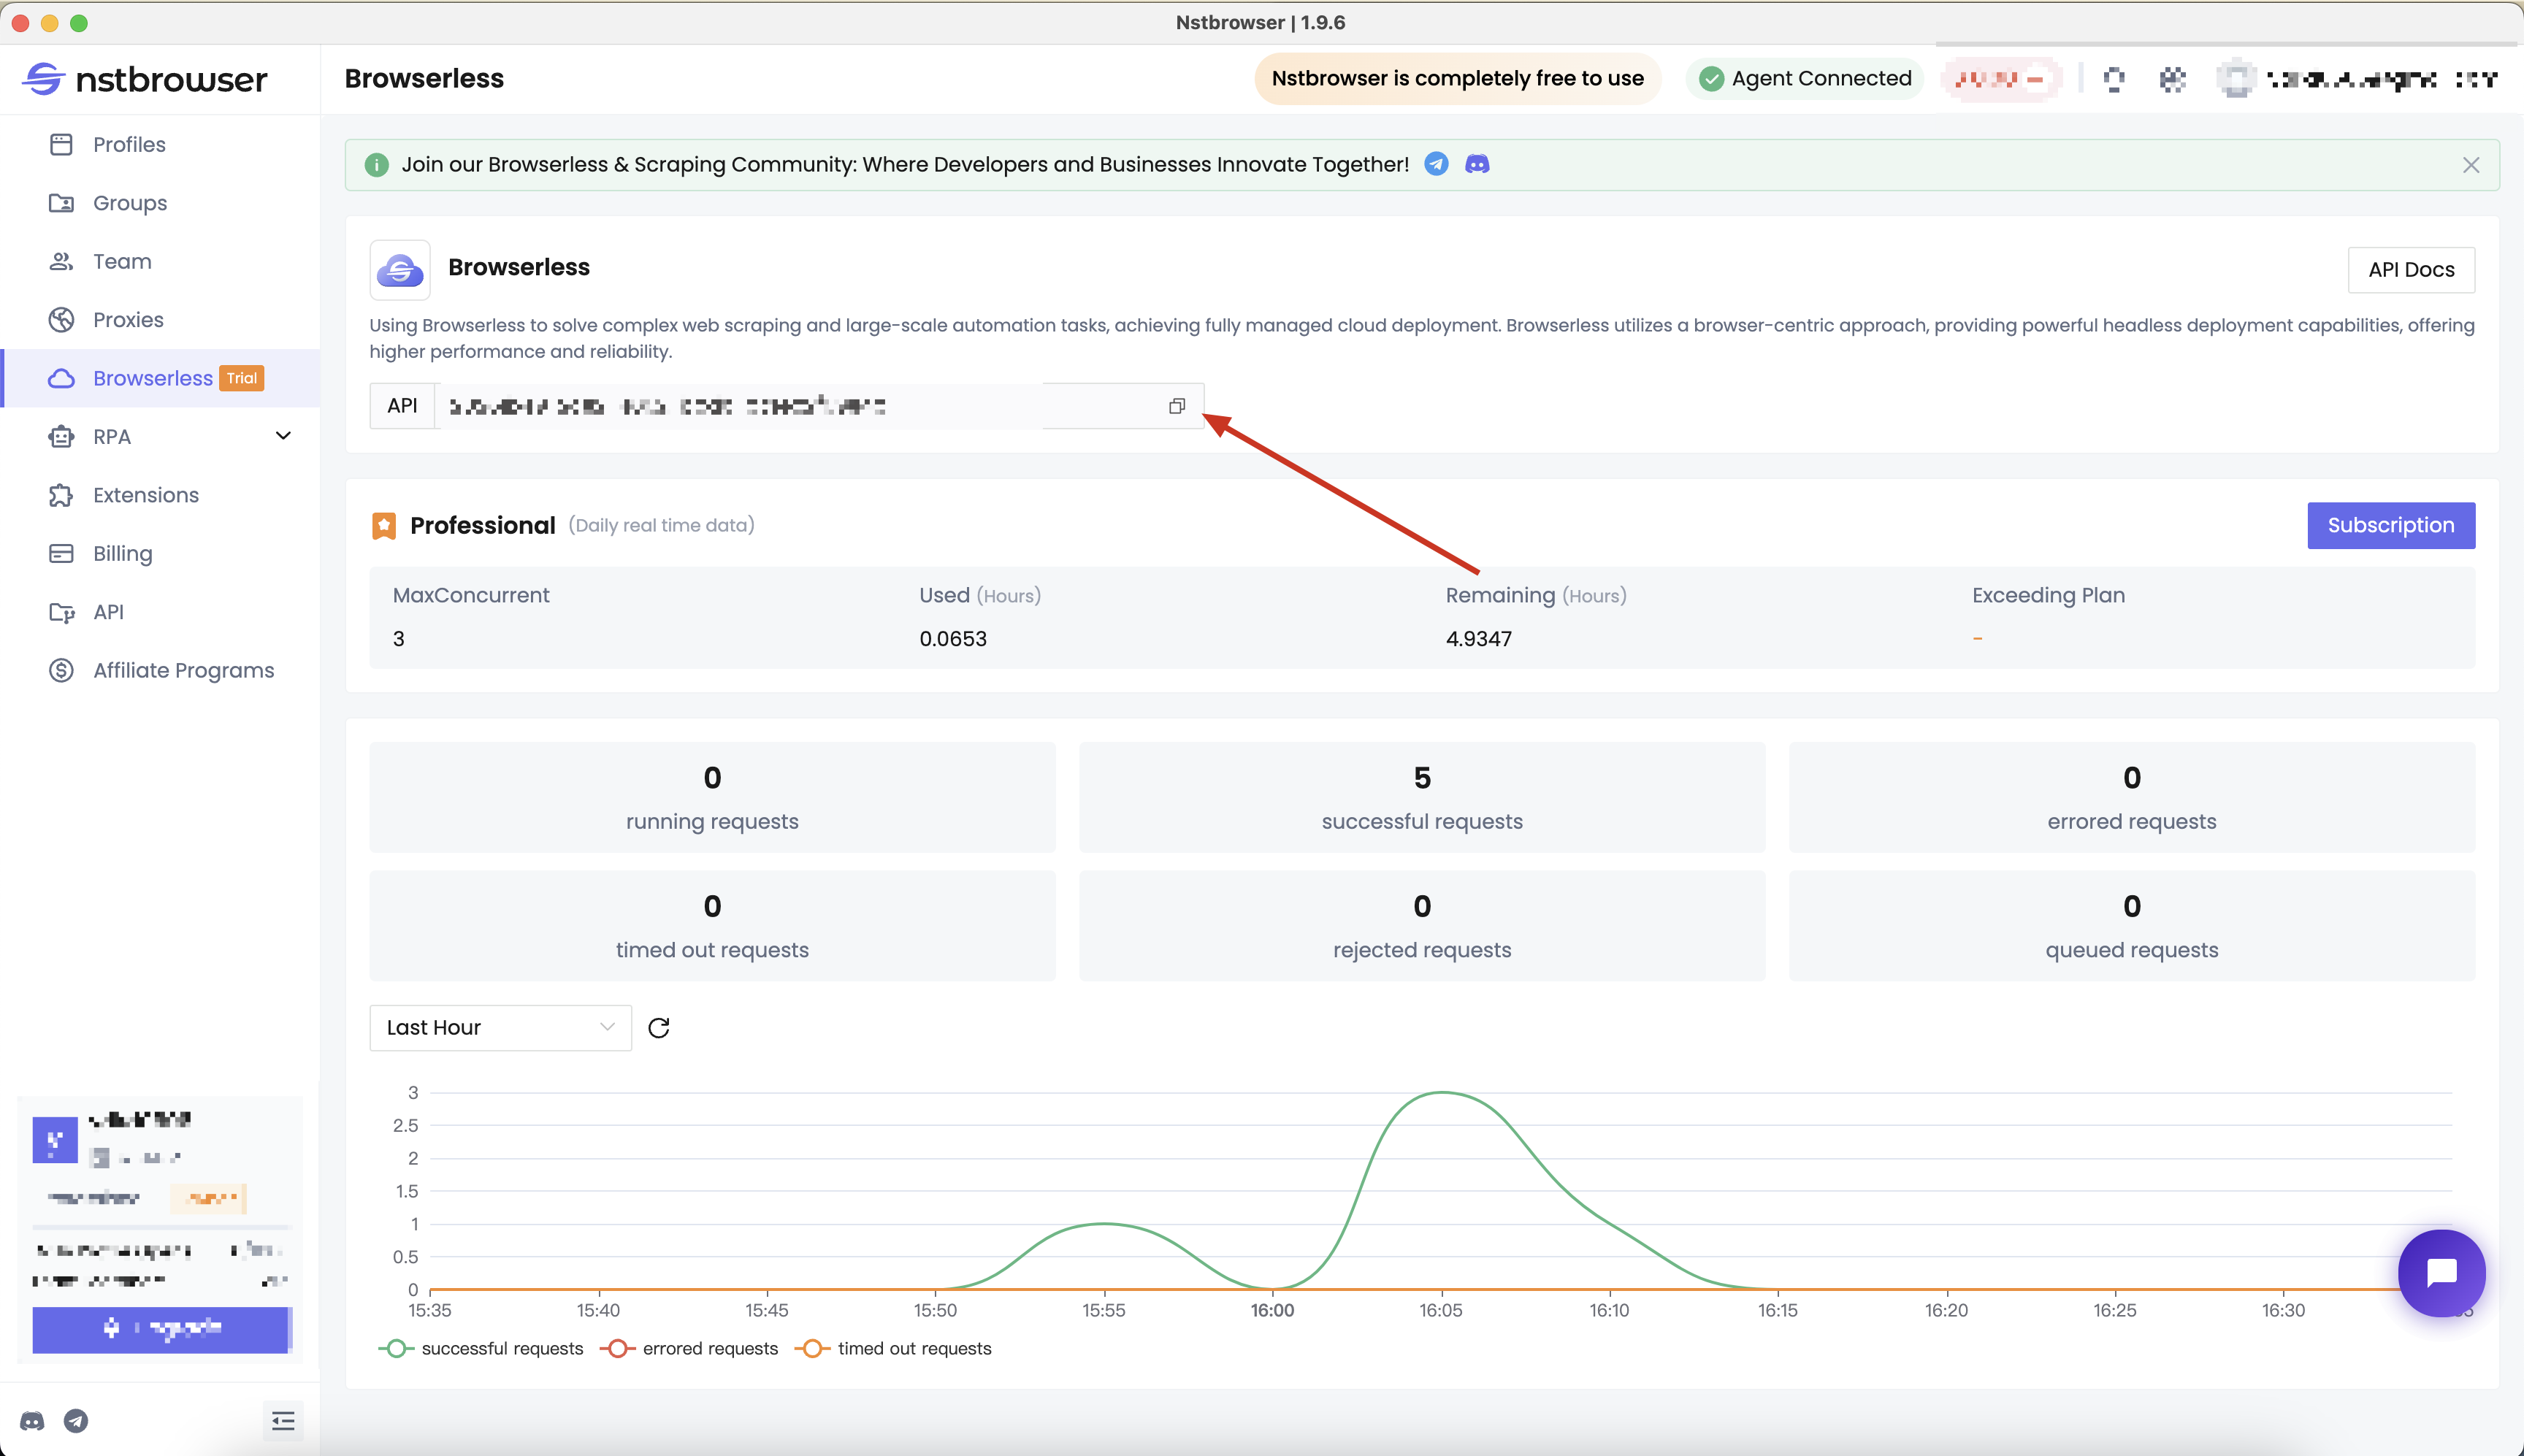
- Get the API KEY and go to the Browserless menu page of the Nstbrowser client, or you can click here to access:
Step2: Install puppeteer-cluster-connect
Why use Puppeteer?
Puppeteer has many maintainers and is very active. It is also built by Chrome developers, so it is one of the highest-quality libraries. So next, we will use Puppeteer to connect Browserless for parallel testing.
Puppeteer-cluster can create multiple puppeteer workers. This library generates a pool of Chromium instances through Puppeteer and helps track operations and errors. It can help us do parallel testing well, but this library does not yet support puppeteer.connect, so it cannot connect to external browser ports.
So in the following examples, we will use puppeteer-cluster-connect instead:
Bash
npm install --save puppeteer
npm install --save puppeteer-cluster-connect
Step3: Use puppeteer-cluster-connect to connect to Browserless
We need to prepare the following function. Just fill in your api key and proxy to start connecting to Browserless:
JavaScript
async function getBrowserWSEndpoint() {
  const token = "your api key"; // 'your proxy'
  const config = {
    proxy: 'your proxy', // required; input format: schema://user:password@host:port eg: http://user:password@localhost:8080
    // platform: 'windows', // support: windows, mac, linux
    // kernel: 'chromium', // only support: chromium
    // kernelMilestone: '128', // support: 128
    // args: {
    //     "--proxy-bypass-list": "detect.nstbrowser.io"
    // }, // browser args
    // fingerprint: {
    //     userAgent: 'Mozilla/5.0 (Windows NT 10.0; Win64; x64) AppleWebKit/537.36 (KHTML, like Gecko) Chrome/128.0.6613.85 Safari/537.36', // userAgent supportted since v0.15.0
    // },
  };

  const query = new URLSearchParams({
    token: token, // required
    config: JSON.stringify(config),
  });

  return `https://less.nstbrowser.io/connect?${query.toString()}`;
}
Next, we need to use the connecting method of puppeteer-cluster-connect to connect to Browserless;
Concurrencyis the implementation type of concurrency. Here we setCluster.CONCURRENCY_CONTEXT, which means that each URL will create an invisible page (BrowserContext) that does not share data;MaxConcurrencyis the maximum number of concurrencies.RestartFunctionis the method for restarting the port when it crashes.
At this point, our Browserless cluster is ready!
JavaScript
import puppeteer from "puppeteer-core";
import { Cluster } from "puppeteer-cluster-connect"

const cluster = await Cluster.connect({
  concurrency: Cluster.CONCURRENCY_CONTEXT,
  maxConcurrency: 3,
  // provide the puppeteer-core library
  puppeteer,
  puppeteerOptions: {
    browserWSEndpoint: await getBrowserWSEndpoint(),
    defaultViewport: null
  },
  // Put restart function callback here
  restartFunction: getBrowserWSEndpoint,
});

console.log('cluster is Connected!');
Step4: Start parallel testing
Next, we will conduct a simple parallel test. We hope to quickly access multiple sites in batches in parallel, record the titles of these sites, and take screenshots after the page is loaded to test whether these sites can be accessed normally.
- Use the
taskmethod of the cluster obtained in the previous step to create a task. This task contains the operation function corresponding to each browser instance:
JavaScript
await cluster.task(async ({ page, data }) => {
  const { url, name } = data
  // Visit Target Site
  await page.goto(url);
  console.log(`[${name} page loaded]:`, url);
  // Get document title
  const documentTitle = await page.evaluate(() => document.title)
  console.log(`[${name} title]:`, documentTitle);
  // take a screenshot
  await page.screenshot({ fullPage: true, path: `${name}.png` });
});- The
queuemethod should be used to add data that needs to be tested in parallel to the cluster - Then, please use
idleandclosemethods to close the cluster and all open browser instances:
JavaScript
cluster.queue({ url: "https://www.google.com", name: 'google' });
cluster.queue({ url: "https://www.wikipedia.org", name: 'wikipedia' });
cluster.queue({ url: "https://github.com/", name: 'github' });

await cluster.idle();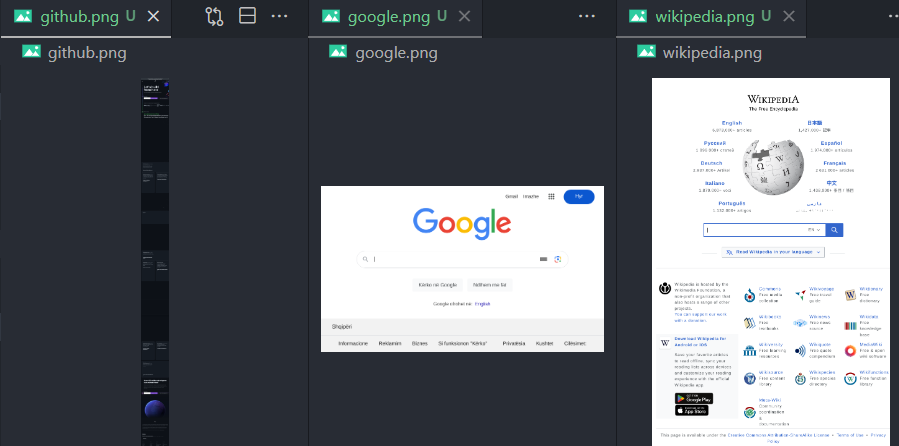
await cluster.close();- Now, we can run the above script to see the results of the above parallel tests:

- You can also see the corresponding screenshots in the path where the script is executed:
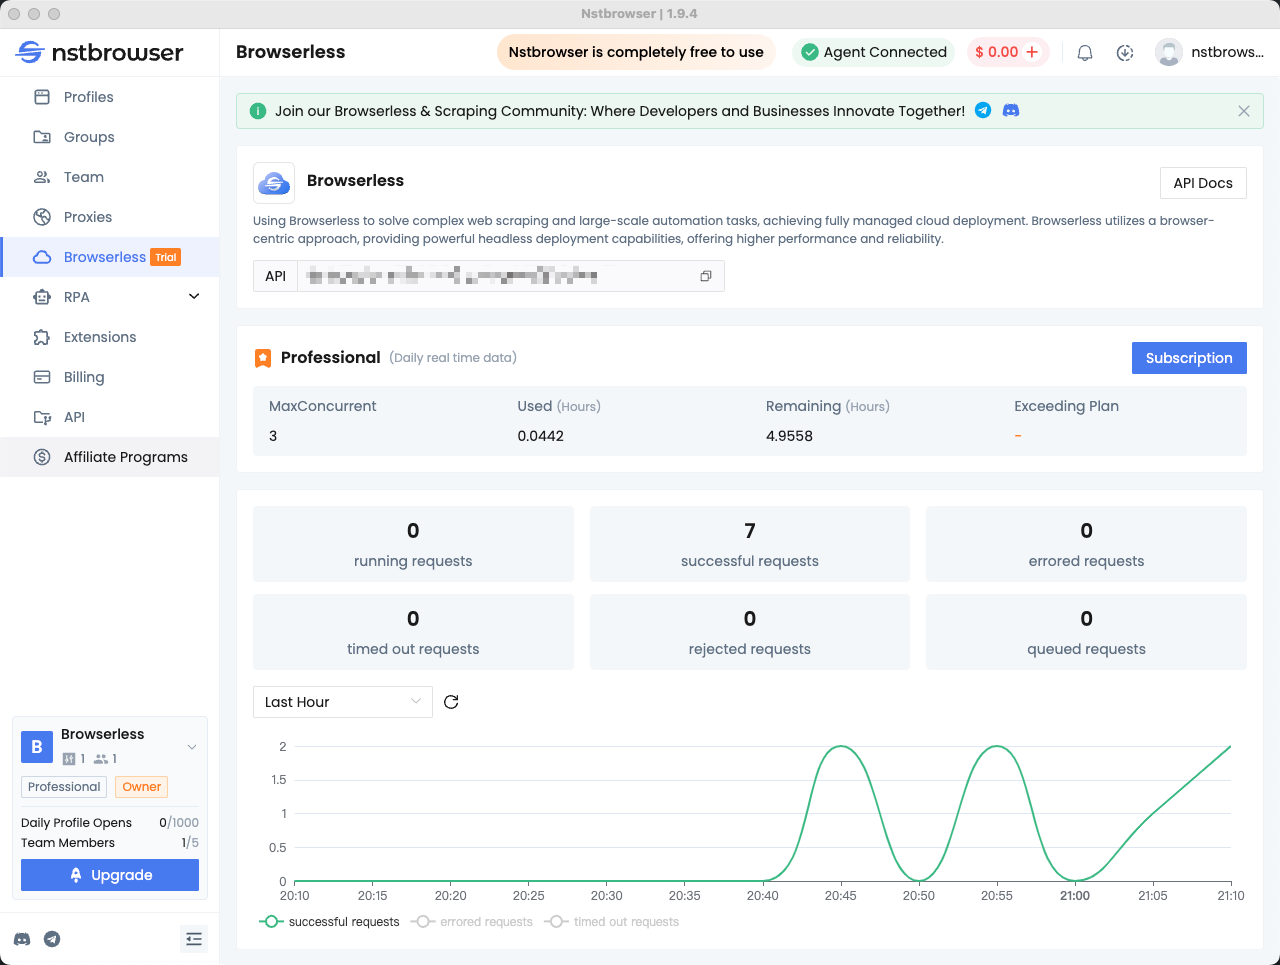
Step5: Check the Browserless Dashboard
You can view statistics for recent requests and remaining session time in the Browserless menu of the Nstbrowser client.
It's a Wrap
Do you always need to parallelize your work? Running tests in parallel always requires access to multiple platforms and browsers, which increases our testing costs.
In addition, we may encounter situations where we cannot access all browsers and versions. Browserless can easily help you solve the above problems. It only takes 4 simple steps to easily complete parallel testing.
More


