Web Scraping
How to Use Node.js for Web Scraping?
In this article, we will introduce how to use Node.js for web scraping, including basic concepts, tool usage and anti-detection methods to help efficiently acquire and process website data.
May 15, 2024Robin Brown
Using Node.js for web scraping is a common need, whether you want to gather data from a website for analysis or display it on your own site. Node.js is an excellent tool for this task.
By reading this article, you will:
- Understand the basic concepts of web scraping
- Learn the basics of
Node.js - Learn how to use Node.js for web scraping
What Is Web Scraping and What Are Its Benefits?
Web scraping is the process of extracting data from websites. It involves using tools or programs to simulate browser behavior and retrieve the needed data from web pages. This process is also known as web harvesting or web data extraction.
Web scraping has many benefits, such as:
- Helping you collect data from websites for analysis.
- Allowing you to gather competitor data during product development to analyze their strengths and weaknesses.
- Automating repetitive tasks, like downloading all images from a site or extracting all links.
What Is Node.js?
"Node.js" is an open-source, cross-platform JavaScript runtime environment that executes JavaScript code on the server side. Created by Ryan Dahl in 2009, it is built on Chrome's V8 JavaScript engine. Node.js is designed for building high-performance, scalable network applications, especially those that handle a large number of concurrent connections, like web servers and real-time applications.
Features of Node.js:
- Event-driven and asynchronous programming model. Node.js uses an event-driven architecture and non-blocking I/O operations, making it highly efficient in handling concurrent requests. This means the server won't be blocked while waiting for I/O operations to complete.
- Single-threaded architecture. Node.js runs on a single thread using an event loop, which handles concurrent requests efficiently without the overhead of thread context switching.
- npm (Node Package Manager). Node.js comes with npm, a package management tool that makes it easy for developers to install and manage libraries and tools required for their projects. With a vast repository of open-source modules, npm greatly accelerates development.
- Cross-platform. Node.js can run on various operating systems, including Windows, Linux, and macOS, making it a versatile development platform.
Why Should You Use Node.js for Web Scraping?
Node.js is a popular JavaScript runtime environment that allows you to use JavaScript for server-side development. Using Node.js for web scraping offers several advantages:
- Extensive libraries: Node.js has many libraries for web scraping, such as Request, Cheerio, and Puppeteer.
- Asynchronous non-blocking nature: Node.js's non-blocking I/O makes concurrent web scraping easier and more efficient.
- I/O intensive task handling: Node.js excels at handling I/O intensive tasks, making web scraping straightforward.
- Ease of learning: If you know JavaScript, you can quickly learn Node.js and start web scraping.
How to Use Node.js for Web Scraping?
Without further ado, let's get started with data scraping with Node.js!
Step 1: Initialize the environment
First, download and install Node.js from its official website. Follow the detailed installation guides for your operating system.
Step 2: Install Puppeteer
Node.js offers many libraries for web scraping, such as Request, Cheerio, and Puppeteer. Here, we'll use Puppeteer as an example. Install Puppeteer using npm with the following commands:
Bash
mkdir web-scraping && cd web-scraping
npm init -y
npm install puppeteer-core
Step 3: Create a Script
Create a file, such as index.js, in your project directory and add the following code:
goTomethod is used to open a webpage. It takes two parameters: the URL of the webpage to open and a configuration object. We can set various parameters in this object, such as waitUntil, which specifies to return after the page has finished loading.waitForSelectormethod is used to wait for a selector to appear. It takes a selector as a parameter and returns a Promise object when the selector appears on the page. We can use this Promise object to determine if the selector has appeared.contentmethod is used to get the content of the page. It returns a Promise object, which we can use to fetch the content of the page.page.$evalmethod is used to get the text content of a selector. It takes two parameters: the first is the selector, and the second is a function that will be executed in the browser. This function allows us to retrieve the text content of the selector.
JavaScript
const puppeteer = require('puppeteer');

async function run() {
  const browser = await puppeteer.launch({
    headless: false,
    ignoreHTTPSErrors: true,
  });
  const page = await browser.newPage();
  await page.goto('https://airbnb.com/experiences/1653933', {
    waitUntil: 'domcontentloaded',
  });
  await page.waitForSelector('h1');
  await page.content();
  const title = await page.$eval('h1', (el) => el.textContent);
  console.log(title);
  await browser.close();
}

run();
Step 4: Run the Script
Run index.js with the following command:
Bash
node index.jsAfter running the script, you will see the output in the terminal:

In this example, we use puppeteer.launch() to create a browser instance, browser.newPage() to create a new page, page.goto() to open a webpage, page.waitForSelector() to wait for a selector to appear, and page.$eval() to get the text content of a selector.
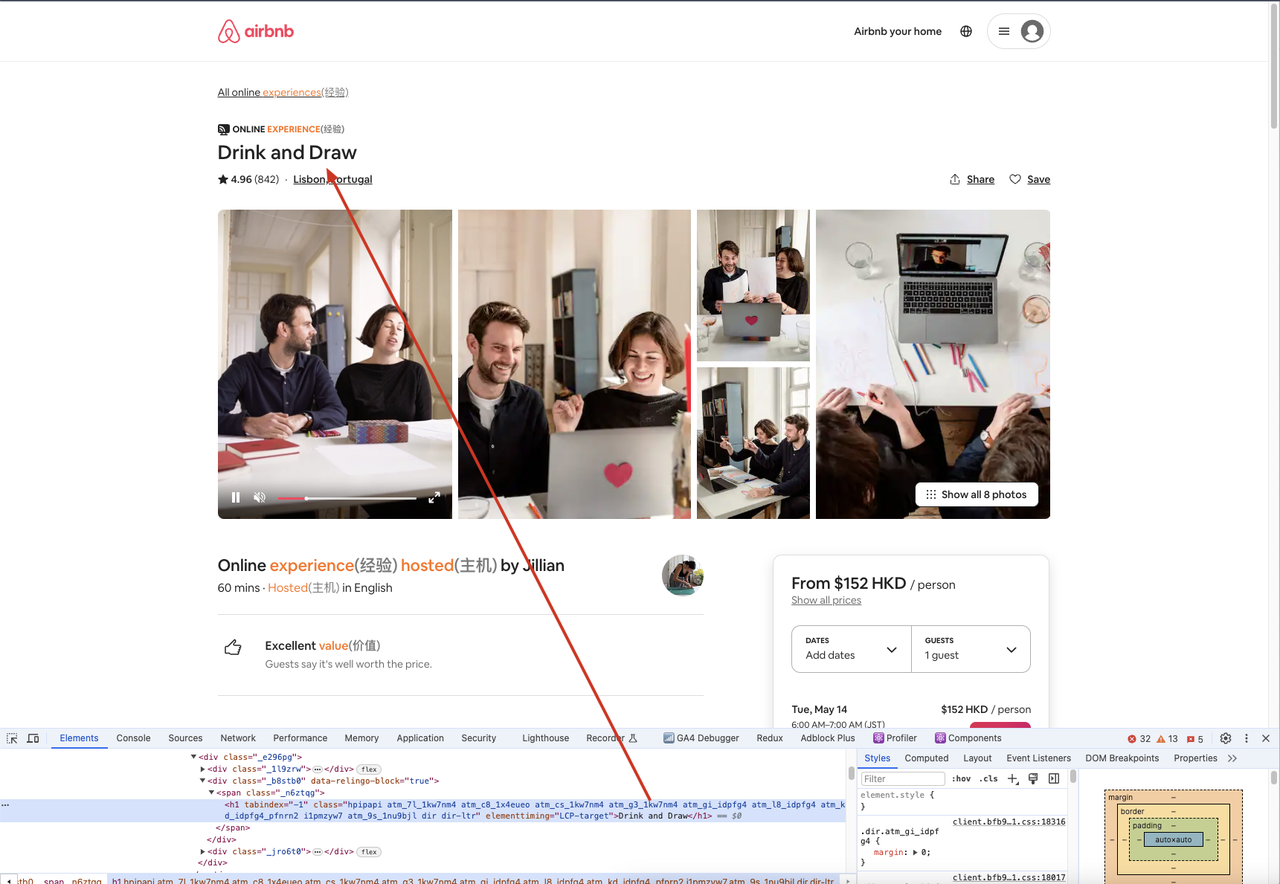
Additionally, we can go to the crawled site via a browser, open the developer tool, and then use the selector to find the element we need, comparing the element content to what we get in the code to ensure consistency.

Anti-Detection Techniques
While using Puppeteer for web scraping, some websites may detect your scraping activity and return errors like 403 Forbidden. To avoid detection, you can use various techniques such as:
- Using proxy IPs
- Modifying User-Agent
- Running in headless mode
- Customizing fonts and canvas fingerprints
These methods help bypass detection, allowing your web scraping tasks to proceed smoothly. For advanced anti-detection techniques, consider using tools like Nstbrowser - Advanced Anti-Detect Browser.
More


