
Proxy
How to Configure PrivateProxy in Nstbrowser
PrivateProxy. takes a different approach to working with customers.
Every request is evaluated and the best proxy server solution is offered for every particular scenario.
Mar 25, 2024Carlos Rivera
Take a Quick Look
Nstproxy offers a global proxy network with fast connections, stable performance, and flexible location options, making it easier to stay connected across different websites and online platforms.
Whether you're browsing the web, managing social media accounts, conducting research, or running business operations, Nstproxy provides the reliability and flexibility needed for everyday online activities.
Step 1: Acquiring Proxy Information
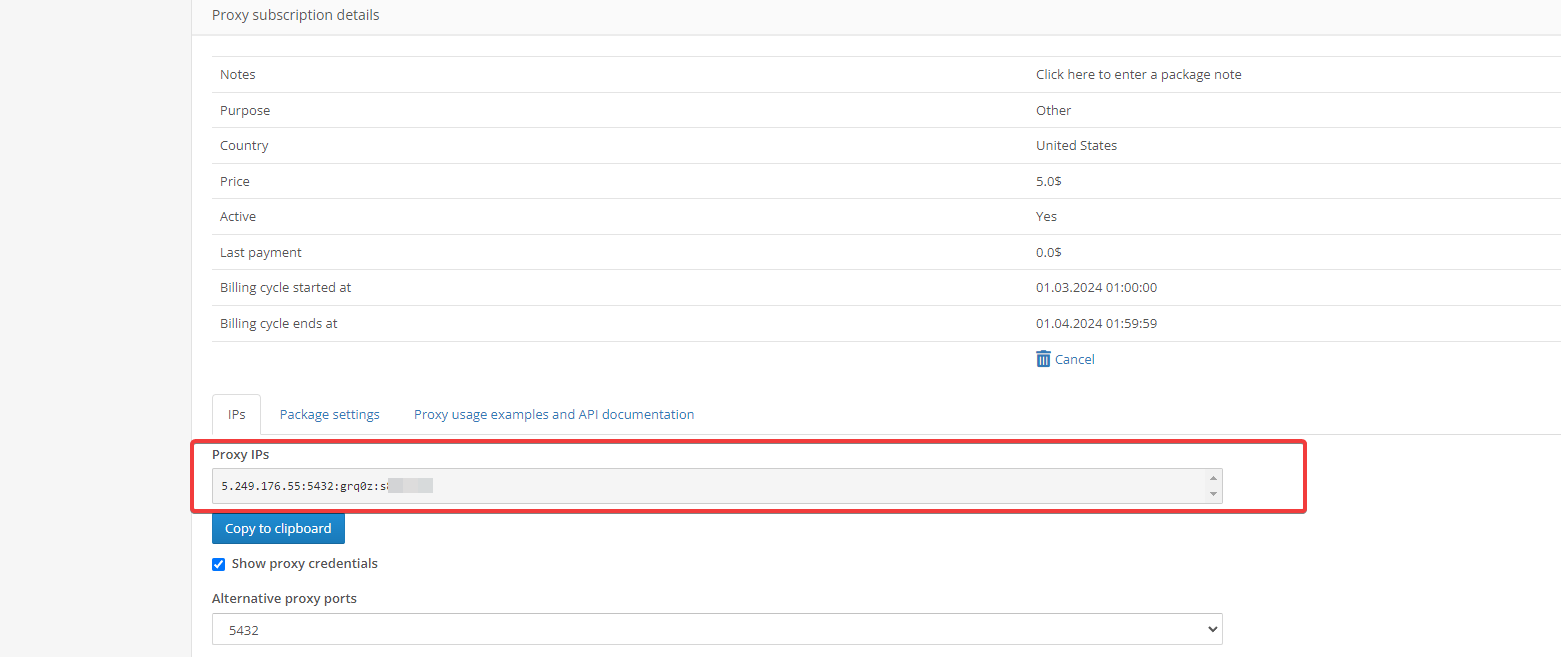
- Navigate to the designated section within the platform to access proxy details. This can typically be done by selecting a "Get Proxylist" option or similar. Upon selection, the proxy information will be displayed, including necessary details such as the proxy address, port, and any required authentication.

- The resulting screen will provide comprehensive details about the available proxies.
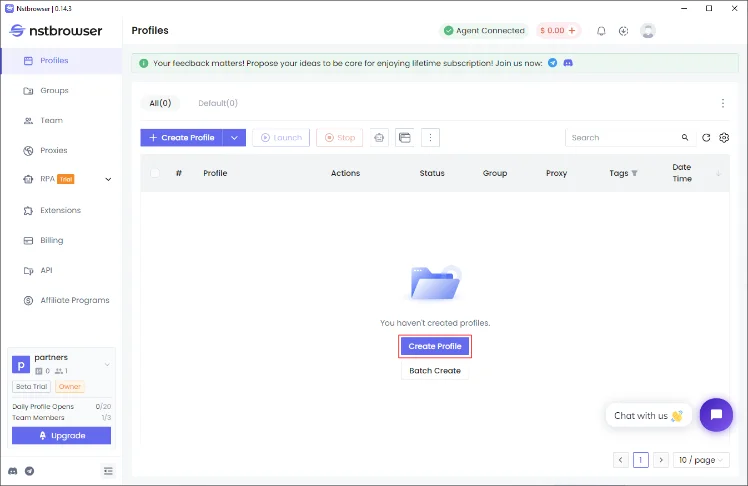
Step 2: Configuring a New Browser Profile
- In the Nstbrowser interface, initiate the creation of a new browser profile by selecting the "Create profile" button. This action will direct you to the profile creation settings.
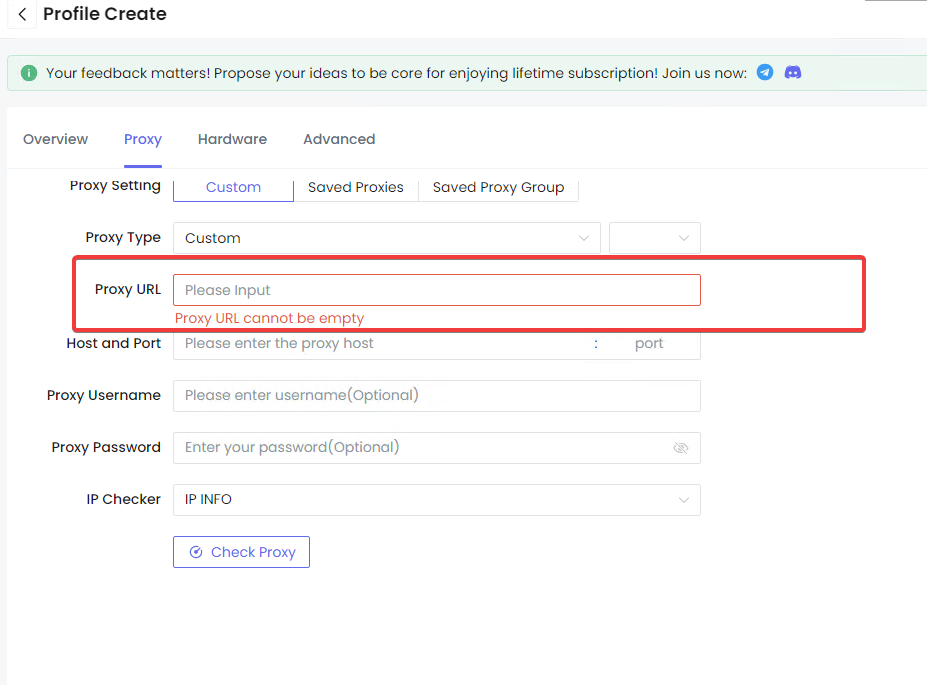
- During profile setup, access the "Proxy" settings and select the "Custom" option to manually input your proxy configuration. The simplest method for this is to copy the proxy URI directly from your PrivateProxy dashboard and paste it into the "Proxy URL" field provided.
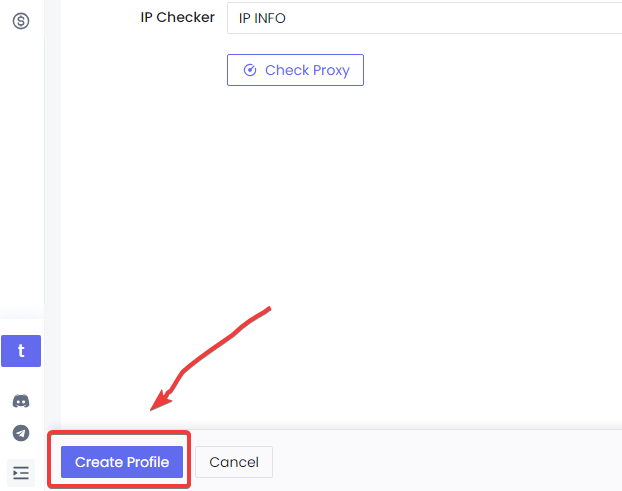
- Finalize the profile creation by clicking the "Create profile" button.
Step 3: Launching the Configured Profile
- To activate and use the newly configured browser profile, locate and press the "Play" button associated with the profile. This action initiates the download of the appropriate browser kernel, allowing for subsequent undetected browsing activities.

By following these steps, users can effectively configure and utilize a custom proxy from PrivateProxy within the Nstbrowser, enhancing privacy and bypassing detection mechanisms during their browsing sessions.
More


