
Browserless
How to launch Nstbrowser profiles in Docker?
Learn how to launch Nstbrowser profiles in Docker, synchronize data across environments, and automate workflows using APIs. This guide covers everything from setup to execution.
Mar 14, 2025Carlos Rivera
In this article, we’ll explore how to launch Nstbrowser profiles in Docker , covering both manual setups and API-driven automation. We’ll also demonstrate how to synchronize login data between the client and Docker containers, enabling a login-free experience.
Let’s get started!
Preparation
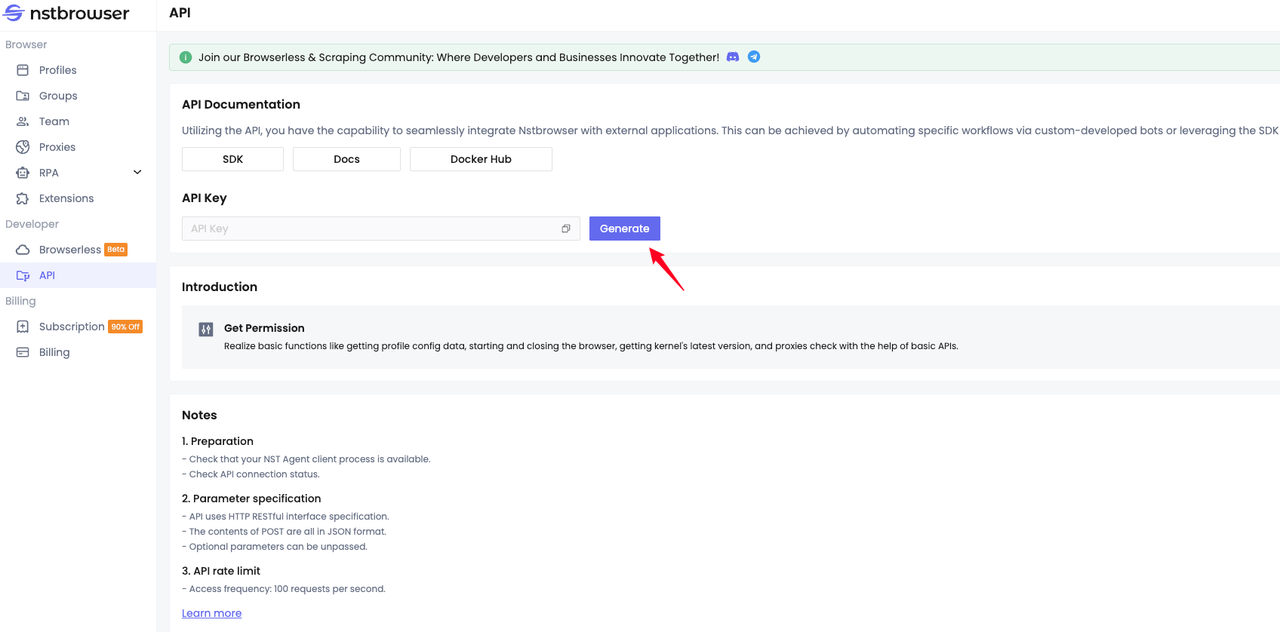
- Visit the official Nstbrowser website and download the client suitable for your platform. Follow the installation instructions to set it up on your system.
- After installing the client, register an account and log in to generate your unique API key. This key will be essential for making API requests later.
- If you haven’t already, install Docker on your system. You can pull the official Nstbrowser Docker image using the following command:
Shell
docker run -it \
  -e TOKEN=xxx \
  -p 8848:8848 \
  -p 5900:5900 \
  --name browserless \
  nstbrowser/browserless:latest
How to Create and Launch Profiles in Nstbrowser?
Nstbrowser supports two types of profiles: General Profiles and Once Profiles . Below, you’ll find detailed steps for creating and launching each type based on your needs.
General Profile
Manual Creation and Launch
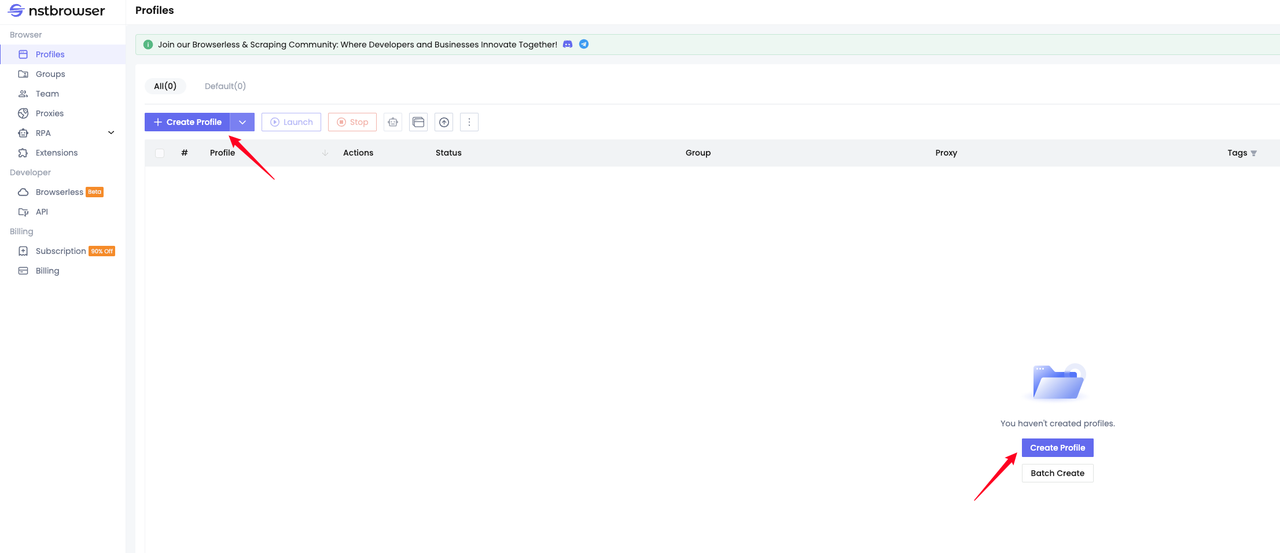
Navigate to the profile creation page in the Nstbrowser client. Customize the browser fingerprint according to your needs or use predefined configurations. Click "Create Profile" to create the profile.
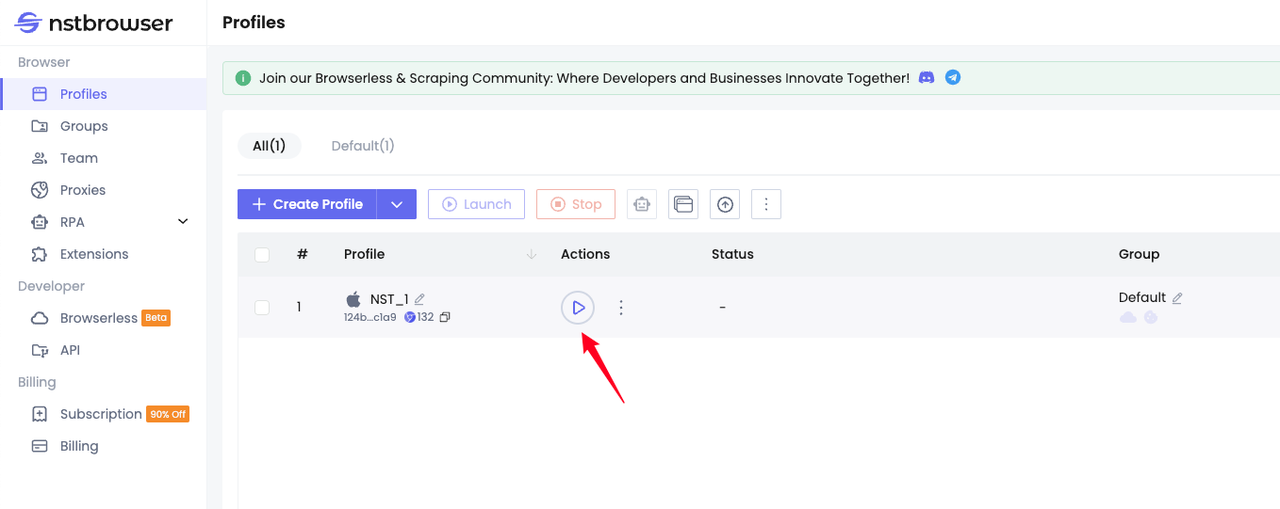
Once the profile is created, click the "Launch" button to start it.
If this warning appears, click Download Now. Wait for the installation to complete and restart the profile.

API-Based Creation and Launch
We recommend using API v2 for programmatic operations. Below are the steps to create and launch a profile via API.
Create a Profile Using the API
Nstbrowser provides a CreateProfile API. Requesting this interface will directly create a profile for you. Please pay attention to the required parameters. Use curl to initiate the request:
Shell
# replace with your apikey
curl 'http://localhost:8848/api/v2/profiles/' -X POST \
-H 'Content-Type: application/json' \
-H 'x-api-key: apikey' \
--data-raw $'{"name": "profileCreatedByApiCreateProfile"}'
Response:
JSON
{
"data": {
"profileId": "xxxxxx",
"fingerprintId": "xxxxxx",
"groupId": "xxxxxx",
"teamId": "xxxxxx",
"userId": "xxxxxx",
"name": "profileCreatedByApiCreateProfile",
"kernel": 0,
"kernelVersion": "",
"kernelMilestone": "132",
"uaFullVersion": "132.0.6834.83",
"platform": 0,
"platformVersion": "13.0.0",
"saveLocal": false,
"status": 1,
"note": ""
},
"err": false,
"msg": "success",
"code": 200
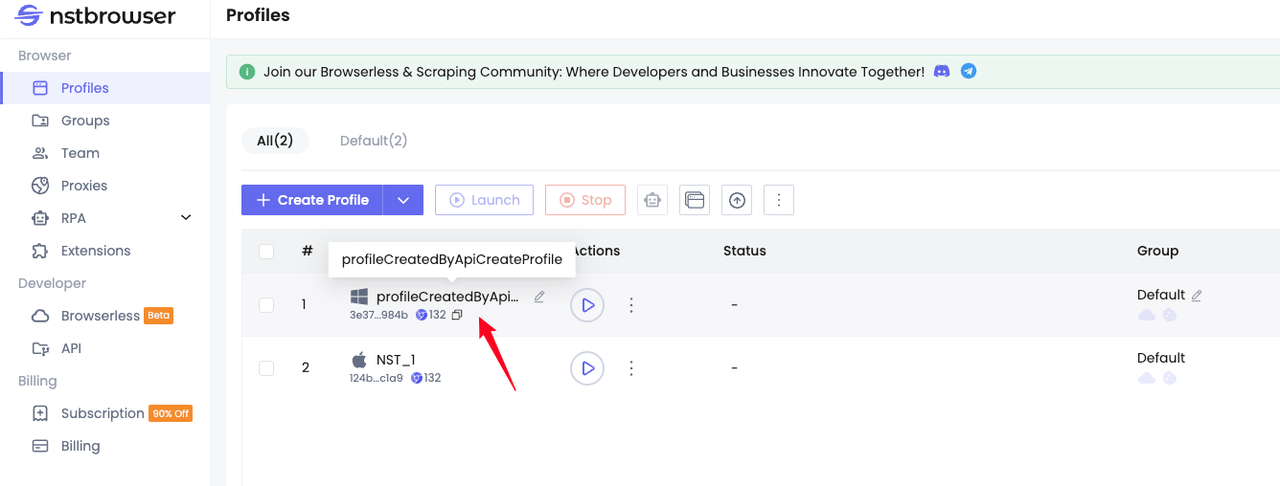
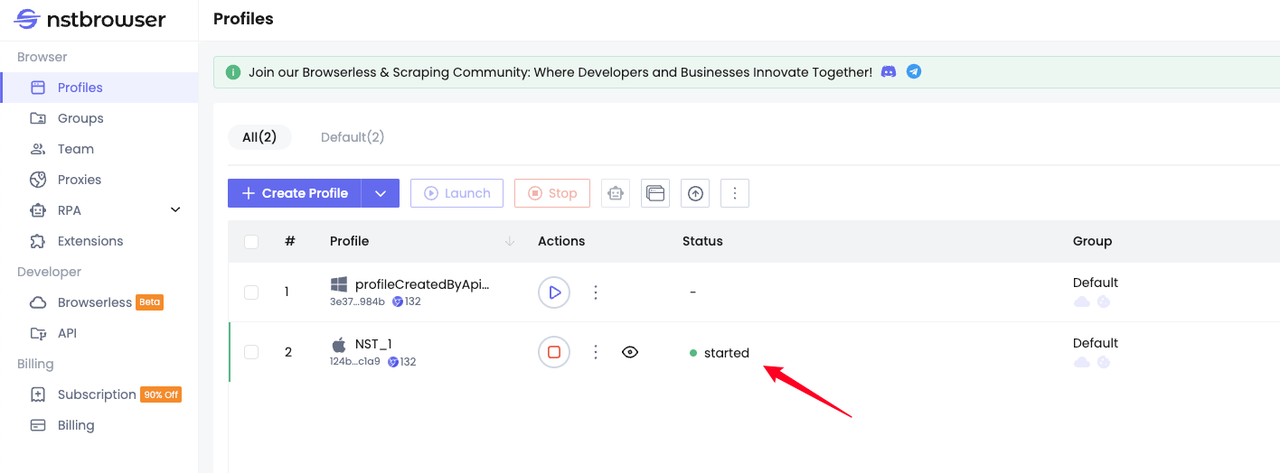
}You can see the profile you just created using the CreateProfile API on the Dashboard Profiles page.
Launch Profiles
The following APIs can be used to start the created Profile:
This interface is used to start the created daily profile. The curl method initiates the request interface:
Shell
# replace with your apikey and profileId
curl 'http://localhost:8848/api/v2/browsers/xxxxxx' -X POST \
-H 'x-api-key: apikey'
Response result:
JSON
{
"data": {
"profileId": "xxxxxx",
"port": 46300,
"webSocketDebuggerUrl": "ws://127.0.0.1:browserPort/devtools/browser/xxxxx"
},
"err": false,
"msg": "success",
"code": 200
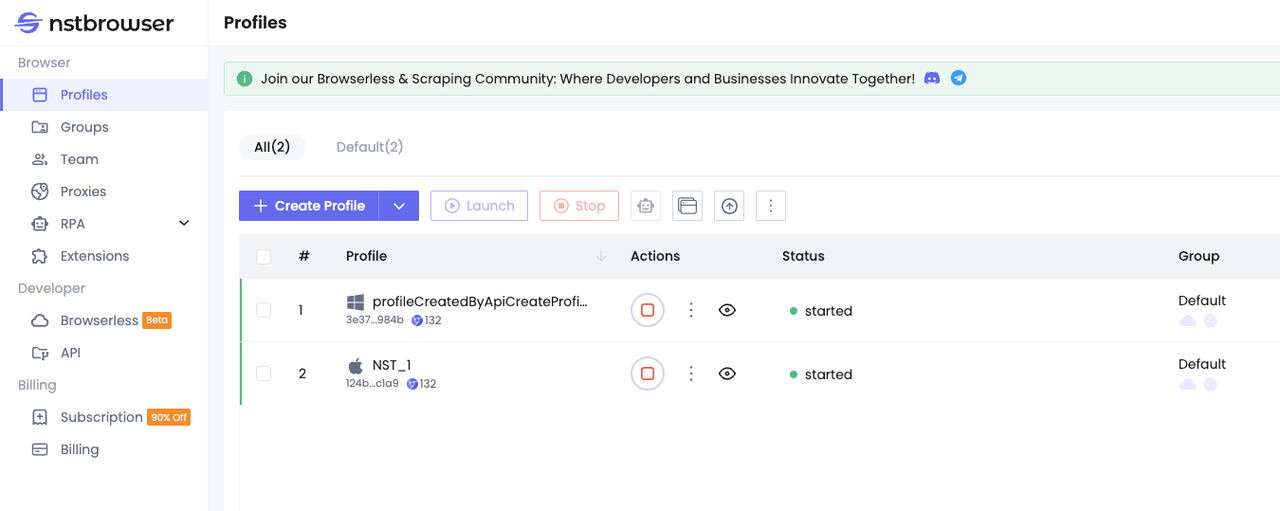
}You can see that the Profile we created through the API has been successfully started through the interface request.
This interface is used to batch start the created profiles. The curl method initiates the request interface:
Shell
# replace with your apikey and profileIds
curl 'http://localhost:8848/api/v2/browsers' -X POST \
--header 'Content-Type: application/json' \
-H 'x-api-key: apikey' \
--data-raw '[
    "xxxxxx",
    "xxxxxx"
]
You can see that the profile we created before was successfully started through the batch start API
This interface supports access using HTTP GET and WebSocket. If you only want to start the browser, please use HTTP GET to access. If you want to connect, you need to use WebSocket to access it. It is mainly used for:
- Connect to a running browser, you need to start the profile in advance.
- Start and connect to the created profile. You don't need to start the profile in advance.
The following demonstrates how to access the interface using JavaScript Puppeteer:
JavaScript
import puppeteer from "puppeteer-core";
// your apikey
const apiKey = 'xxxxxx';
// your profileId
const profileId = 'xxxxxx';
// browser WebSocket endpoint
const browserWSEndpoint = `ws://localhost:8848/api/v2/connect/${profileId}`;
(async () => {
let browser = null
try {
browser = await puppeteer.connect({
browserWSEndpoint,
defaultViewport: null, // set max viewport
headers: {
'x-api-key': apiKey,
}
});
const page = await browser.newPage();
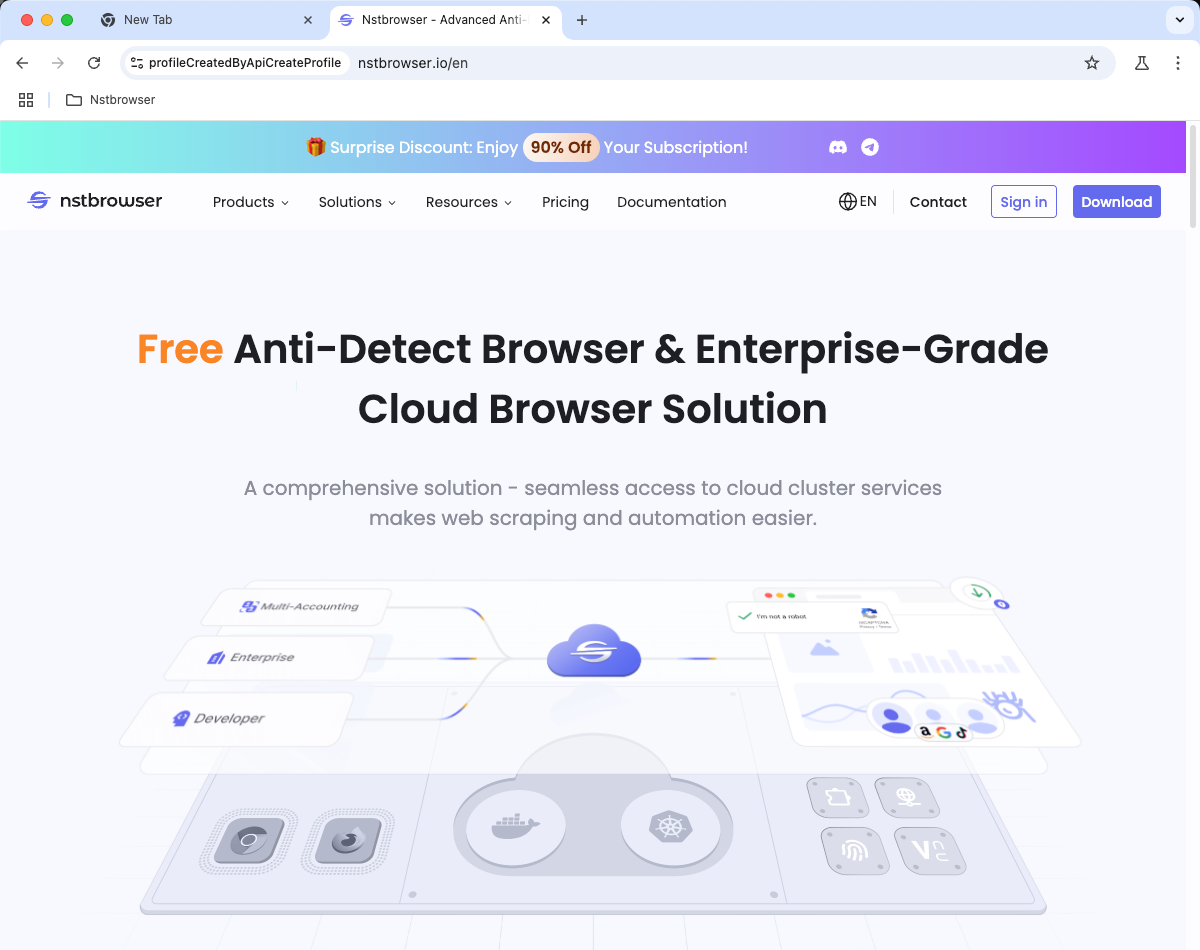
await page.goto("https://nstbrowser.io");
await page.screenshot({ fullPage: true, path: 'nstbrowser.png' });
}
catch (e) {
console.log(e);
} finally {
browser && browser.close();
}
})();We can see that the profile we created previously through the CreateProfile API was successfully launched and accessed the Nstbrowser official website.
Once profiles
Once profiles do not save user data. Profile directories are automatically deleted after the browser is closed. You can start or connect to a once profile using the ConnectOnceBrowser API. Here's how to access the API using JavaScript Playwright:
JavaScript
import { chromium } from "playwright";
// your apikey
const apiKey = 'xxxxxx';
// once profile config
const config = {
"name": "onceProfileByConnectOnceBrowser"
};
const query = new URLSearchParams({
"config": JSON.stringify(config),
});
// `ConnectOnceBrowser API` WebSocket endpoint with launch config
const endpointURL = `ws://localhost:8848/api/v2/connect?${query.toString()}`;
(async () => {
let browser = null
try {
browser = await chromium.connectOverCDP(
endpointURL,
{
headers: {
'x-api-key': apiKey,
}
});
const page = await browser.newPage();
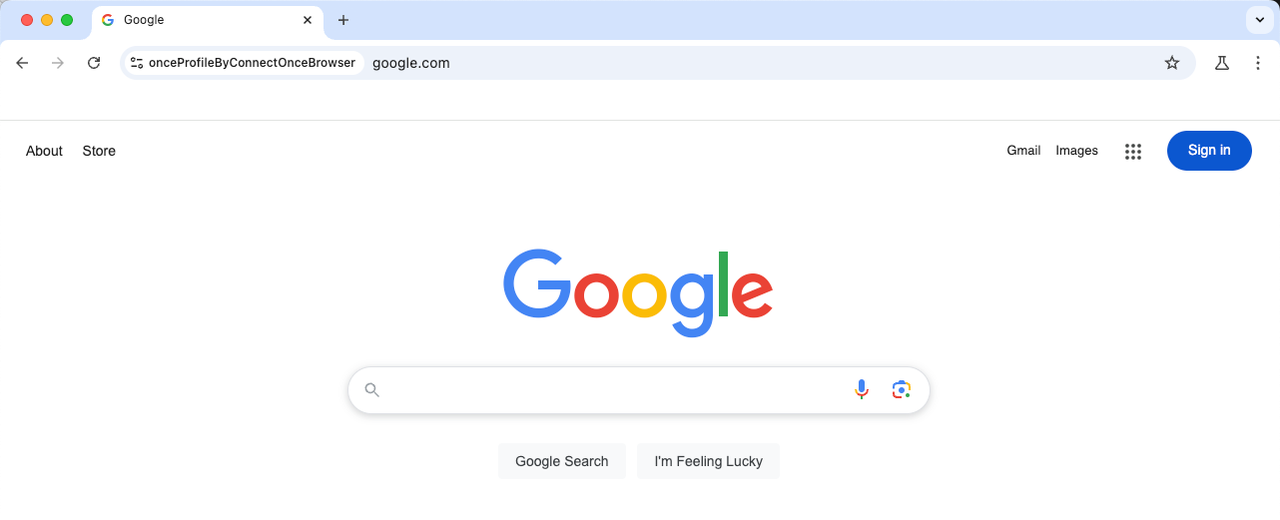
await page.goto("https://google.com");
await page.screenshot({ fullPage: true, path: 'google.png' });
}
catch (e) {
console.log(e);
} finally {
browser && browser.close();
}
})();This once profile will automatically delete user's data after closing.
How to launch the Profile created by the client in Docker?
Step 1. Create profiles and start
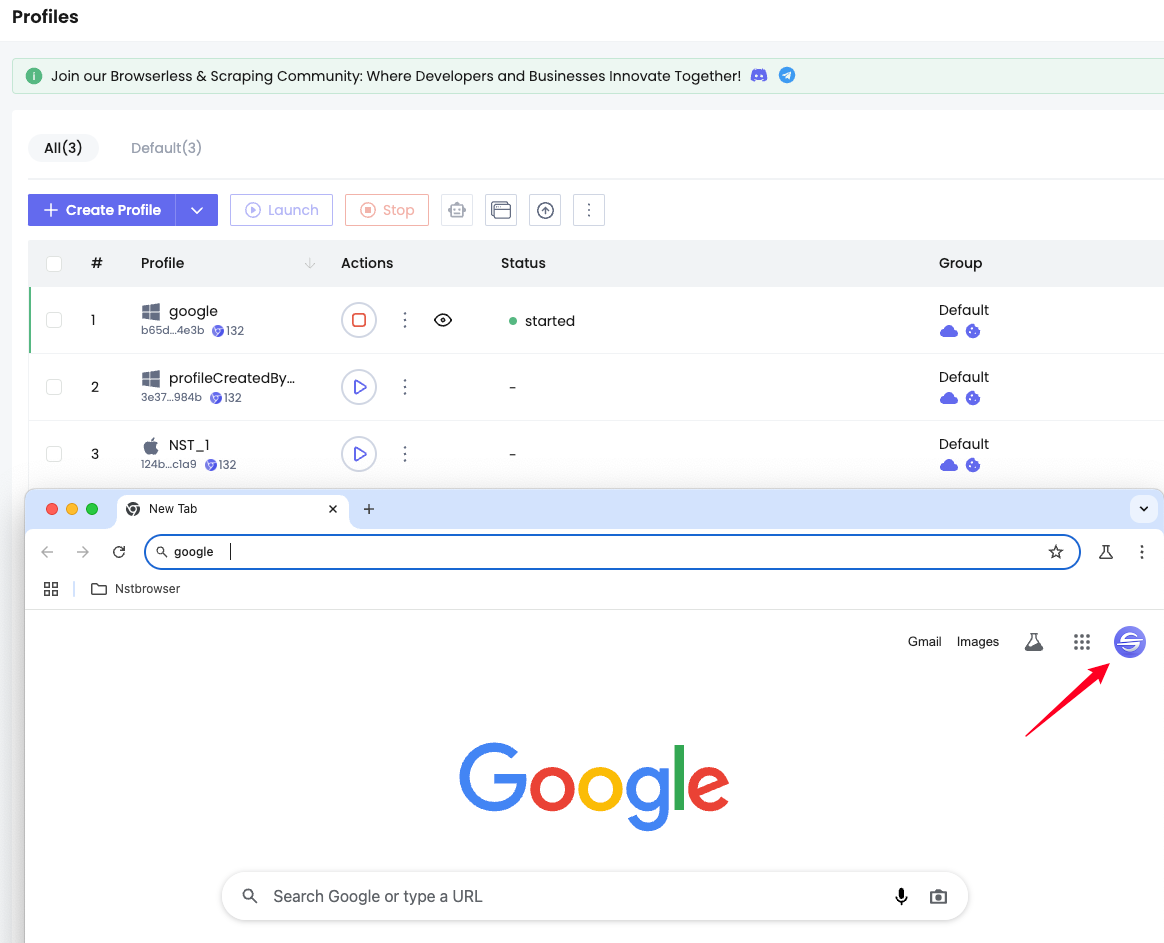
We create a profile on the client and add the Google login page to the Startup URLs. You can also input other sites:

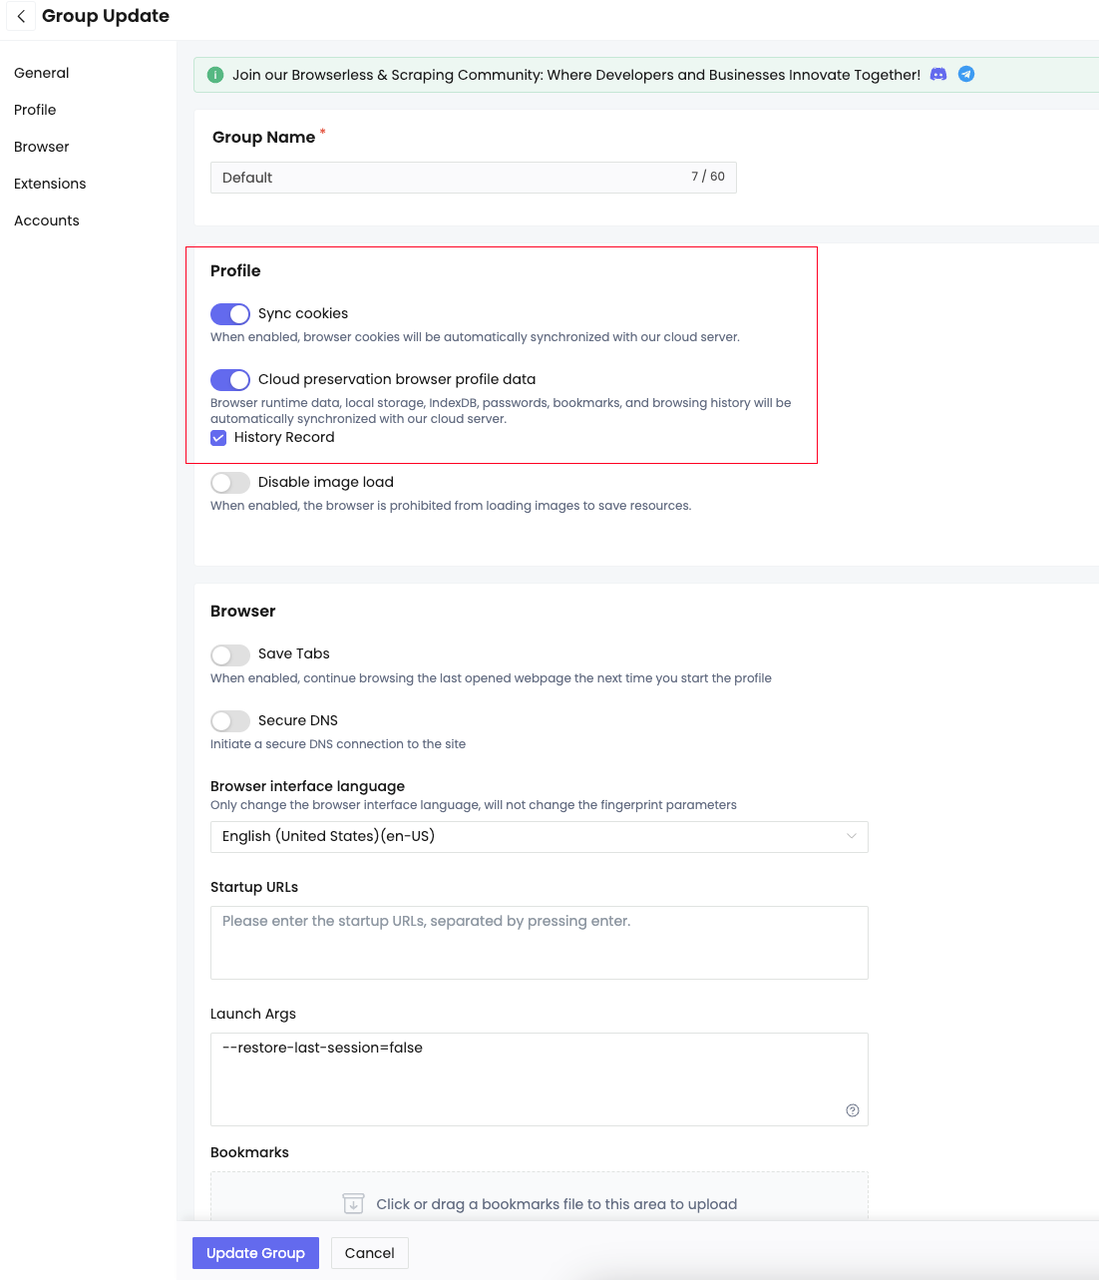
In order to synchronize the profile data started by the client to the Docker container, you need to enable cloud synchronization and cookie synchronization in the group settings:
Step 2. Sync login data
Click to start the profile and log in to Google, then click to close the browser and the data will be automatically synced to the cloud:
Step 3. Start the profile in Docker
- Run the container
Shell
# replace xxxxxx with your apikey
docker run -it \
  -e TOKEN=xxxxxx \
  -p 8848:8848 \
  -p 5900:5900 \
  --name browserless \
nstbrowser/browserless:latest- Start the profile
We use the code in Automation with JavaScript Puppeteer to access the Docker container and start the profile of the Google account logged in on the client:
JavaScript
import puppeteer from 'puppeteer';
async function execPuppeteer(browserWSEndpoint) {
try {
const browser = await puppeteer.connect({
browserWSEndpoint: browserWSEndpoint,
defaultViewport: null,
});
const page = await browser.newPage();
await page.goto('https://myaccount.google.com');
await page.screenshot({ path: 'google.png' });
await browser.disconnect();
} catch (err) {
console.error(err);
}
}
// ConnectBrowser: Launch and connect to a running browser or a created profile
async function launchAndConnectToBrowser(profileId) {
const host = 'localhost:8848';
const browserWSEndpoint = `ws://${host}/api/v2/connect/${profileId}`;
console.log('browserWSEndpoint: ', browserWSEndpoint);
await execPuppeteer(browserWSEndpoint);
}
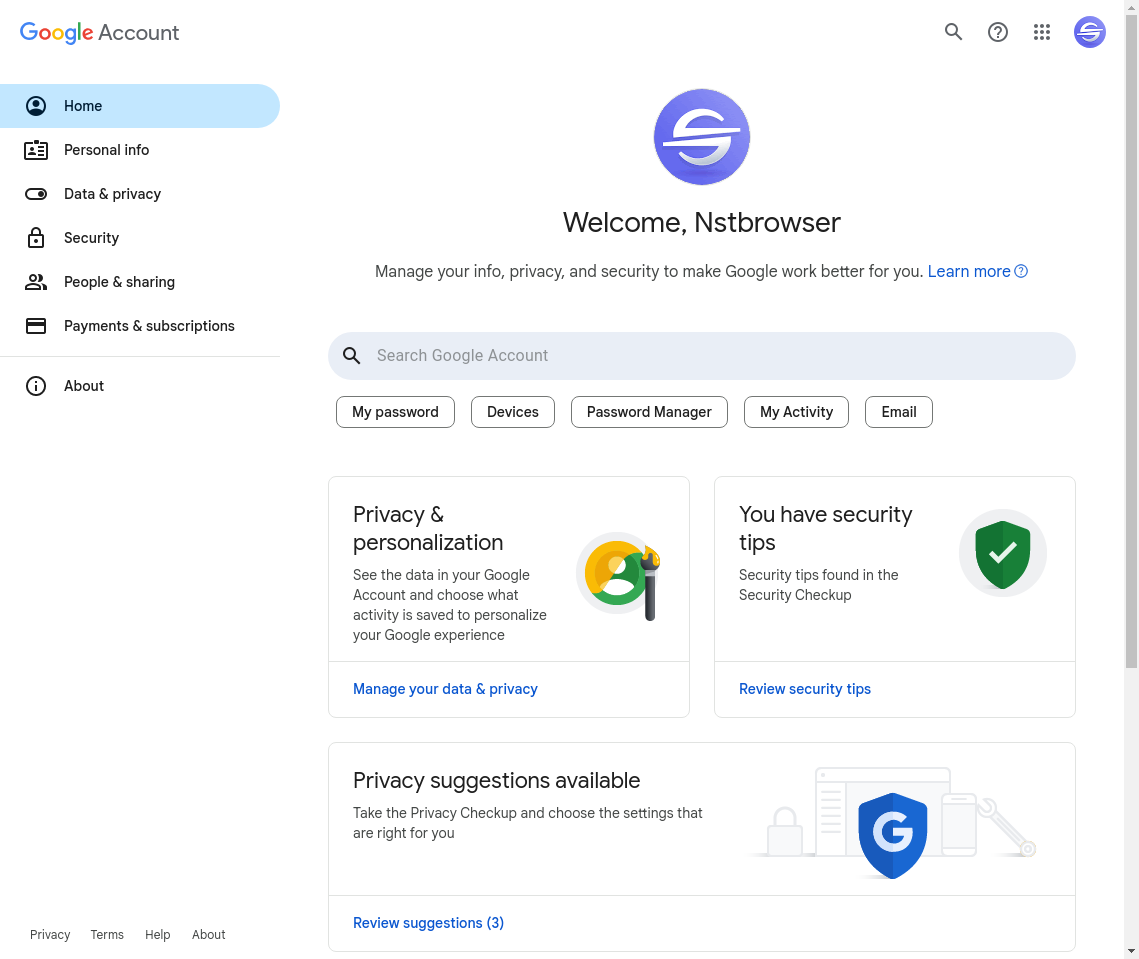
launchAndConnectToBrowser('your profileId').then();After starting the profile, the Google account page will be automatically accessed. Because we have logged in to the Google account on the client and turned on cloud synchronization, we can synchronize the Google account login information after starting the profile in the docker container.
The Ending Thoughts
We introduced how to create and start a profile, and demonstrated how to log in to the Nstbrowser site after creating and starting a profile with cloud synchronization enabled on the client, and then successfully synchronize data after starting the profile in the Docker container to achieve the login-free effect.
This article and all interfaces are based on Nstbrowser API v2, requiring the Nstbrowser client to be updated to version v1.15.4 and above, and the Docker image version 132-202503101200.v1 and above
Further Reading
More


