
solution
How to Use Nstbrowser Agent to Build a Crawler Service on Ubuntu?
This article will provide developers with a detailed guide on how to install and run the Nstbrowser Agent on Ubuntu systems and connect to the launched browser via Puppeteer.
Feb 24, 2025Carlos Rivera
Nstbrowser is a browser focused on privacy protection and fingerprint management, making it suitable for developers or business scenarios that require customized fingerprint environments.
1. Article Content and Purpose
The purpose of this tutorial is to help developers quickly get started with the installation and usage of the Nstbrowser Agent. It covers the entire process from script installation to operating the browser via Puppeteer. By following this article, you will be able to:
- Install Nstbrowser Agent on Ubuntu.
- Start and run the Agent service.
- Use Puppeteer to interact with the browser launched by the Agent.
2. Installing Nstbrowser Agent
System requirements and environment preparation
To ensure the service runs smoothly, make sure your server meets the following requirements before starting the setup:
- Operating System: Currently, Nstbrowser-agent is only compatible with the following system versions:
- Ubuntu 22.04 (AMD64 or ARM64 architecture)
- Ubuntu 24.04 (AMD64 or ARM64 architecture)
- Hardware Requirements:
- At least 2 GB of RAM
- At least 10 GB of available disk space
- Network Environment:
- Ensure the server can access the internet to download necessary files.
Executing the Nstbrowser-agent one-click installation script
Nstbrowser GitHub provides a convenient installation script. You can download and run it directly using the following command:
Bash
wget -qO- https://github.com/Nstbrowser/nstbrowser-agent-setup/releases/download/v1.0/agent_install.sh | sudo bashNote: By default, the installation script will download and install necessary fonts and kernels. If you don't need these components, you can skip them using the following options:
- Skip kernel installation:
--no-kernel - Skip font installation:
--no-fonts
For example, if you only want to install Nstbrowser-agent without fonts and kernels, run the following command:
Bash
wget -qO- https://github.com/Nstbrowser/nstbrowser-agent-setup/releases/download/v1.0/agent_install.sh | sudo bash -s --no-kernel --no-fontsInstallation Process Breakdown
The installation script will automatically complete the following tasks:
- Check if the system meets the minimum requirements (e.g., OS version, memory, and disk space).
- Update system packages and install necessary dependencies.
- Download and install the latest Nstbrowser-agent.
- Download and install fonts and kernels (unless skipped).
After the installation is complete, you will see the prompt: "agent install success!"
Starting Nstbrowser-agent
After installation, run the following command to start Nstbrowser-agent:
Bash
sudo ./agent --referer=client
By default, Nstbrowser-agent uses port 8848 to provide services. Once started, you can access your crawler server by visiting http://<YOUR_SERVER_IP>:8848.
3. Connecting to Agent Using Puppeteer
After installing and starting Nstbrowser-agent, you can begin using it for crawler development. Since Nstbrowser supports mainstream automation tools like Puppeteer and Playwright, you can easily integrate it into your existing crawler framework.
For example, if you are using Puppeteer, you can connect to Nstbrowser-agent with the following code:
JavaScript
import puppeteer from 'puppeteer-core';

async function execPuppeteer(browserWSEndpoint) {
    try {
        const browser = await puppeteer.connect({
            browserWSEndpoint: browserWSEndpoint,
        });
        const page = await browser.newPage();
        await page.goto('https://www.google.com');
        await page.screenshot({ fullPage: true, path: "google.png" })
        await browser.close()
    } catch (err) {
        console.error(err);
    }
}

async function createAndConnectToBrowser() {
    const host = 'YOU_SERVER_IP:8848';
    const apiKey = 'YOU_API_KEY';
    const config = {
        headless: true, // Must be true
        name: 'NstProfile',
        platform: 'linux',
        kernel: 'chromium',
        kernelMilestone: '132',
        once: true,
    };
    const query = new URLSearchParams({
        'x-api-key': apiKey, // required
        config: encodeURIComponent(JSON.stringify((config))),
    });

    const browserWSEndpoint = `ws://${host}/devtool/launch?${query.toString()}`;
    await execPuppeteer(browserWSEndpoint)
}

createAndConnectToBrowser().then();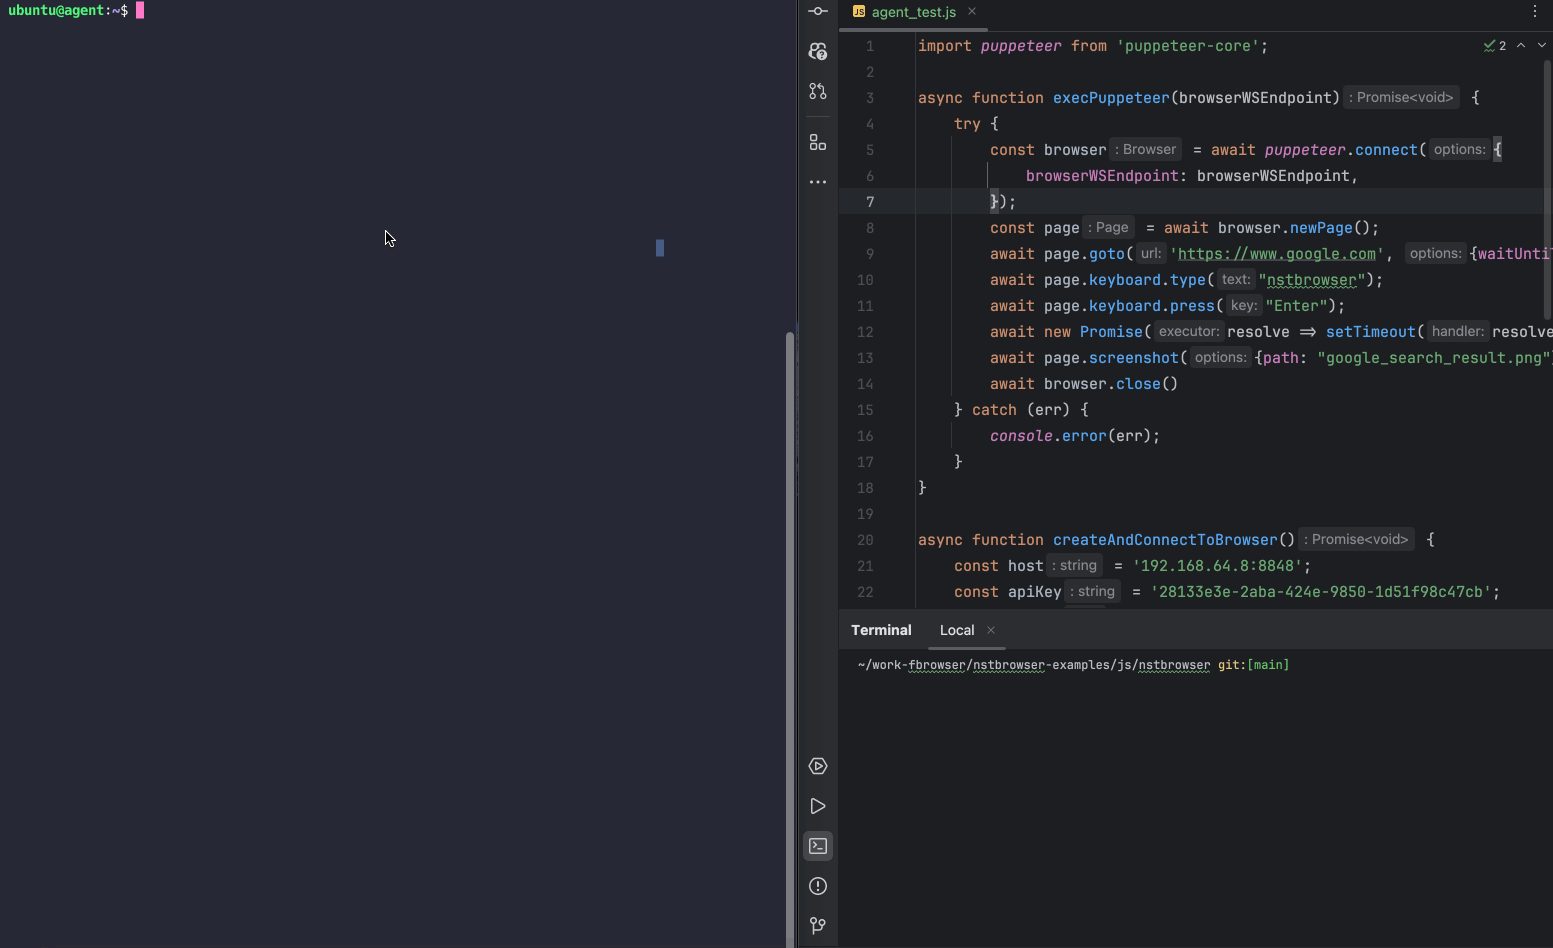
Note: Since Nstbrowser-agent typically runs in a headless server environment without a virtual graphical display, the browser can only be launched in headless mode.
4. Using APIs to Operate the Agent
Nstbrowser-agent provides powerful API support, allowing users to programmatically create and manage browser configurations. These configurations can be used for automated testing, crawler development, or other scenarios requiring browser instances.
Next, we demonstrate a specific API usage example: Createfile
Javascript
import axios from 'axios';

async function createProfile() {
    const host = 'YOU_SERVER_IP:8848';
    const apiUrl = `http://${host}/api/agent/profile`;
    const apiKey = 'YOU_API_KEY';

    const profileData = {
        name: 'NstProfile',
        platform: 'linux',
        kernel: 'chromium',
        kernelMilestone: '132',
        proxy: 'http://username:password@proxy_ip:proxy_port',
        startupUrls: ['https://www.google.com'], // The URL that is loaded at startup
        args: {
            "--headless": true // chrome startup parameter
        }
    };
    try {
        const response = await axios.post(apiUrl, profileData, {
            headers: {
                'x-api-key': apiKey,
                'Content-Type': 'application/json',
            },
        });

        console.log('Profile created successfully:', response.data);
    } catch (error) {
        console.error('Failed to create profile:', error);
    }
}

createProfile();
After running successfully, you will get the following result:
PowerShell
Profile created successfully: {
  data: {
    profileId: 'YOU_PROFILEID',
    fingerprintId: 'YOU_FINGERPRINTID',
    groupId: 'YOU_GROUP_ID',
    teamId: 'YOU_TEAM_ID',
    userId: 'YOU_USER_ID',
    name: 'NstProfile',
    kernel: 0,
    kernelVersion: '',
    kernelMilestone: '132',
    uaFullVersion: '132.0.6834.83',
    platform: 2,
    platformVersion: '6.3.3',
    saveLocal: false,
    status: 1,
    note: '',
    tags: null,
    _id: 'YOU_ID',
    createdAt: '2025-01-01T00:00:00.000Z',
    updatedAt: '2025-01-01T00:00:00.000Z'
  },
  err: false,
  msg: 'success',
  code: 200
}
5. Nstbrowser Resources
Below are the official resource links for Nstbrowser. Developers can explore further as needed:
- Official Website: https://www.nstbrowser.io - Learn about Nstbrowser's product features and latest updates.
- Documentation: https://docs.nstbrowser.io - Get detailed instructions on installation, configuration, and API development.
- Discord Community: https://discord.gg/apuW9DgB - Join the community to exchange experiences with other developers or get technical support.
More


