
Cloudflare Bypass
How to Bypass Cloudflare Human Check in 2024: The 5 Best Methods
Cloudflare detects everything! That's always a trouble for us in web scraping. All of this blog is talking about Cloudflare bot management and bypassing Cloudflare.
Aug 02, 2024Robin Brown
What is Cloudflare Bot Management?
Cloudflare Bot Management is a web service provided through Cloudflare that helps detect and block web crawlers and other bots from visiting or crawling web pages.
Here are some of the key features and functionality of Cloudflare Bot Management:
- Bot detection. It can detect various types of bots, including web crawlers, account hijacking bots, etc. through machine learning models and behavioral analysis.
- Real-time protection. This service provides real-time bot traffic analysis and protection against malicious bot attacks, such as DDoS attacks, data scraping, and account theft.
- Behavioral analysis. It can distinguish human users or bots by analyzing user behavior patterns. For example, it will monitor behaviors such as clicks, mouse movements, and keyboard input.
- Threat Intelligence. Cloudflare Bot Management utilizes a global threat intelligence network to provide up-to-date information on malicious bots and trends to enhance detection.
- Customized Rules. It allows users to create customized security rules to respond to specific bot activity, such as limiting access frequency, blocking specific IP addresses or user agents, and more.
- Dashboards and Reports. It provides detailed dashboards and reports to help users understand what is happening with bot traffic and take action accordingly.
- Integration and compatibility. Cloudflare Bot Management seamlessly integrates with Cloudflare's other security services (e.g. DDoS protection, WAF) to provide a comprehensive security solution.
It is becoming an increasingly popular method of blocking web crawlers. By using Cloudflare Bot Management, websites and applications can effectively minimize the risk posed by malicious bots and improve security and performance.
3 Common Cloudflare Errors
Due to Cloudflare bot detection, you will often encounter many Cloudflare errors. Each unique code represents a special network blocking event. How to bypass Cloudflare human check? Let's start with some common Cloudflare errors:
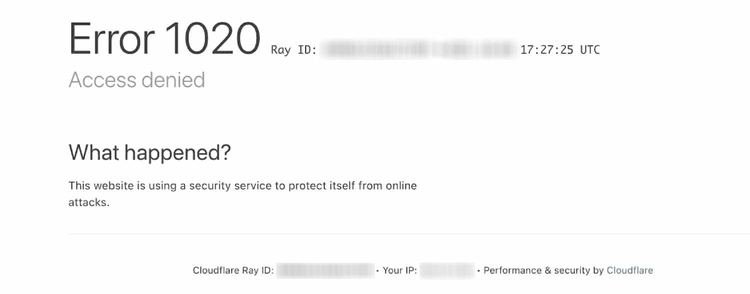
Cloudflare 1020 error is an access denied error and displays the common “Access Denied” message.
Since it is affected by various reasons, it is difficult to directly determine which one is responsible for it.
However, we can achieve Cloudflare human verification bypass by mimicking the behavior of a real user using a full crawl tool obfuscation.
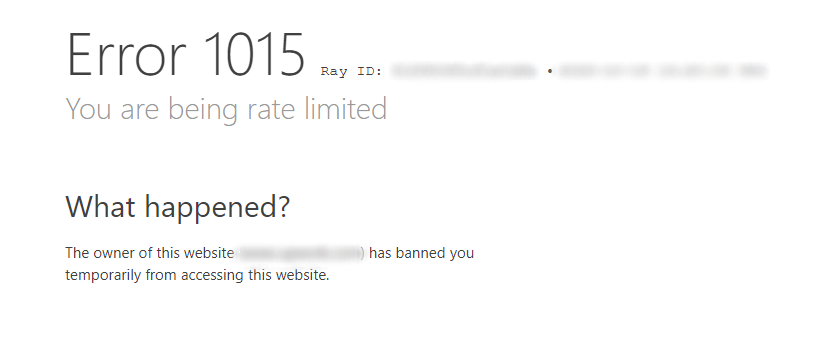
Cloudflare error 1015: You are being rate-limited.
It indicates that your IP address has been blocked. This happens when the rate at which you make HTTP requests exceeds a specified number of times in a given time frame.
How can you fix this problem? Try using Nstbrowser's IP rotation feature to avoid rate limit blocking.
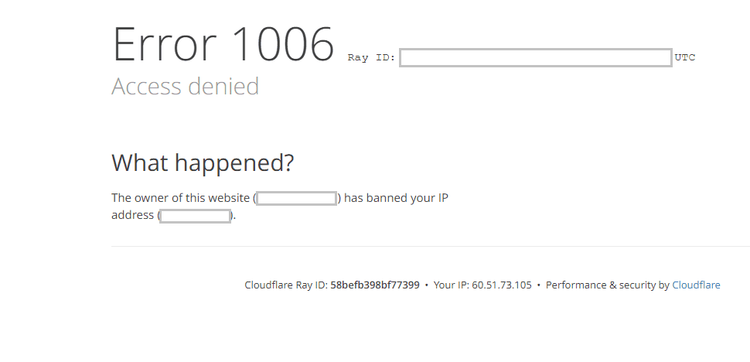
Cloudflare errors 1006, 1007, and 1008 indicate that your access was denied.
They have some similarities with error 1015, and these errors imply that your IP address has been banned. It usually occurs when you are crawling website data using tools that can be easily recognized as bots.
In this case, the web server thinks that you are trying to bypass Cloudflare to get the data and therefore denies your access. In this case, you can fix it by setting a dynamic IP and using an advanced proxy.
How does Cloudflare detect web crawlers?
How does Cloudflare detect your web activity? Why does it always block you when you are performing automated tasks? Let's take a look at 8 common ways Cloudflare detects web crawlers.
1. TLS fingerprint recognition
TLS fingerprint recognition (Transport Layer Security) is an extremely powerful identification method. It identifies you by analyzing the characteristic information sent by the client when establishing a TLS connection. This information usually includes:
- Protocol version
- Cipher suites
- Extended fields
- Compression method
- Other Handshake Parameters
How does TLS implement fingerprinting? Here are the specific steps:
Step 1. Analyze during TLS handshake.
During the TLS handshake, the client sends a “client hello” message, which contains information about the cipher suite, extended fields, and elliptic curves. Next, Cloudflare will analyze these fields and extract the corresponding feature information.
Step 2. Compute the fingerprint hash.
The human verification system will combine and hash the extracted features to generate a unique fingerprint hash. Common fingerprinting methods include JA3, JARM, and CYU, each of which analyzes different aspects of the TLS handshake, but all of which generate a consistent fingerprint for a given client configuration.
Step 3. Finding a pre-collected fingerprint hash database.
Cloudflare compares the generated fingerprint hash with its database of pre-collected fingerprint hashes. This database contains known fingerprint hashes of standard browsers and legitimate clients.
Step 4. Further comparison of user agent headers.
If the fingerprint hashes match, Cloudflare further compares the client's user agent header. This is because the user agent header provides additional information about the client's software and version. It helps to further refine the identification.
Step 5. Access control.
If both the fingerprint hash and the user agent header match, the security system assumes that the request comes from a standard browser and allows the client to access it.
On the contrary, if the fingerprint hash or the user agent header does not match, Cloudflare marks the client as a bot and blocks its access.
2. IP fingerprinting
Cloudflare first evaluates the reputation of your IP address using a variety of factors, including geographic location, ISP type, historical behavior, and more. These factors help determine the potential risk or trust level of the connecting client.
In addition, Cloudflare categorizes IP addresses based on their origin:
- Residential IP addresses: They are usually associated with real users and have a high trust score.
- Mobile IP addresses: These IP addresses are assigned by cellular networks and are also usually associated with real users and have a higher trust score.
- Data center IP addresses: They are commonly associated with automated scripts and bots and have a lower trust score.
Nstbrowser automatically rotates IP to avoid an IP ban
Join our discord to get more free solutions!
3. HTTP info
The UA field contains the client's software information, such as browser type, version, operating system, etc. Cloudflare checks the legitimacy of the User-Agent field and uses pattern-matching technology to identify common robot User-Agents. If the User-Agent field is empty or contains abnormal values, it may indicate a malicious robot, so appropriate protective measures will be taken.
The Referer field shows the source URL of the request. By analyzing the Referer, abnormal traffic sources and cross-site request forgery (CSRF) attacks can be detected. Cloudflare checks the legitimacy of the Referer field. If the Referer field is empty or contains abnormal values, it may be marked as a suspicious request to prevent potential attacks.
Cookie analysis is used to identify users and sessions. Cloudflare detects forgery or tampering by checking whether the request contains legitimate cookies and analyzing the cookie values. If the request lacks necessary cookies or the cookie value is abnormal, it may be the behavior of a malicious robot.
HTTP method analysis helps identify and detect uncommon or unsafe HTTP methods, such as TRACE and TRACK. These methods may be used to detect vulnerabilities. Cloudflare identifies abnormal behavior and takes appropriate security measures by checking the frequency and pattern of use of different HTTP methods.
4. JavaScript
Cloudflare detects web crawlers and malicious robots by executing specific JavaScript code in the client browser.
This JavaScript code collects various information about the browser and device, such as screen resolution, browser plug-ins, time zone, language settings, Canvas and WebGL fingerprints, font list, etc.
The collected data is sent back to the Cloudflare server and compared with the known fingerprint database to identify abnormal crawler fingerprints.
5. Behavioral analysis
As mentioned earlier, Cloudflare also analyzes user behaviors such as mouse movement, click events, keyboard input patterns, and page scrolling to distinguish human users or automated tools.
If suspicious activity is detected, Cloudflare will challenge the client, such as CAPTCHA verification or more complex JavaScript challenges, to further verify the authenticity of the user.
This real-time detection and verification mechanism helps Cloudflare effectively identify and block malicious crawlers and protect website security.
6. Captcha
When Cloudflare suspects that a request is initiated by a robot, it will issue a CAPTCHA challenge to the client. Users need to complete a test, such as identifying objects in a picture or entering displayed characters.
These tests are designed to be easy for only human users to complete, and automated robots usually cannot pass. It effectively blocks most automated robots and malicious activities and protects the security of websites.
7. Canvas fingerprinting
Cloudflare uses the HTML5 Canvas element to generate device fingerprints. In the client browser, Cloudflare's JavaScript code draws images on the Canvas and reads the generated pixel data.
Because different devices and browsers have subtle differences when rendering images, these differences form a unique Canvas fingerprint.
The generated Canvas fingerprint is sent back to the Cloudflare server and compared with a database of known fingerprints. If the fingerprint matches a known malicious device or an abnormal pattern, Cloudflare can identify potential crawlers or robots and take corresponding protective measures.
This technology effectively improves the accuracy of malicious traffic detection by exploiting device rendering differences.
8. Environment API query
These queries execute JavaScript code in the client browser, collecting various environmental properties such as the Navigator object for the browser and operating system, the Screen object for screen resolution and color depth, installed plugins and MIME types, WebGL rendering information, and device characteristics generated through Canvas fingerprinting.
The collected data is sent back to the Cloudflare servers and compared to a database of known fingerprints. By analyzing this information, Cloudflare can identify requests that match known malicious devices or unusual patterns, thereby detecting potential crawlers and bots. Once suspicious activity is detected, Cloudflare takes protective measures to further confirm the authenticity of the user.
Enough with that! Let's learn in detail how to bypass Cloudflare human check!
Method 1: Use a Headless browser
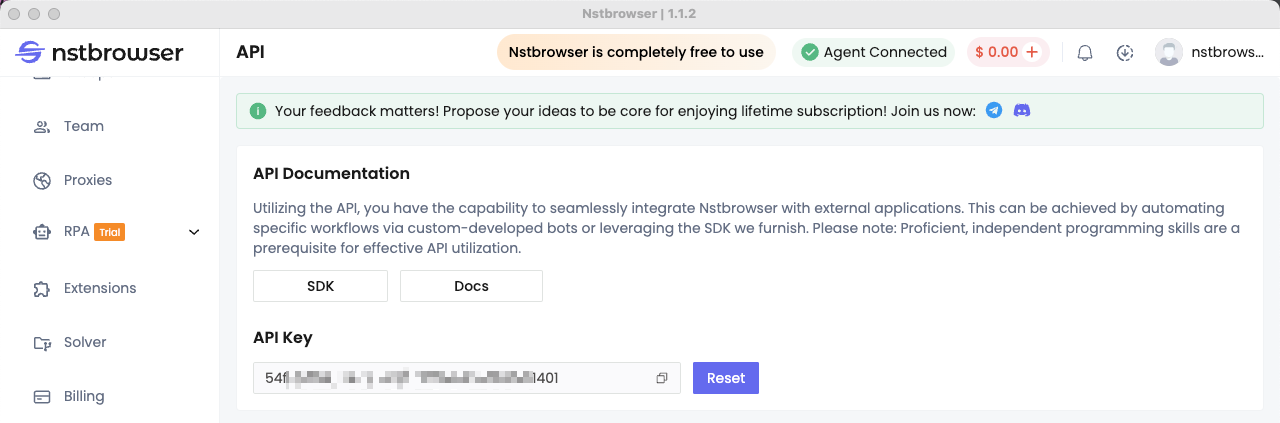
Step 1: Get your API Key
Cloudflare human verification bypass is very easy with Nstbrowser!
For a better experience, you need to register a new account on our official website: https://app.nstbrowser.io/account/register.
Use your registration information to log in to the Nstbrowser client. After successful login, don't forget to generate your exclusive API key in the API menu!
Step 2: Get the Nstbrowserless image and run
You need to get the API Key and replace the following {YOUR_API_KEY} part.
Bash
docker run -it -e TOKEN={YOUR_API_KEY} -e SERVER_PORT=8848 -p 8848:8848 --name nstbrowserless nstbrowser/browserless:0.0.1-betaStep 3: Write code to get the Cloudflare Turnstile token
It's time to create a Node project, which will be done if you complete the following steps:
- Create a
turnstile.jsfile and insert the following code to automatically get Turnstile Token data through Puppeteer.
JavaScript
import puppeteer from "puppeteer-core";

async function delay(time) {
    return new Promise(resolve => setTimeout(resolve, time));
}

let browser = null;
async function getTurnstileToken() {
    let config = {
        remoteDebuggingPort: 9223,
        once: true,
        headless: false,
        autoClose: false,
        fingerprint: {
            name: 'testProfile',
            kernel: 'chromium',
            platform: 'linux',
            kernelMilestone: '120', // fixed value: 120
            hardwareConcurrency: 8,
            deviceMemory: 8,
            proxy: '', // your proxy url
        },
    };
    const configQuery = encodeURIComponent(JSON.stringify(config));
    browser = await puppeteer.connect({
        browserWSEndpoint: `http://127.0.0.1:8848/browser/launch?config=${configQuery}`,
        defaultViewport: null,
    });

    const page = await browser.newPage();
    let resolveToken = null;
    const tokenPromise = new Promise(resolve => resolveToken = resolve);

    // This method is used to monitor whether the Checkbox exists on the page and click it
    const checkbox = async () => {
        while (true) {
            try {
                if (page.isClosed()) return;
                const targetFrameUrl = 'cdn-cgi/challenge-platform/';
                const iframe = page.frames().find((frame) => frame.url().includes(targetFrameUrl));
                if (iframe) {
                    // TODO find the position of the verification checkbox and simulate mouse clicks
                    const position = {
                        x: 0,
                        y: 0,
                    }
                    await page.mouse.move(position)
                    await page.mouse.click(position)
                }
            } catch (e) {
            } finally {
                await delay(1000)
            }
        }
    }

    // This method is used to monitor whether the token is returned
    const findToken = async () => {
        while (true) {
            if (page.isClosed()) return;
            const response = await page.evaluate(() => {
                const token = window?.turnstile?.getResponse()
                if (token) {
                    return { token: token }
                }
            });
            if (response) {
                resolveToken(response);
                return;
            }
            await delay(1000)
        }
    }

    findToken().then()
    checkbox().then()

    await page.goto('https://example.com/login.html');
    return tokenPromise;
}

// Test get trunstile token
getTurnstileToken()
    .then(result => console.log(result))
.catch(err => console.error(err))- Execute node
turnstile.jsin the terminal and wait for the result. The output may look like:
JSON
{ "token": "0.ZDHeg0BH58fAptHKige3NNlwavjsNJtp9mIHOxV6Qbqp30cpqwi7ib2M7utunoXsOAf2EYd71XFzJnMw2rA_Zi5VuAFqe-CaXx7bHdecjxrjOaTdOGWQ_0mk9WA3v-FfJgXaJZD5FVmp1UCtQuzrxt4__TVYwytrbtrKbFpBJKqKH6CdY5MCnORHgcjc2FXS9PD0rCBdzJuicWJedZkmDvvGeWG2iKQ5D1T85oUoqkKpT-NMkSt1webVc_Yfa0sPXmbw8DKkYsauwJPvqfbqyfSdrDi17qK2APCQANeWdXgd-1NsHdlkV4OMdZuunbsoROJVXIOu-i1R_8rkWKiejsGQfkubX8Y8_xempdEO0LfYEBmrMUbPzyr12QcEefE5r_BPmdn_RTX_dU2kh734G3qaodxCcOOcCo5UKM1cvHI.D_fh7cB0Bxhb4b0PHB7jew.451b703e4df2a4e8cd61d90d175329883eb3af85d72e77787959c0b52fe112e2" }Step 4: Submitting a form request
After obtaining the Turnstile token, we usually need to submit this token to the server as part of the form request. The implementation of this step may vary depending on the actual website.
Therefore, you need to modify and apply the following code sample according to the requirements of the current website.
Javascript
async function submitForm(token) {
  const formData = new FormData();
  formData.append('username', 'your_username');
  formData.append('password', 'your_password');
  formData.append('cf-turnstile-response', token);
  const response = await fetch('https://xxx.com/login', {
    method: 'POST',
    body: formData,
  });
  if (response.ok) {
    console.log('Form submitted successfully!');
  } else {
    console.error('Form submission failed!');
  }
}
Every wonderful idea and experience is available to be shared in Nstbrowser Discord and Telegram!
Method 2: Use a high-quality residential proxy
A proxy sends your request through a different IP address, making it look like it comes from another machine. So, in order to deal with IP address analysis, you can use a high-quality proxy to avoid blocking such as rate-limiting IP bans.
In addition, if you often do large-scale web scraping, please use rotating proxies. It can be very effective in avoiding IP rate limits.
Method 3: Scrape Google Cache
You can enter the URL of the target web page in the Google search box and select the "Cache" option next to the search result. This will direct you to the page cached by Google instead of directly visiting the website protected by Cloudflare.
Because the cached page is stored on Google servers and is not restricted by Cloudflare, this method can effectively bypass Cloudflare protection.
However, please note that the cached content may be outdated, so it is suitable for fetching old versions of web pages instead of the latest data.
If Google Cache doesn't work, you can try other archive services such as Internet Archive or WebCite, which also provide snapshots of web pages and may help bypass Cloudflare's detection.
Method 4: Bypassing Cloudflare CDN by calling the origin server
1. Find the origin IP address
Websites protected by Cloudflare usually hide their DNS records. However, subdomains (such as mail servers or database servers) may point directly to the origin server.
You can use tools such as Shodan, Censys, CloudFlair, and CloudPeler to scan information about the website's internal services and subdomains to get the original IP address.
2. Request data from the origin server
Now you will send requests directly to the origin server without going through Cloudflare's CDN.
- Use the cURL tool: cURL can specify the Host header in the request to ensure that the request is routed to the correct virtual host.
Bash
curl -H "Host: targetdomain.com" http://<original-ip>- Modify the host file: Edit the host file of your computer (such as /etc/hosts) to map the target domain name to the original IP address to avoid DNS checking.
Plain Text
<original-ip> targetdomain.comNotes
- Difficulty in obtaining IP addresses. Finding the origin server IP address can be difficult, especially if the website is well hidden and protected.
- Server rejection of request. The origin server may be configured to only accept traffic from trusted IP addresses, causing your request to be rejected.
- Virtual host sharing. When multiple websites share the same IP address, you need to ensure that the Host header in the request is correct so that the server can identify the specific website to access.
- Configuration is not scalable. Modifying the host file method works for a small number of machines, but it is not scalable for large-scale or dynamic environments.
Method 5: Try undetected-chromedriver
Undetected-chromedriver can help you perform automated tasks without being blocked by Cloudflare's detection mechanism.
1. Setting up undetected-chromedriver
All we need to do is configure Chromedriver to look like a normal user browser.
Step 1. Use the undetected-chromedriver library:
Python
import undetected_chromedriver.v2 as uc

options = uc.ChromeOptions()
options.add_argument('--disable-blink-features=AutomationControlled')

driver = uc.Chrome(options=options)
driver.get('https://example.com')
Step 2. Modify default settings: Make sure to disable any features that may expose automated tools.
Python
options.add_argument('--no-sandbox')
options.add_argument('--disable-dev-shm-usage')
2. Hiding automated features
The next step is to simulate human user behavior to avoid detection.
Step 1. Set a random User-Agent:
Python
from selenium.webdriver.common.by import By
from selenium.webdriver.support.ui import WebDriverWait
from selenium.webdriver.support import expected_conditions as EC

user_agent = "Mozilla/5.0 (Windows NT 10.0; Win64; x64) AppleWebKit/537.36 (KHTML, like Gecko) Chrome/91.0.4472.124 Safari/537.36"
options.add_argument(f'user-agent={user_agent}')
Step 2. Disable webdriver features:
Python
driver.execute_script("Object.defineProperty(navigator, 'webdriver', {get: () => undefined})")3. Simulate human user behavior
In addition, it is important to behave like a human user during the visit to reduce the risk of being identified as a robot.
Step 1. Simulate mouse movement and clicks:
Python
from selenium.webdriver.common.action_chains import ActionChains

element = driver.find_element(By.ID, 'example')
actions = ActionChains(driver)
actions.move_to_element(element).click().perform()
Step 2. Randomize the operation time: Usetime.sleep to wait randomly to simulate the time interval of human operation.
Python
import time
import random

time.sleep(random.uniform(1, 3))
However, please note that the protection measures of the target website may be constantly updated, so you need to adjust the strategy regularly to maintain effectiveness.
Conclusion
Cloudflare verification is so troublesome! How to bypass Cloudflare human check? In this blog, you have learned 5 most effective methods. All of them can help you have seamless web browsing.
With information on Cloudflare checking techniques, you can apply more solutions to solve it. But just as I said, no method can bypass human verification permanently.
Because of the unstoppable development and updates of Nstbrowser, we highly recommend you try it for the best solution.
More


