solution
如何在Ubuntu上使用Nstbrowser Agent构建爬虫服务?
本文将为开发者提供一份详细指南,介绍如何在Ubuntu系统上安装和运行Nstbrowser Agent,并通过Puppeteer连接到已启动的浏览器。
Feb 24, 2025Carlos Rivera
Nstbrowser是一款专注于隐私保护和指纹管理的浏览器,使其适用于需要定制指纹环境的开发者或业务场景。
1. 文章内容和目的
本教程旨在帮助开发者快速上手安装和使用Nstbrowser Agent。它涵盖了从脚本安装到通过Puppeteer操作浏览器的整个过程。阅读本文后,您将能够:
- 在Ubuntu上安装Nstbrowser Agent。
- 启动和运行Agent服务。
- 使用Puppeteer与Agent启动的浏览器交互。
2. 安装Nstbrowser Agent
系统要求和环境准备
为了确保服务顺利运行,在开始设置之前,请确保您的服务器满足以下要求:
- 操作系统: 目前,Nstbrowser-agent仅兼容以下系统版本:
- Ubuntu 22.04(AMD64或ARM64架构)
- Ubuntu 24.04(AMD64或ARM64架构)
- 硬件要求:
- 至少2 GB内存
- 至少10 GB可用磁盘空间
- 网络环境:
- 确保服务器可以访问互联网以下载必要的文件。
执行Nstbrowser-agent一键安装脚本
Nstbrowser GitHub提供了一个方便的安装脚本。您可以使用以下命令直接下载并运行它:
Bash
wget -qO- https://raw.githubusercontent.com/Nstbrowser/nstbrowser-agent-setup/refs/heads/main/scripts/agent_install.sh | sudo bash注意: 默认情况下,安装脚本将下载并安装必要的字体和内核。如果您不需要这些组件,可以使用以下选项跳过它们:
- 跳过内核安装:
--no-kernel - 跳过字体安装:
--no-fonts
例如,如果您只想安装Nstbrowser-agent而不安装字体和内核,请运行以下命令:
Bash
wget -qO- https://raw.githubusercontent.com/Nstbrowser/nstbrowser-agent-setup/refs/heads/main/scripts/agent_install.sh | sudo bash -s --no-kernel --no-fonts安装过程分解
安装脚本将自动完成以下任务:
- 检查系统是否满足最低要求(例如,操作系统版本、内存和磁盘空间)。
- 更新系统软件包并安装必要的依赖项。
- 下载并安装最新的Nstbrowser-agent。
- 下载并安装字体和内核(除非跳过)。
安装完成后,您将看到提示:“agent install success!”

启动Nstbrowser-agent
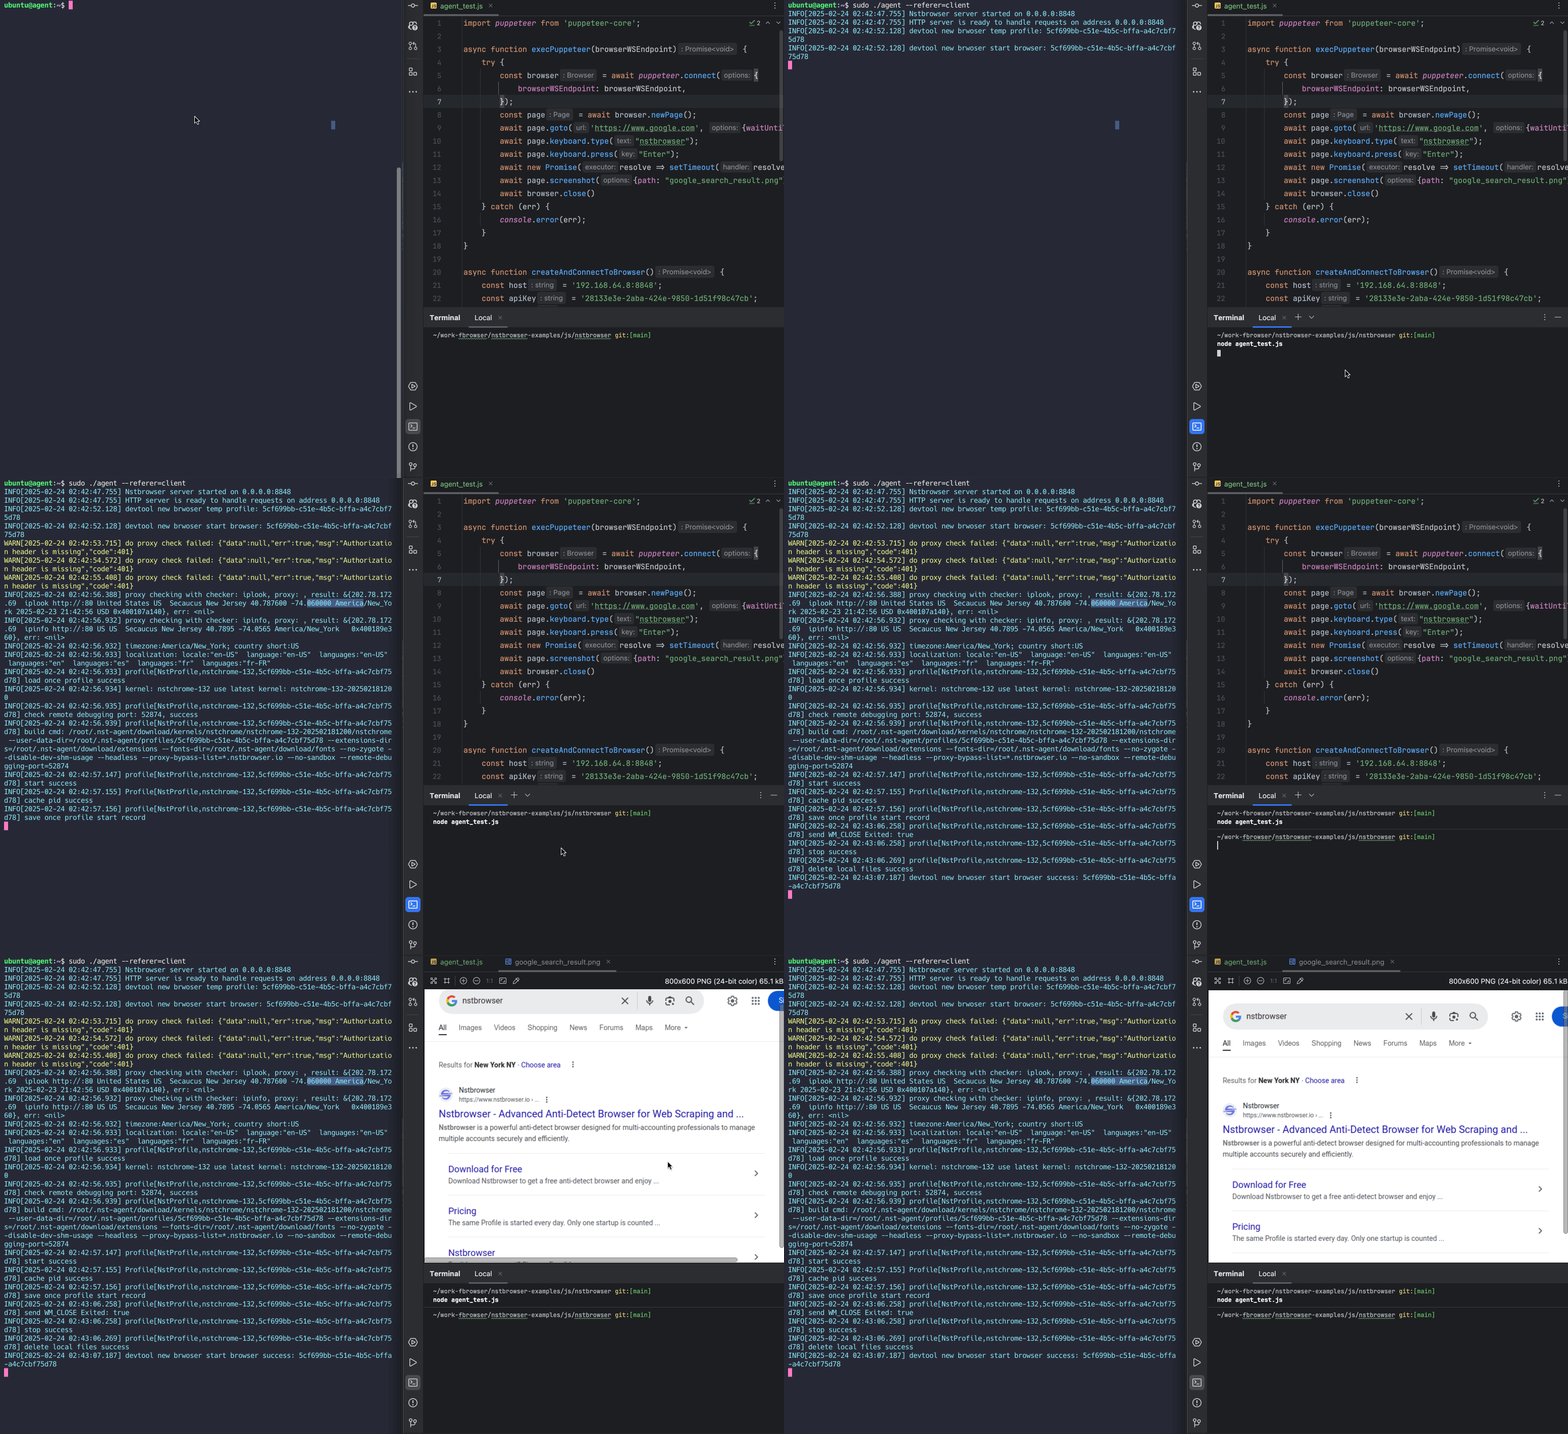
安装完成后,运行以下命令启动Nstbrowser-agent:
Bash
sudo ./agent --referer=client
默认情况下,Nstbrowser-agent使用端口8848提供服务。启动后,您可以通过访问http://<YOUR_SERVER_IP>:8848来访问您的爬虫服务器。
3. 使用Puppeteer连接到Agent
安装并启动Nstbrowser-agent后,您可以开始使用它进行爬虫开发。由于Nstbrowser支持Puppeteer和Playwright等主流自动化工具,您可以轻松地将其集成到您现有的爬虫框架中。
例如,如果您使用Puppeteer,您可以使用以下代码连接到Nstbrowser-agent:
JavaScript
import puppeteer from 'puppeteer-core';

async function execPuppeteer(browserWSEndpoint) {
    try {
        const browser = await puppeteer.connect({
            browserWSEndpoint: browserWSEndpoint,
        });
        const page = await browser.newPage();
        await page.goto('https://www.google.com');
        await page.screenshot({ fullPage: true, path: "google.png" })
        await browser.close()
    } catch (err) {
        console.error(err);
    }
}

async function createAndConnectToBrowser() {
    const host = 'YOU_SERVER_IP:8848';
    const apiKey = 'YOU_API_KEY';
    const config = {
        headless: true, // Must be true
        name: 'NstProfile',
        platform: 'linux',
        kernel: 'chromium',
        kernelMilestone: '132',
        once: true,
    };
    const query = new URLSearchParams({
        'x-api-key': apiKey, // required
        config: encodeURIComponent(JSON.stringify((config))),
    });

    const browserWSEndpoint = `ws://${host}/devtool/launch?${query.toString()}`;
    await execPuppeteer(browserWSEndpoint)
}

createAndConnectToBrowser().then();
注意: 由于Nstbrowser-agent通常在没有虚拟图形显示的无头服务器环境中运行,因此浏览器只能在无头模式下启动。
4. 使用API操作Agent
Nstbrowser-agent提供强大的API支持,允许用户以编程方式创建和管理浏览器配置。这些配置可用于自动化测试、爬虫开发或其他需要浏览器实例的场景。
接下来,我们演示一个具体的API使用示例:Createfile
Javascript
import axios from 'axios';

async function createProfile() {
    const host = 'YOU_SERVER_IP:8848';
    const apiUrl = `http://${host}/api/agent/profile`;
    const apiKey = 'YOU_API_KEY';

    const profileData = {
        name: 'NstProfile',
        platform: 'linux',
        kernel: 'chromium',
        kernelMilestone: '132',
        proxy: 'http://username:password@proxy_ip:proxy_port',
        startupUrls: ['https://www.google.com'], // The URL that is loaded at startup
        args: {
            "--headless": true // chrome startup parameter
        }
    };
    try {
        const response = await axios.post(apiUrl, profileData, {
            headers: {
                'x-api-key': apiKey,
                'Content-Type': 'application/json',
            },
        });

        console.log('Profile created successfully:', response.data);
    } catch (error) {
        console.error('Failed to create profile:', error);
    }
}

createProfile();
运行成功后,您将得到以下结果:
PowerShell
Profile created successfully: {
  data: {
    profileId: 'YOU_PROFILEID',
    fingerprintId: 'YOU_FINGERPRINTID',
    groupId: 'YOU_GROUP_ID',
    teamId: 'YOU_TEAM_ID',
    userId: 'YOU_USER_ID',
    name: 'NstProfile',
    kernel: 0,
    kernelVersion: '',
    kernelMilestone: '132',
    uaFullVersion: '132.0.6834.83',
    platform: 2,
    platformVersion: '6.3.3',
    saveLocal: false,
    status: 1,
    note: '',
    tags: null,
    _id: 'YOU_ID',
    createdAt: '2025-01-01T00:00:00.000Z',
    updatedAt: '2025-01-01T00:00:00.000Z'
  },
  err: false,
  msg: 'success',
  code: 200
}
5. Nstbrowser资源
以下是Nstbrowser的官方资源链接。开发者可以根据需要进一步探索:
- 官方网站: https://www.nstbrowser.io - 了解Nstbrowser的产品特性和最新更新。
- 文档: https://docs.nstbrowser.io - 获取有关安装、配置和API开发的详细说明。
- Discord社区: https://discord.gg/apuW9DgB - 加入社区,与其他开发者交流经验或获得技术支持。
更多


