Browserless
How to Use Browserless with Ubuntu 22.04?
Ubuntu 22.04 is a powerful system for every developer! How does it work with Browserless? All the details you will find in this wonderful blog.
Sep 26, 2024Carlos Rivera
Ubuntu 22.04 is a Debian-based Linux operating system that is a long-term support version (LTS), providing five years of official support and security updates.
It uses a modern GNOME desktop environment, optimizes performance and stability, and contains the latest packages and tools to support new hardware. In addition, Ubuntu 22.04 enhances security and provides stricter default security settings and privacy protection.
Is Ubuntu 22.04 still supported?
Yes!
Ubuntu 22.04 is codenamed Jammy Jellyfish. It was released on 21 April 2022 and is a long-term support release, supported for five years, until April 2027.
What is Browserless?
Browserless is a powerful browser solution. Based on cloud clusters, Browserless is designed to facilitate complex browser automation tasks, web crawling, and testing in a scalable and efficient manner. It is built on Nstbrowser's comprehensive fingerprint library and provides random fingerprint switching to meet user needs for data collection and automation tasks.
Do you have any wonderful ideas and doubts about web scraping and Browserless?
Let's see what other developers are sharing on Discord and Telegram!
How to Use Browserless on Ubuntu 22.04?
Prerequisites
Before using Browserless, you need to configure NodeJS in advance.
Ubuntu 22.04 comes with a Node.js package. Although the default version may not be the latest, it is sufficient to meet basic development needs. We use apt to install it, which is a simple way.
Step 1. Update the local package index.
Before installing Node.js, update the local package index:
Shell
sudo apt updateStep 2. Install Node.js.
Install Node.js using the apt package manager:
Shell
sudo apt install nodejs -yStep 3. Install the node package manager.
npm is used to manage Node.js modules and packages
Shell
sudo apt install npm -yStep 4. Verify that Node.js and npm are installed successfully.
After the installation is complete, you can check the installed Node.js version with the following command:
Shell
node -v
npm -v
If the output shows version information, it means the installation is successful.
Using Browserless
Step 1. Project Construction
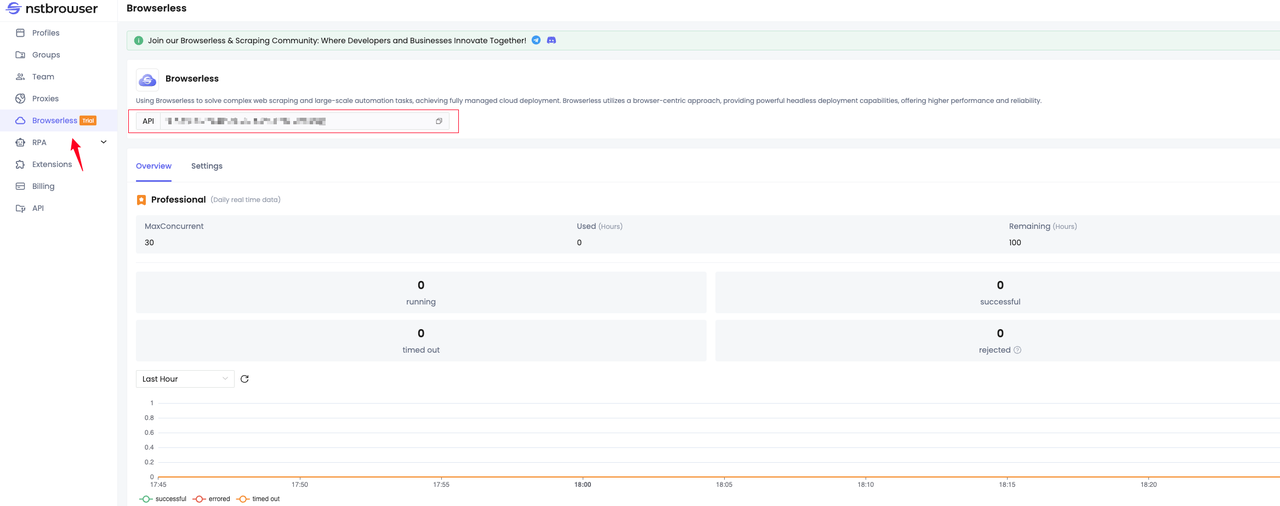
- According to the Nstbrowser browserless API documentation, first, we need to obtain the API Key:

- Next, please create a node project
Bash
mkdir nst-browserless && cd nst-browserless
npm init -y- Then, just choose the IDE whatever you like. We use VisualStudio here:
Bash
code .Currently, Browserless only supports Puppeteer and Playwright. In this tutorial, we choose to use a puppeteer. Next, it's time to install the dependencies:
Bash
npm i --save puppeteer-coreSo far, we have completed the project construction.
Step 2. Coding
Access Browserless
First, write a simple process to verify whether Browserless can be accessed normally:
JavaScript
import puppeteer from "puppeteer-core";

const token = "your token"; // required
const config = {
    proxy: 'your proxy', // required
};
const query = new URLSearchParams({
    token: token, // required
    config: JSON.stringify(config),
});
const browserWSEndpoint = `https://less.nstbrowser.io/connect?${query.toString()}`;

const getBrowser = async () => puppeteer.connect({
    browserWSEndpoint,
    defaultViewport: null,
});

(async () => {
    let browser = null;
    await getBrowser()
        .then(async (browser) => {
            const page = await browser.newPage();
            await page.goto("https://nstbrowser.io");
            await page.screenshot({ path: "screenshot.png", fullPage: true });
            await page.close();
            await browser.close();
        })
        .catch((error) => {
            console.log(error);
        })
        .finally(() => browser?.close());
})()
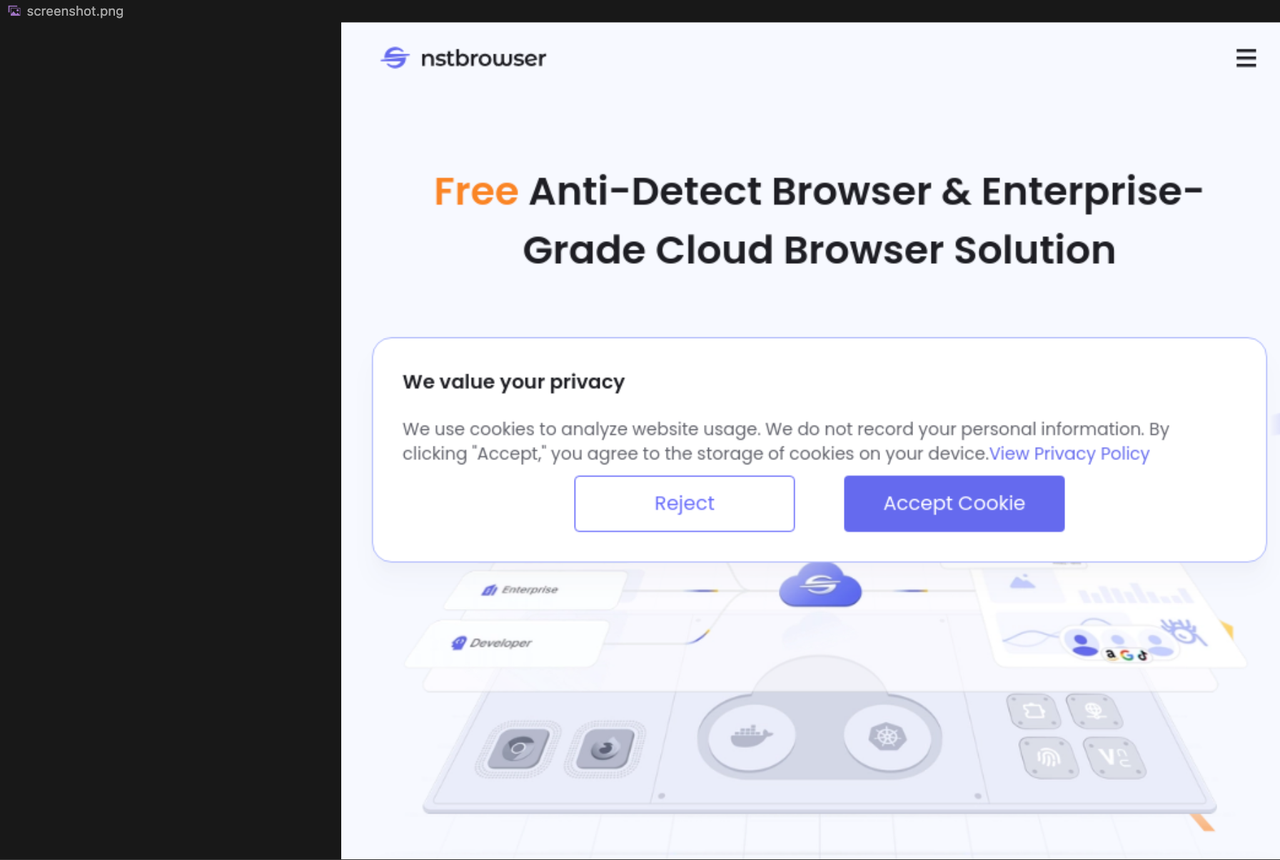
Being able to generate a screenshot shows that we can use Browserless normally:

Scraping images
Next, we go to the Pixels site to crawl some images:
- enter the subpage from the Wall Art category navigation at the top of the homepage
- get the first six image addresses and print the results.
- Site analysis
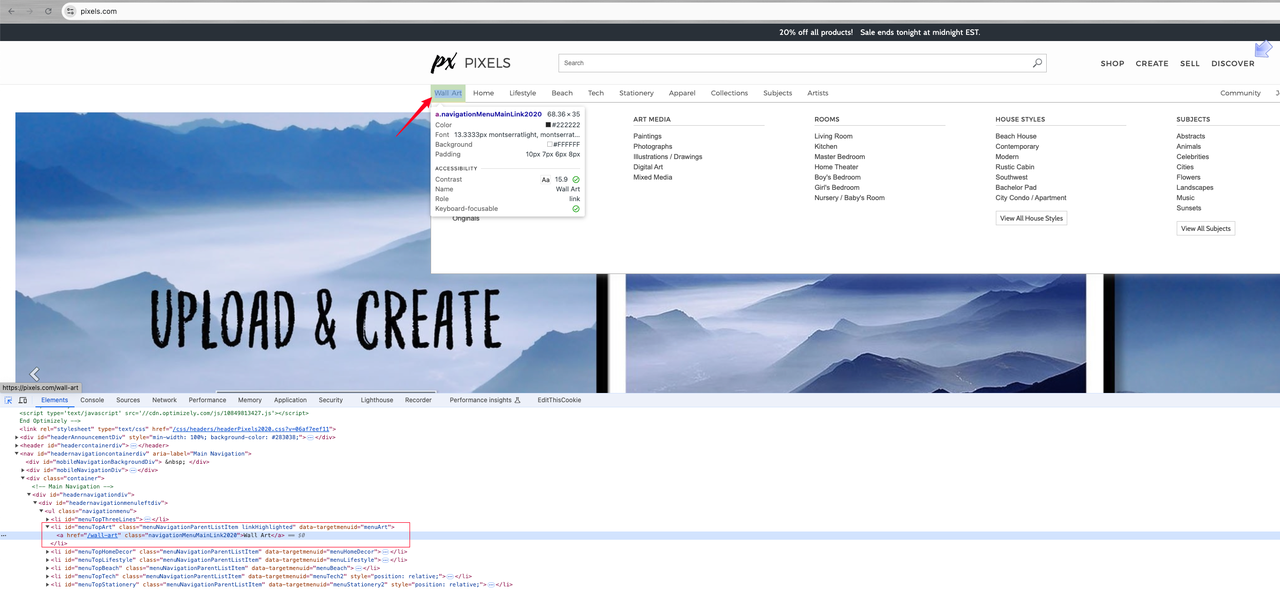
Find the navigation menu link:

After analysis, we can see that the link we need to click is an a tag under the li element with the id menuTopArt. Next, let's further analyze the element to be crawled:

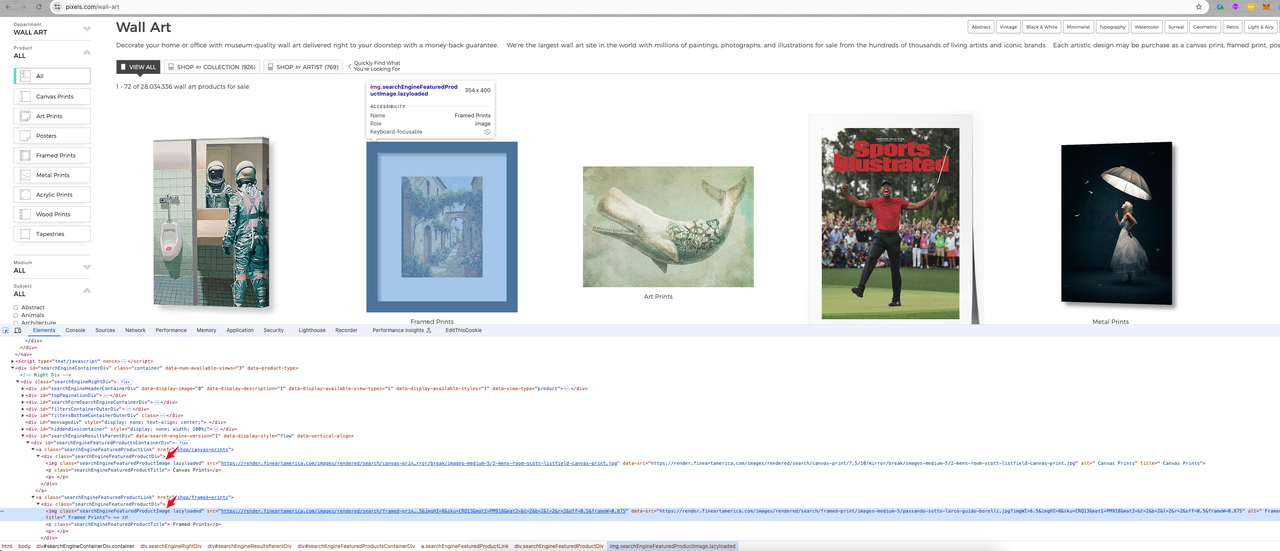
It shows that the element where the image we want is located in the src value of an img element with the class name of searchEngineFeaturedProductImage lazyloaded.
- Crawling images
Modify the code we wrote earlier to complete the crawling work:
JavaScript
import puppeteer from "puppeteer-core";

const token = "your api token";
const config = {
    proxy: 'your proxy', // required
};
const query = new URLSearchParams({
    token: token, // required
    config: JSON.stringify(config),
});
const browserWSEndpoint = `https://less.nstbrowser.io/connect?${query.toString()}`;

const getBrowser = async () => puppeteer.connect({
    browserWSEndpoint,
    defaultViewport: null,
});

(async () => {
    let browser = null;
    const pixelsWebsite = "https://pixels.com";
    await getBrowser()
        .then(async (browser) => {
            const page = await browser.newPage();
            await page.goto(pixelsWebsite);
            await page.waitForSelector("#menuTopArt", { timeout: 30000 });
            await page.click("#menuTopArt a"); // click 'Wall Art' menu
            await page.waitForSelector(".searchEngineFeaturedProductImage", { timeout: 30000 });
            const imageElements = await page.$$('.searchEngineFeaturedProductImage');
            for (const imageElement of imageElements) {
                const src = await page.evaluate(el => el.src, imageElement);
                if (src.includes("Blank.jpg")) { // break if Blank.jgp comes
                    break
                }
                console.log(src);
                // TODO: Add further processing for the image if needed
            }
            await page.close();
            await browser.close();
        })
        .catch((error) => {
            console.log(error);
        })
        .finally(() => browser?.close());
})()
Bravo! Here you can find the scraping result:

Take Away Notes
How wonderful Ubuntu is! In this blog, we learned that:
- The steps to install NodeJS on Ubuntu 22.04
- Use Browserless through Puppeteer to crawl the image address link data on the Pixels site
You can see that the whole process is very light and fast, and the process is also very simple.
Now start to study more ways to play Browserless on your own!
More


