
Proxy
How to Configure Webshare Proxies in Nstbrowser
Learn the benefits & process of integrating Webshare with Nstbrowser.
Nov 13, 2024Carlos Rivera
The Ultimate Combination
Many privacy-savvy users take advantage of a reliable anti-detect browser to ensure their activity on the Web is safe, efficient, and anonymous. However, not all are aware of the many added benefits of combining it with a proxy. Let’s break down exactly why you should set up such a configuration, the steps on the process and a special offer for our readers.
Why Webshare?
Combining a safe browser with any proxy connection is already a good practice. However, ensuring that you’re using proxies from a reliable, high-quality source such asWebshare will result in much less connection hiccups, faster browsing speeds and maximum security due to the proxy provider using many layers of protection.
Risk-Free & Affordable
Webshare has been dominating the entry-level proxy market with emphasis on practicality. The initial setup process is fast and intuitive. Most beginners will not find it overwhelming but advanced users will also find everything they need to set up a custom configuration.
Webshare also offers a fantastic free plan option that gives each new account 10 free datacenter proxies + 1GB/month of bandwidth to use for as long as they want, no credit card required.
Robust Functionality
Don’t get mistaken with the low prices Webshare offers with their plans - you’ll still find all the essential features and functionality along with competitive specs in the industry. Extracting your proxy list to use with Nstbrowser is super easy and adjusting different features can all be done with a few clicks inside your dashboard.
- Datacenter, Residential, ISP, and Verified proxy types
- HTTP/SOCKS5 protocol support
- 195+ countries & 50M+ proxy pool
- IP/Password authentication
- Proxy rotation & backbone connection
- Adjustable concurrency & detailed usage monitoring
- Paid plans start from only $2.99/month & free plan available
Configure Nstbrowser with Webshare
Combining NstBrowser with a Webshare proxy connection only takes a few steps and can be done in a few different ways. Let’s go over the steps.
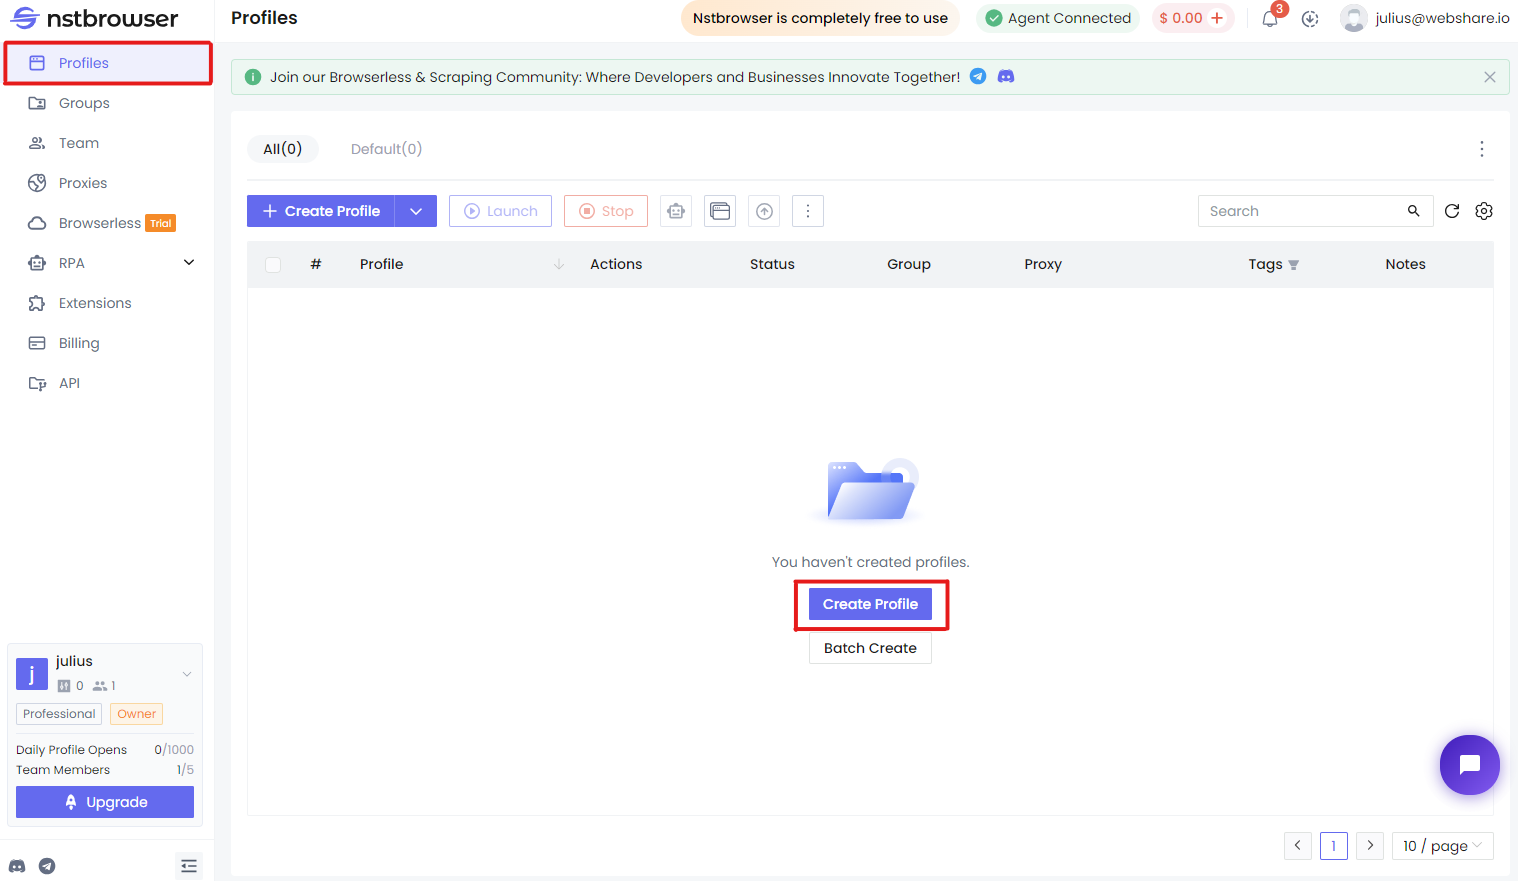
Step 1: Install Nstbrowser & Create a New Profile
If you haven’t already, download the browser from the official download page and installit on your device. After you have opened the application, you’ll need to create a new profile by clicking the Create Profile button. Don’t fill anything in yet.
Step 2: Set Up Webshare Proxies Method #1 (Individual)
If you haven’t already, create a new Webshare account here which will take you to your proxy list. All new accounts automatically receive 10 free proxies, so these users will immediately see their proxy list populated.
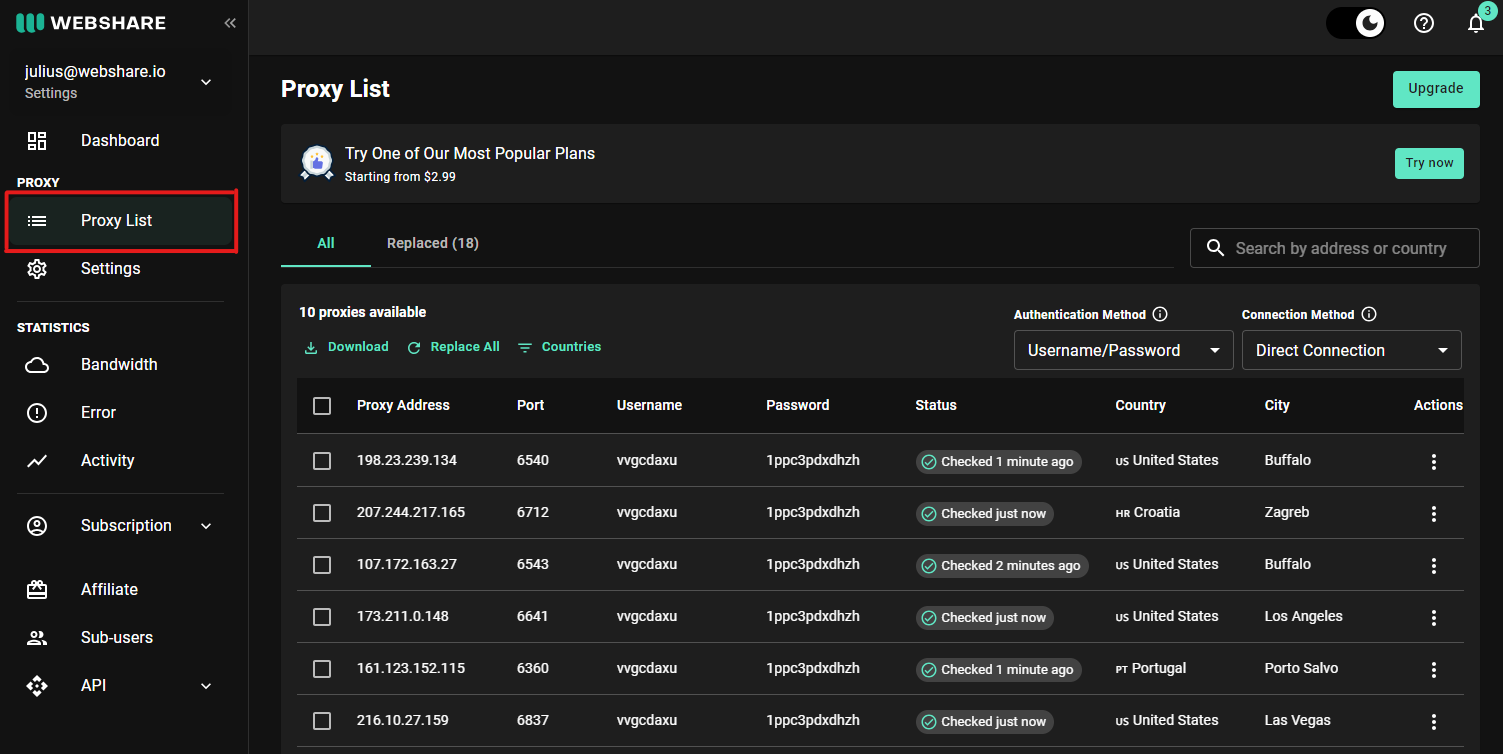
Here, you’ll want to choose the proxy you’ll use with Nstbrowser and copy of the following details:
- Proxy Address
- Port
- Username
- Password
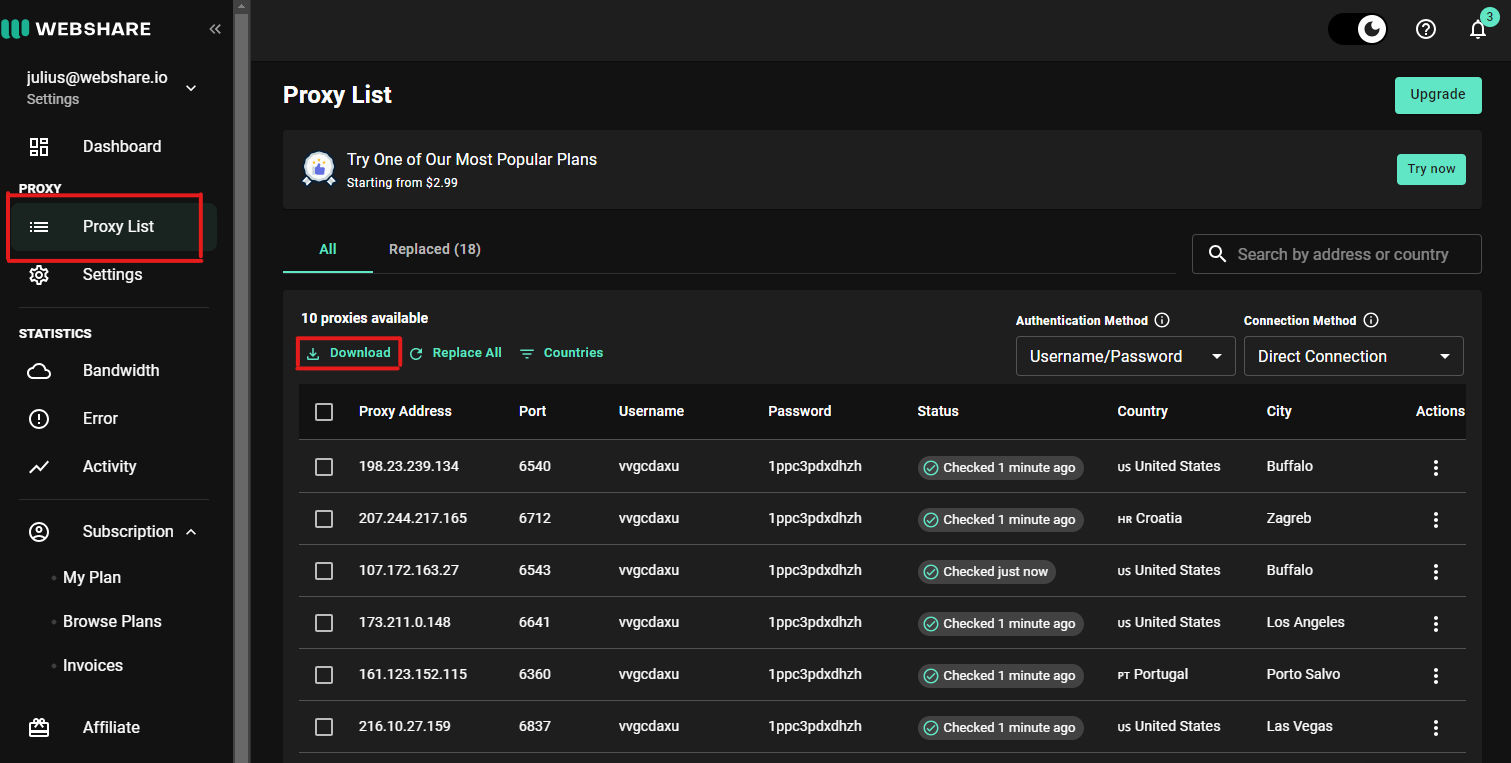
Step 2: Set Up Webshare Proxies Method #2 (Bulk)
Rather than copying and pasting one proxy to your browser, you can also do it in bulk if you desire. In the same Proxy List section of your dashboard, simply click the Download button which will generate a .txt file with all proxy data. You’ll want to copy the contents inside this file.
Bonus Step: Set Up Webshare Proxies with a Paid Plan
If you’d like to have a different proxy (e.g. Residential) with more features and better performance & reliability, you can consider paid plans. You can upgrade your plan right inside your dashboard by navigating to the Subscription section >> Browse Plans.
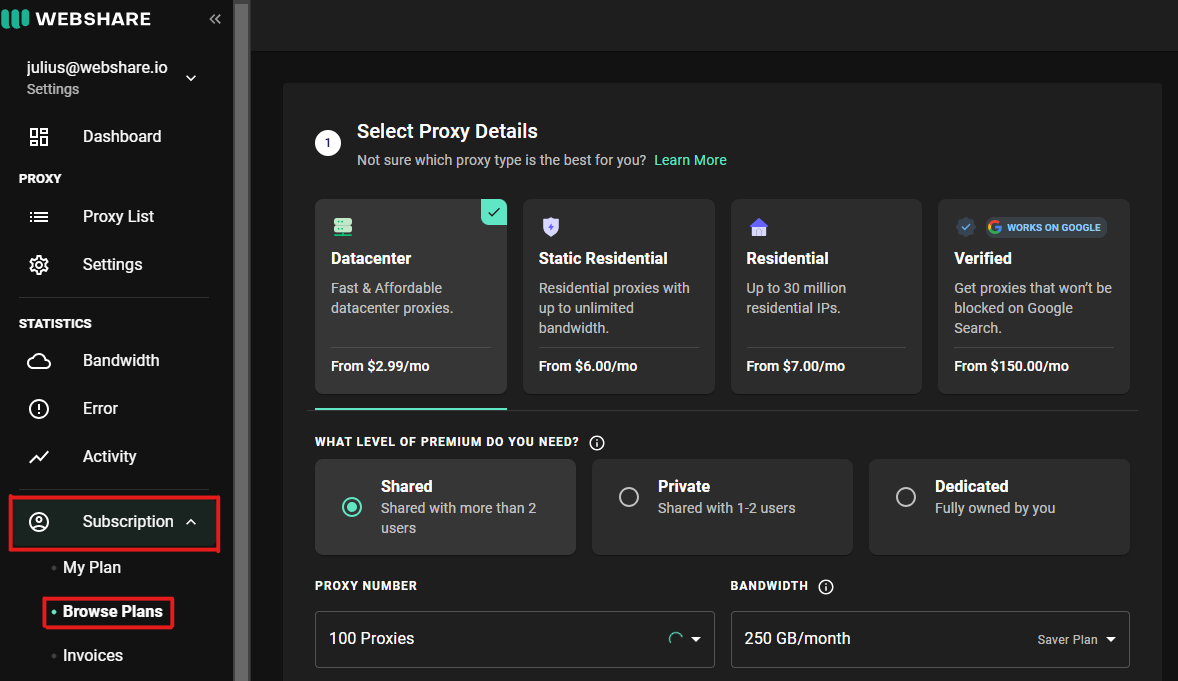
There, you can choose between Datacenter , Residential , Static Residential (ISP) , and Verified proxy types. Each has their own benefits and (sometimes) drawbacks, so you’ll want to do some research if you’re not sure which one to go for. Webshare has some great resource articles explaining each type, so it’s recommended to go through them first:
- What are Datacenter Proxies
- What are Residential Proxies
- What are Verified Proxies
After you choose the type, you can also pick the privacy level between Shared, Private, and Dedicated.They’re pretty self-explanatory, so choose based on your budget and privacy level needed. Lastly, you’ll need to pick the amount of proxies you’d like and bandwidth.
Step 3: Configure Proxy in Nstbrowser Method #1 (Individual)
Now that you’ve copied the needed information for your desired proxy(s), it’s time to configure them in Nstbrowser. Head back to the window that opened after you clicked on Create Profile and choose Proxy. For Proxy Setting and Proxy Type, choose Custom for both fields.
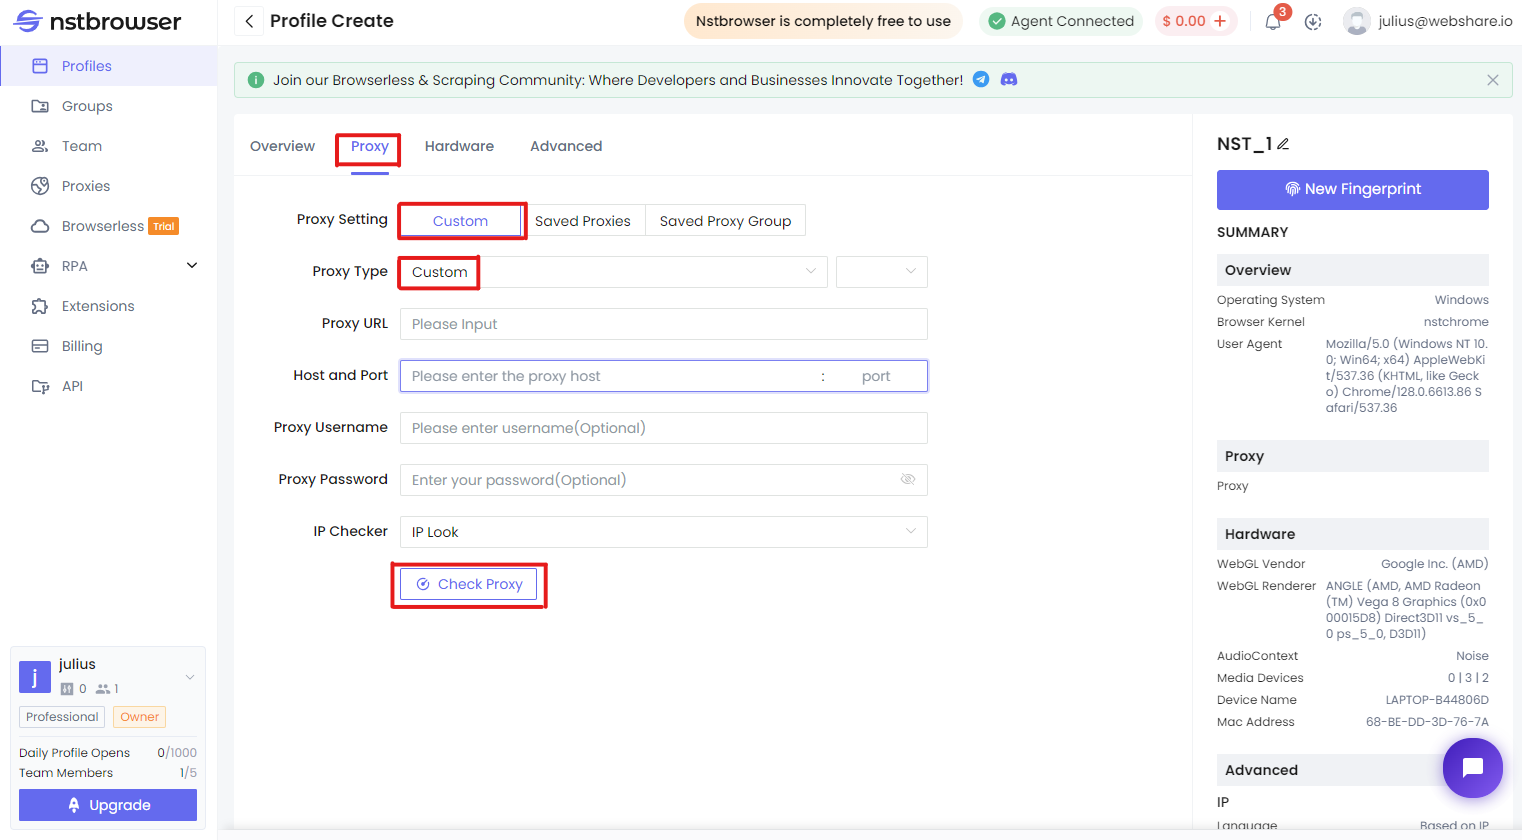
For the rest of the fields, paste the corresponding values you copied from your Webshare proxy list and click Check Proxy
- Proxy URL - dashboard.webshare.io
- Host and Port - Proxy Address : Port
- Proxy Username - Username
- Proxy Password - Password
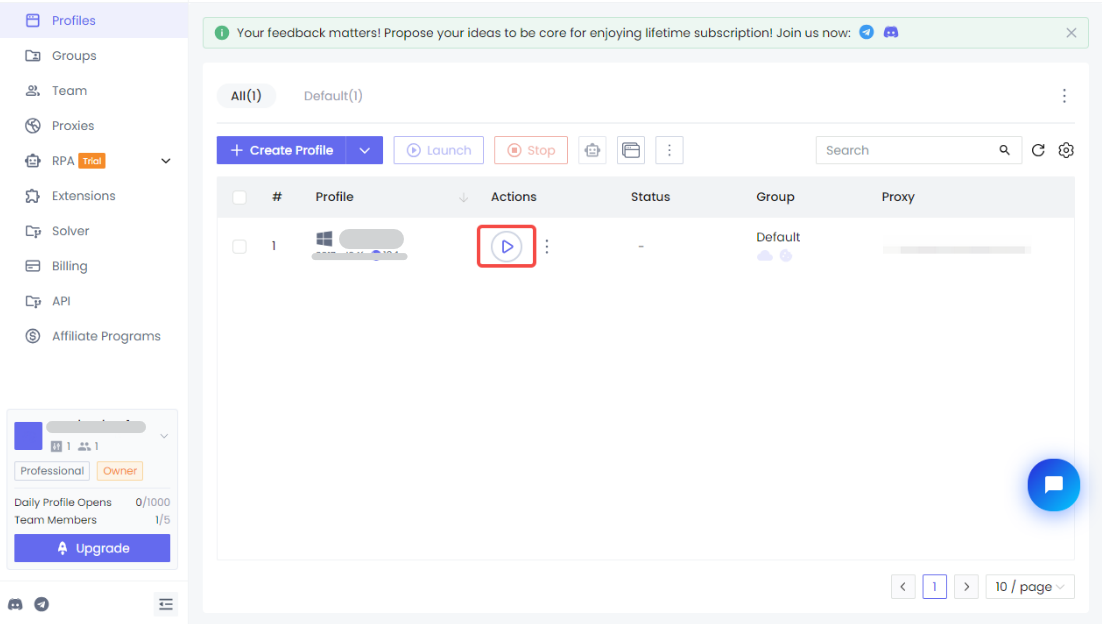
If the test went successfully, finish the profile creation by clicking Create Profile at the bottom. You’ll then see the newly created profile in your Profiles section. To start the connection, simply press the Play icon and you’re ready to browse safely!
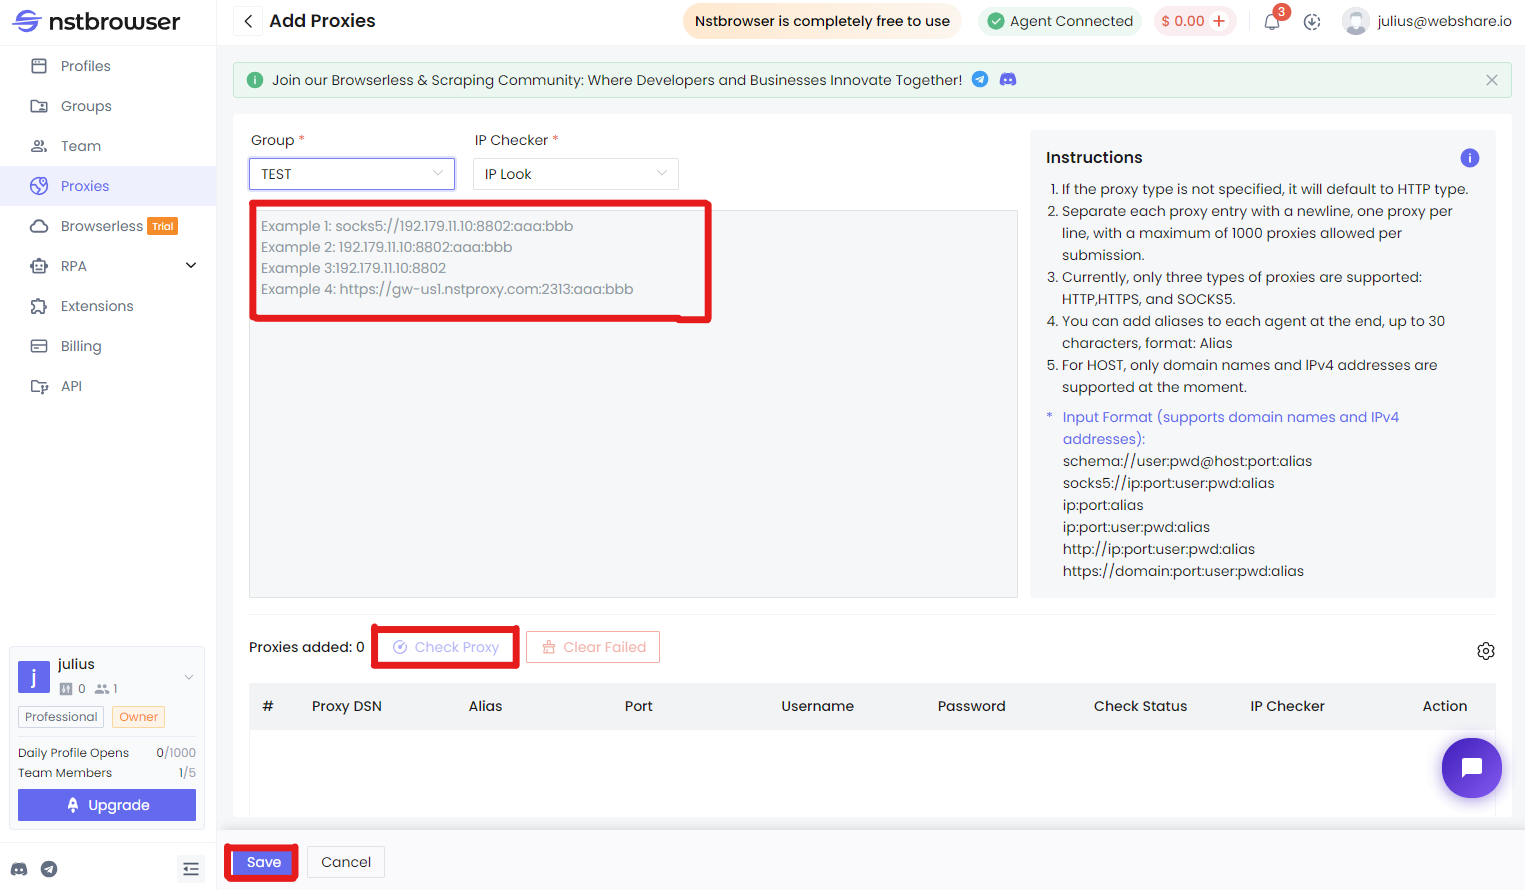
Step 3: Configure Proxy in Nstbrowser Method #2 (Bulk)
If you’d like to add the entire proxy list you copied from Webshare, the process is slightly different. Instead of Profiles, you’ll want to head to the Proxies section. There, choose the Proxy List option and then + Create Group. You’ll be prompted to name this group. You can name it whatever you want.
After that, click on + Add Proxies which will bring up a new box.

Simply paste the contents of your downloaded proxy list .txt file inside the box. Then choose Check Proxy to ensure everything works correctly and lastly, hit Save . The format is the same as it’s structured inside the file: one line per proxy.
That concludes the guide on integrating Webshare proxies with Nstbrowser either individually or by bulk. The process is very simple once you do it the first time! Don’t forget to take advantage of Webshare’s free plan offer and receive 10 proxies to try out before committing to a paid plan.
More


