
Multi-accounting
Nstbrowser RPA - The Secret to Managing Multiple Accounts
With Nstbrowser RPA, you can get an effective way to operate your multiple accounts.
Apr 30, 2024Carlos Rivera
Do you need to operate multiple accounts at the same time? Have you ever been worried about managing them?
Because of the platform limitation that one computer can only log in to one account, you have to spend a lot of money to buy multiple computers. It really increases your operation cost!
Now, with Nstbrowser RPA, all these problems will be solved.
From this guide, you will:
- Understand Nstbrowser's multiple accounts isolation management features.
- Learn about Nstbrowser's RPA features.
- Use Nstbrowser RPA for Twitter Multi-Account Auto-Login.
It's exploring time!
What Is RPA?
RPA stands for Robotic Process Automation. It is a technology that uses software robots or "bots" to automate repetitive and rule-based tasks normally performed by humans.
RPA robots can mimic human actions such as clicking, typing, copying, and pasting, and interact with software applications and systems in the same way that humans do.
There are 3 types of RPA:
- Attended Automation
- Unattended Automation
- Hybrid RPA
How Does RPA Work?
Robotic Process Automation works by using software "bots" to automate repetitive and rule-based tasks.
Here's how RPA works:
- Step 1: Task Identification.
- Step 2: Bot Development.
- Step 3: Process Mapping (developers).
- Step 4: Bot Deployment.
- Step 5: Task Execution.
- Step 6: Error Handling and Exception Handling.
- Step 7: Monitoring and Reporting.
- Step 8: Maintenance and Optimization.
How to Operate Multiple Accounts with Nstbrowser RPA?
Tired of the extra information? Don't worry! Techniques come here.
1. Prerequisites - Nstbrowser account
At the very beginning, one Nstbrowser account is most important. If you already have a Nstbrowser account, then you can skip this step directly.
-
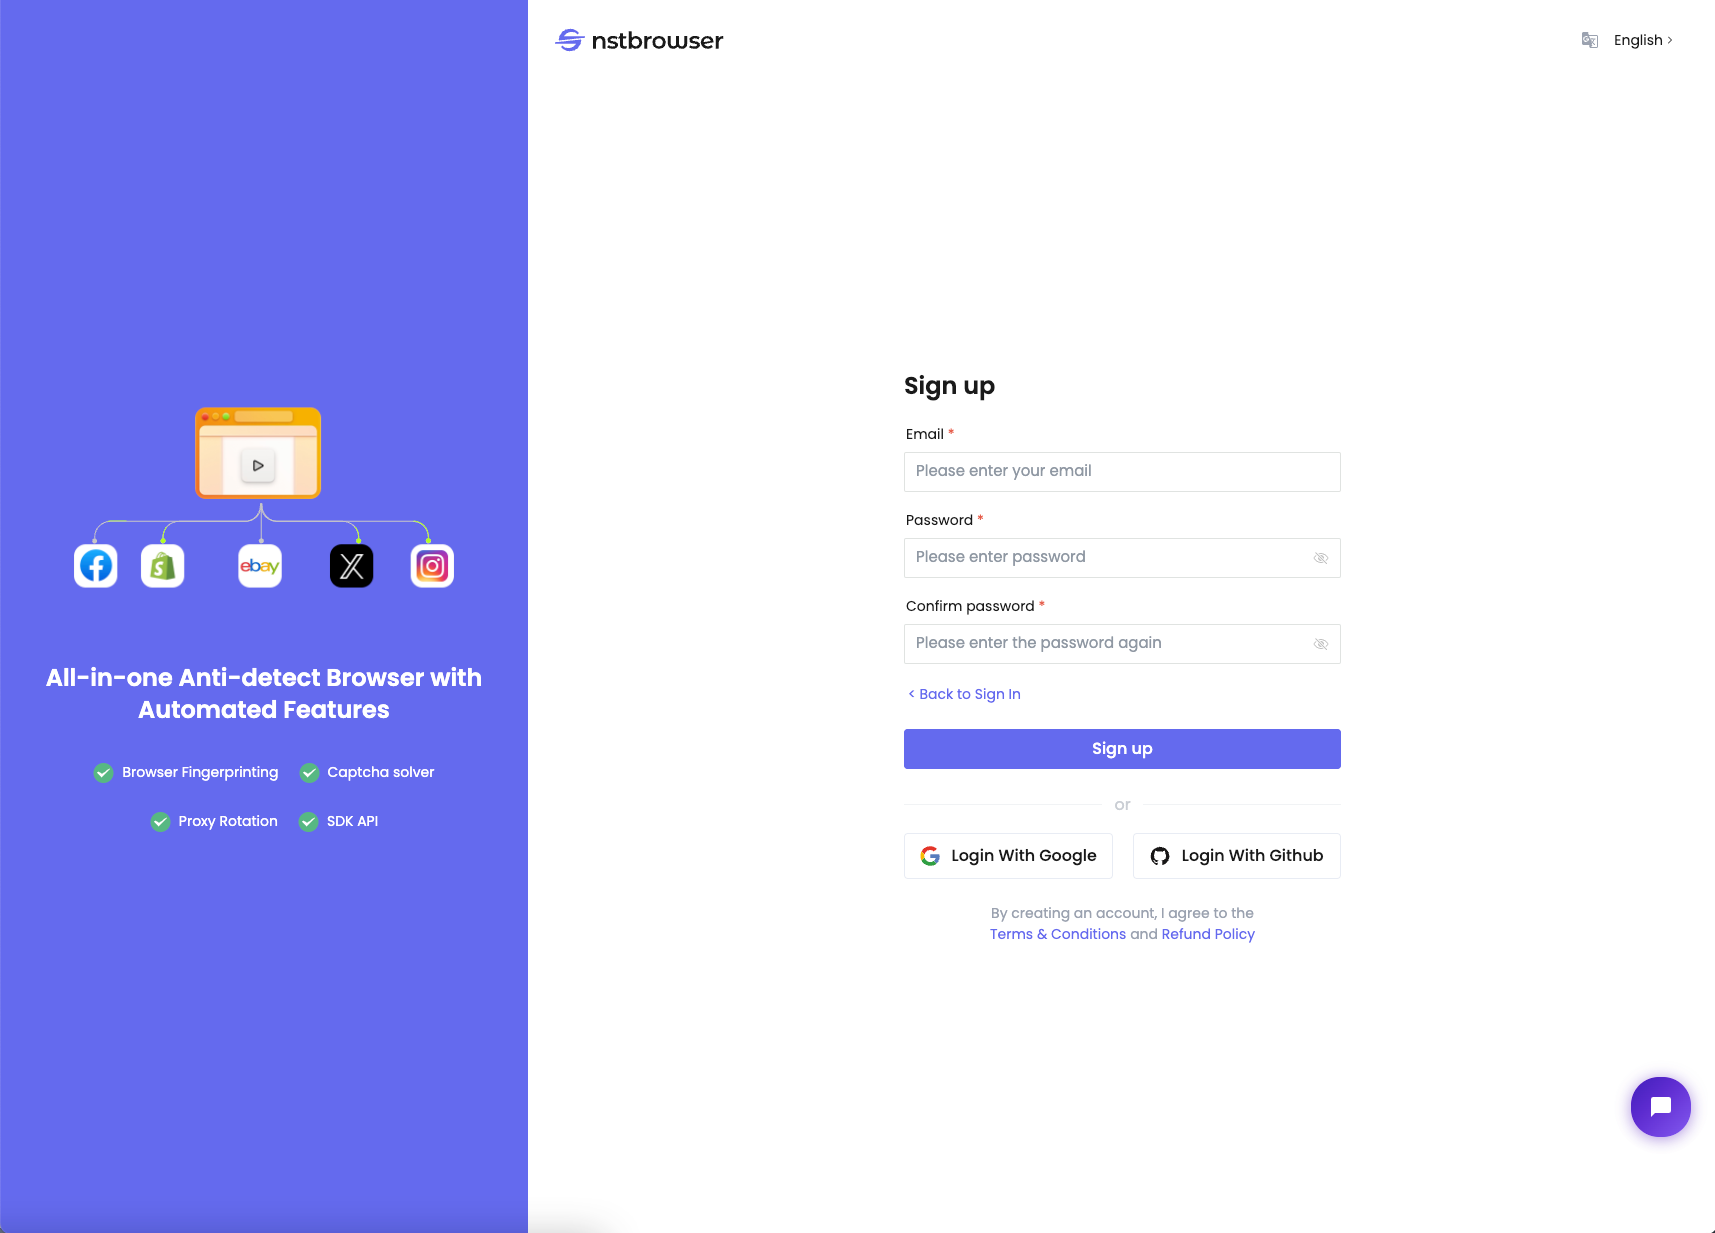
Step 1. Visit Nstbrowser and click the "Sign up" button. You will be redirected to the home page of the Nstbrowser client. Click the "Sign up" button and enter your email and password to complete Nstbrowser account registration.
- Step2. Follow the prompts to download Nstbrowser Agent. Yes, it is a desktop application. Please do all the subsequent steps in this application.
- Step 3. Open the Nstbrowser desktop app and log in with the account you have registered. Now, everything is ready!
2. Creating Profiles
After logging in, you will be required to create the specific profile you need to use. Each Profile will be in a separate environment. It helps to prevent you from being detected by the target site by using multiple logins.
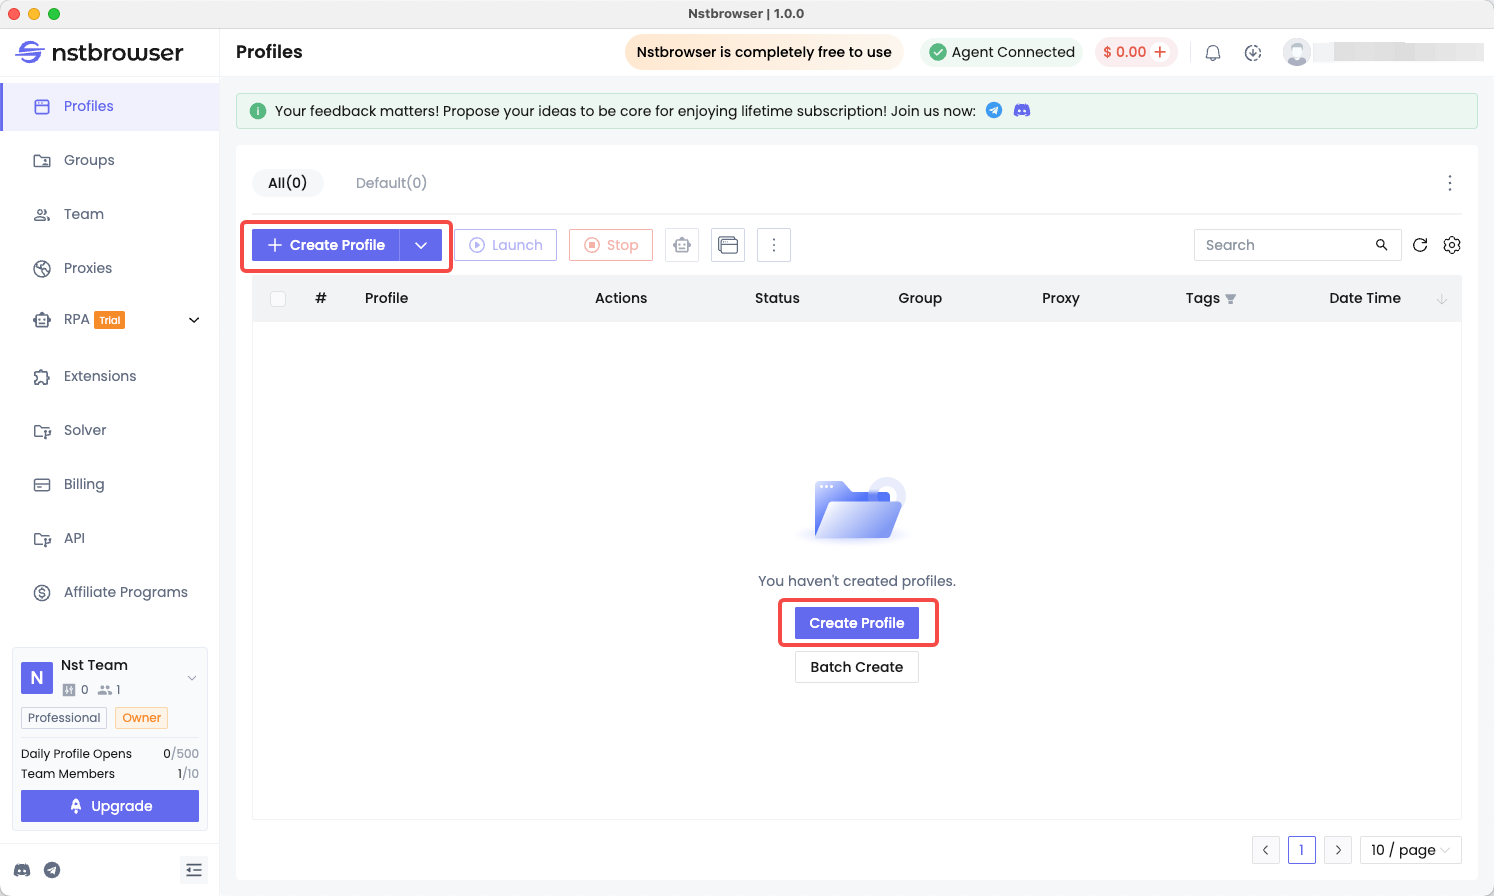
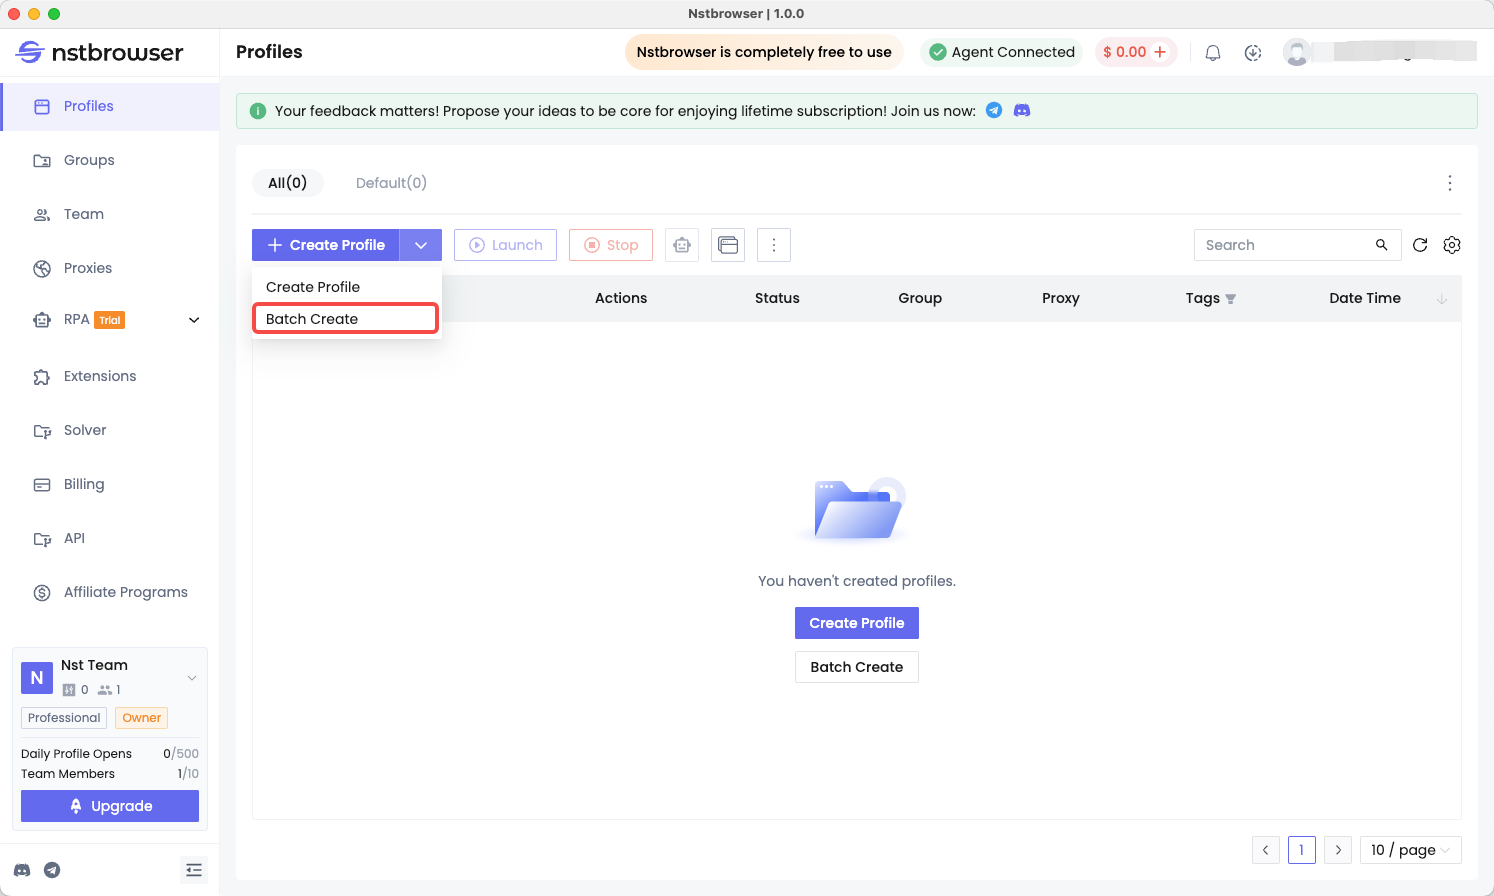
You can create as many profiles as you need to use at the same time. Of course, Nstbrowser also supports batch profile creation:
3. Creating an RPA Workflow
Just as I said before, the RPA is so wonderful for numerous repetitive tasks. Nstbrowser certainly provides this functionality as well, and it's free right now!
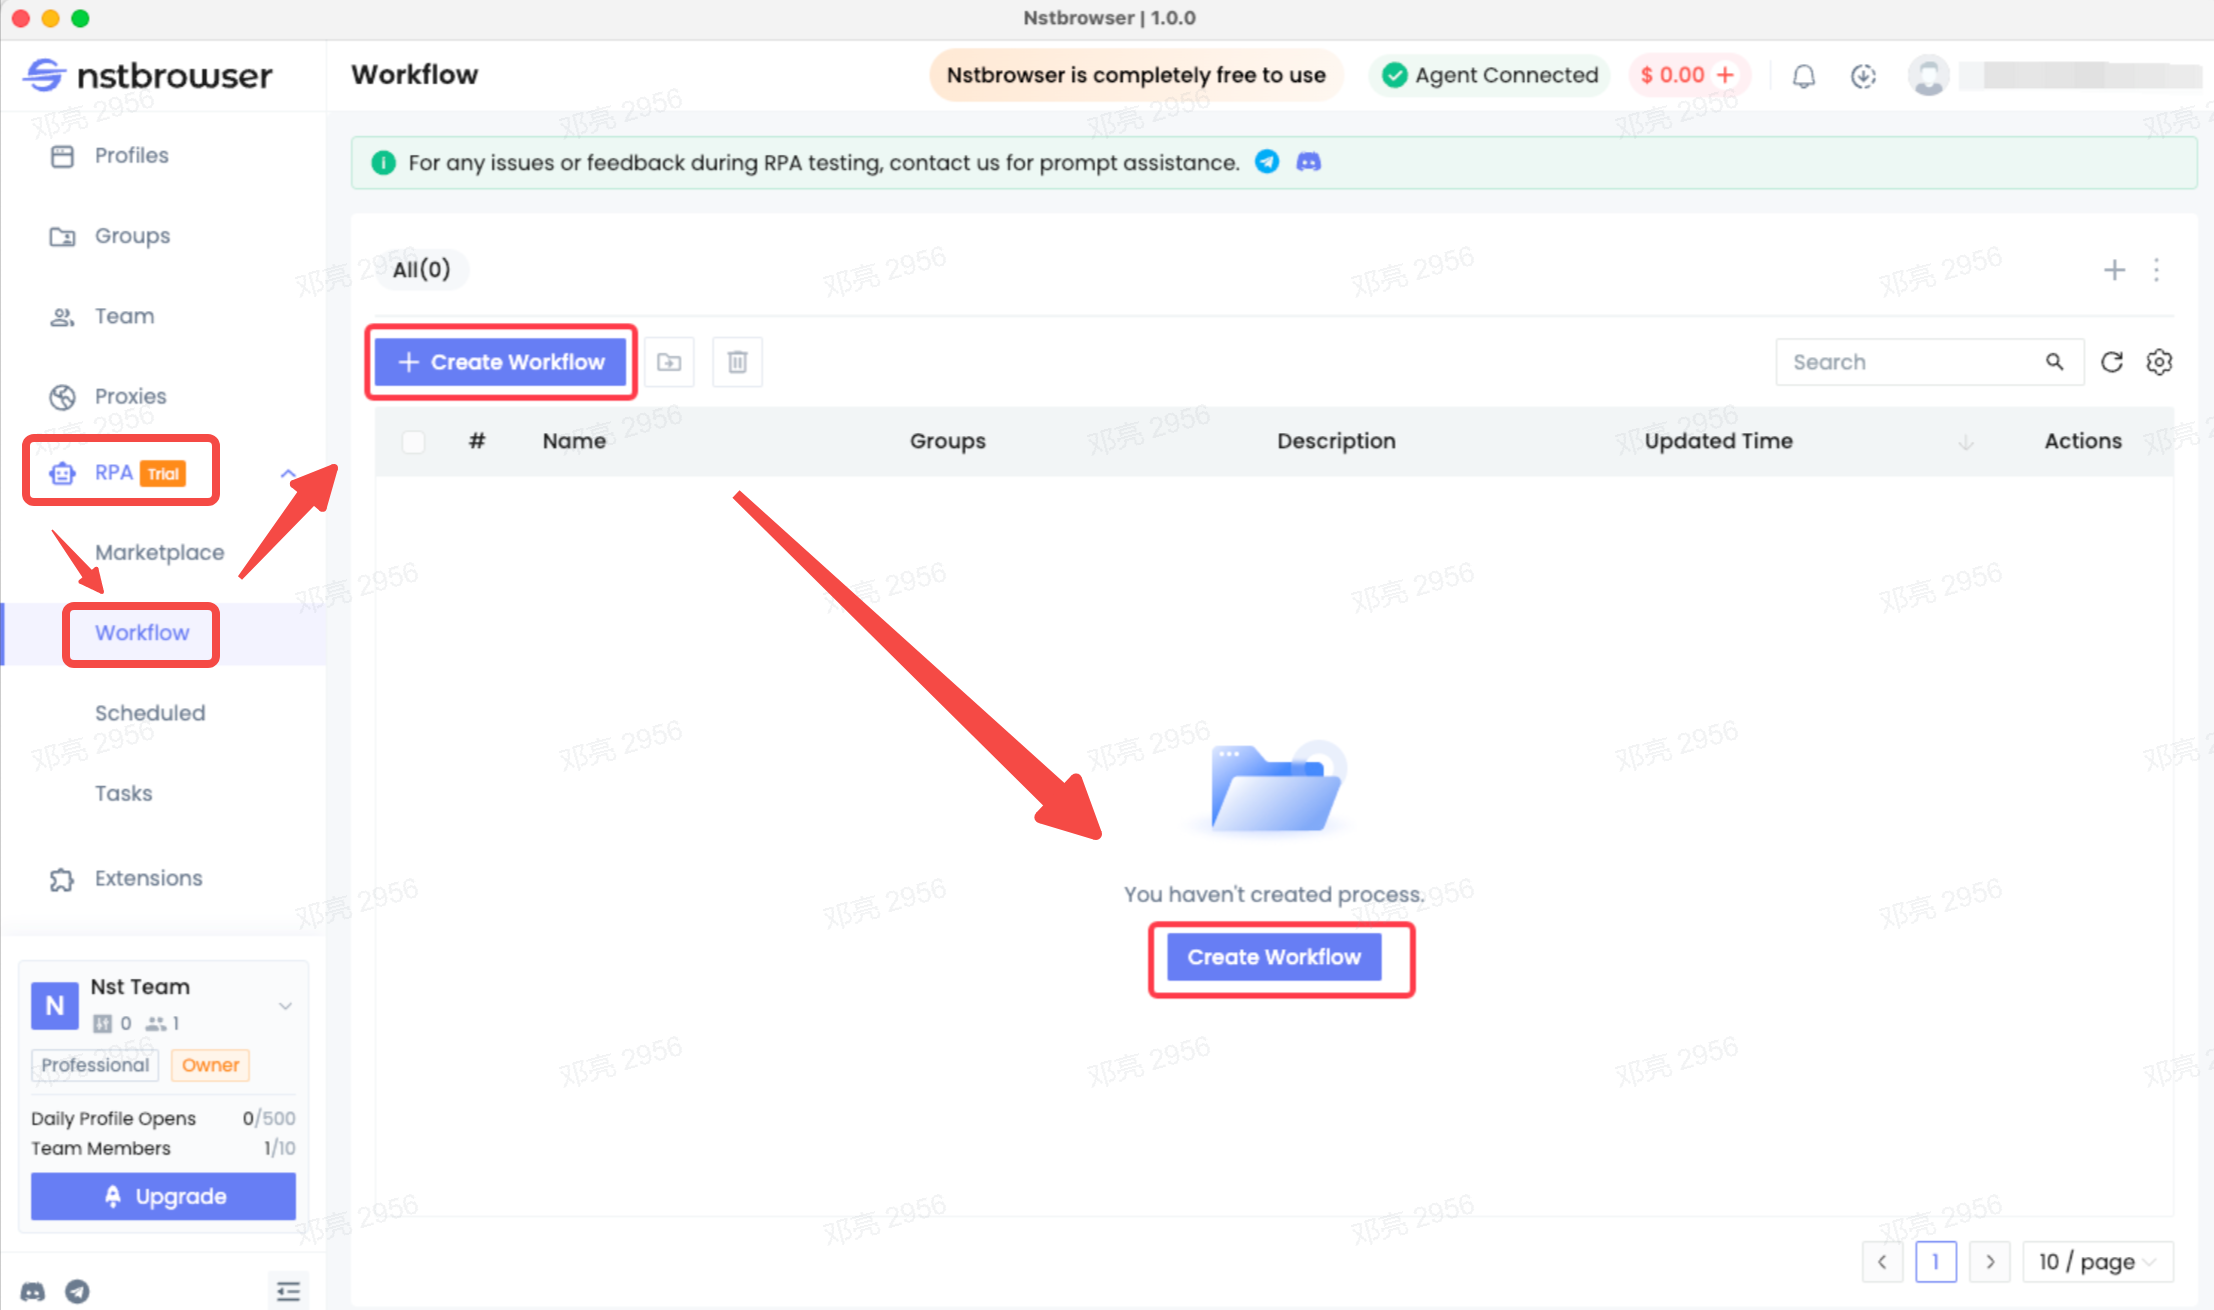
- Click on the "RPA" option in the left navigation bar.
- Click on the "Workflow" option to go to the RPA Workflow page.
- Click "Create Workflow" to start creating your first RPA:
Entering the Workflow edit page, on the left side are the RPA nodes that Nstbrowser provides you with, which you can use to configure the operations you want to implement.
Before we start configuring the nodes, we need some preparatory activities.
- Prepare your Twitter account and password and save them in an Excel file.
- Add a new column to this Excel file with [Nstbrowser_profile_id] as the list header. This column is used to save the ID of the previously created Profile.
- Go back to the Profile list page get every ID that needs to be used with the profile and save them in the column created in the previous step with [Nstbrowser_profile_id] as the list header. The account and password on the same line of each profile_id is a match for the account and password that will be logged into this profile.
Now that the preparatory activities are complete, let's officially start configuring Workflow!
Step 1. Accessing the target site
- In the list of nodes on the left, find the
Goto Urlnode and drag it to the canvas on the right. Or you can just click the “+” button on the right to add the node to the canvas as well. - Click on the added node and the corresponding edit field will appear on the right. Then, enter our target address in the Url field:
pythonhttps://twitter.com/i/flow/login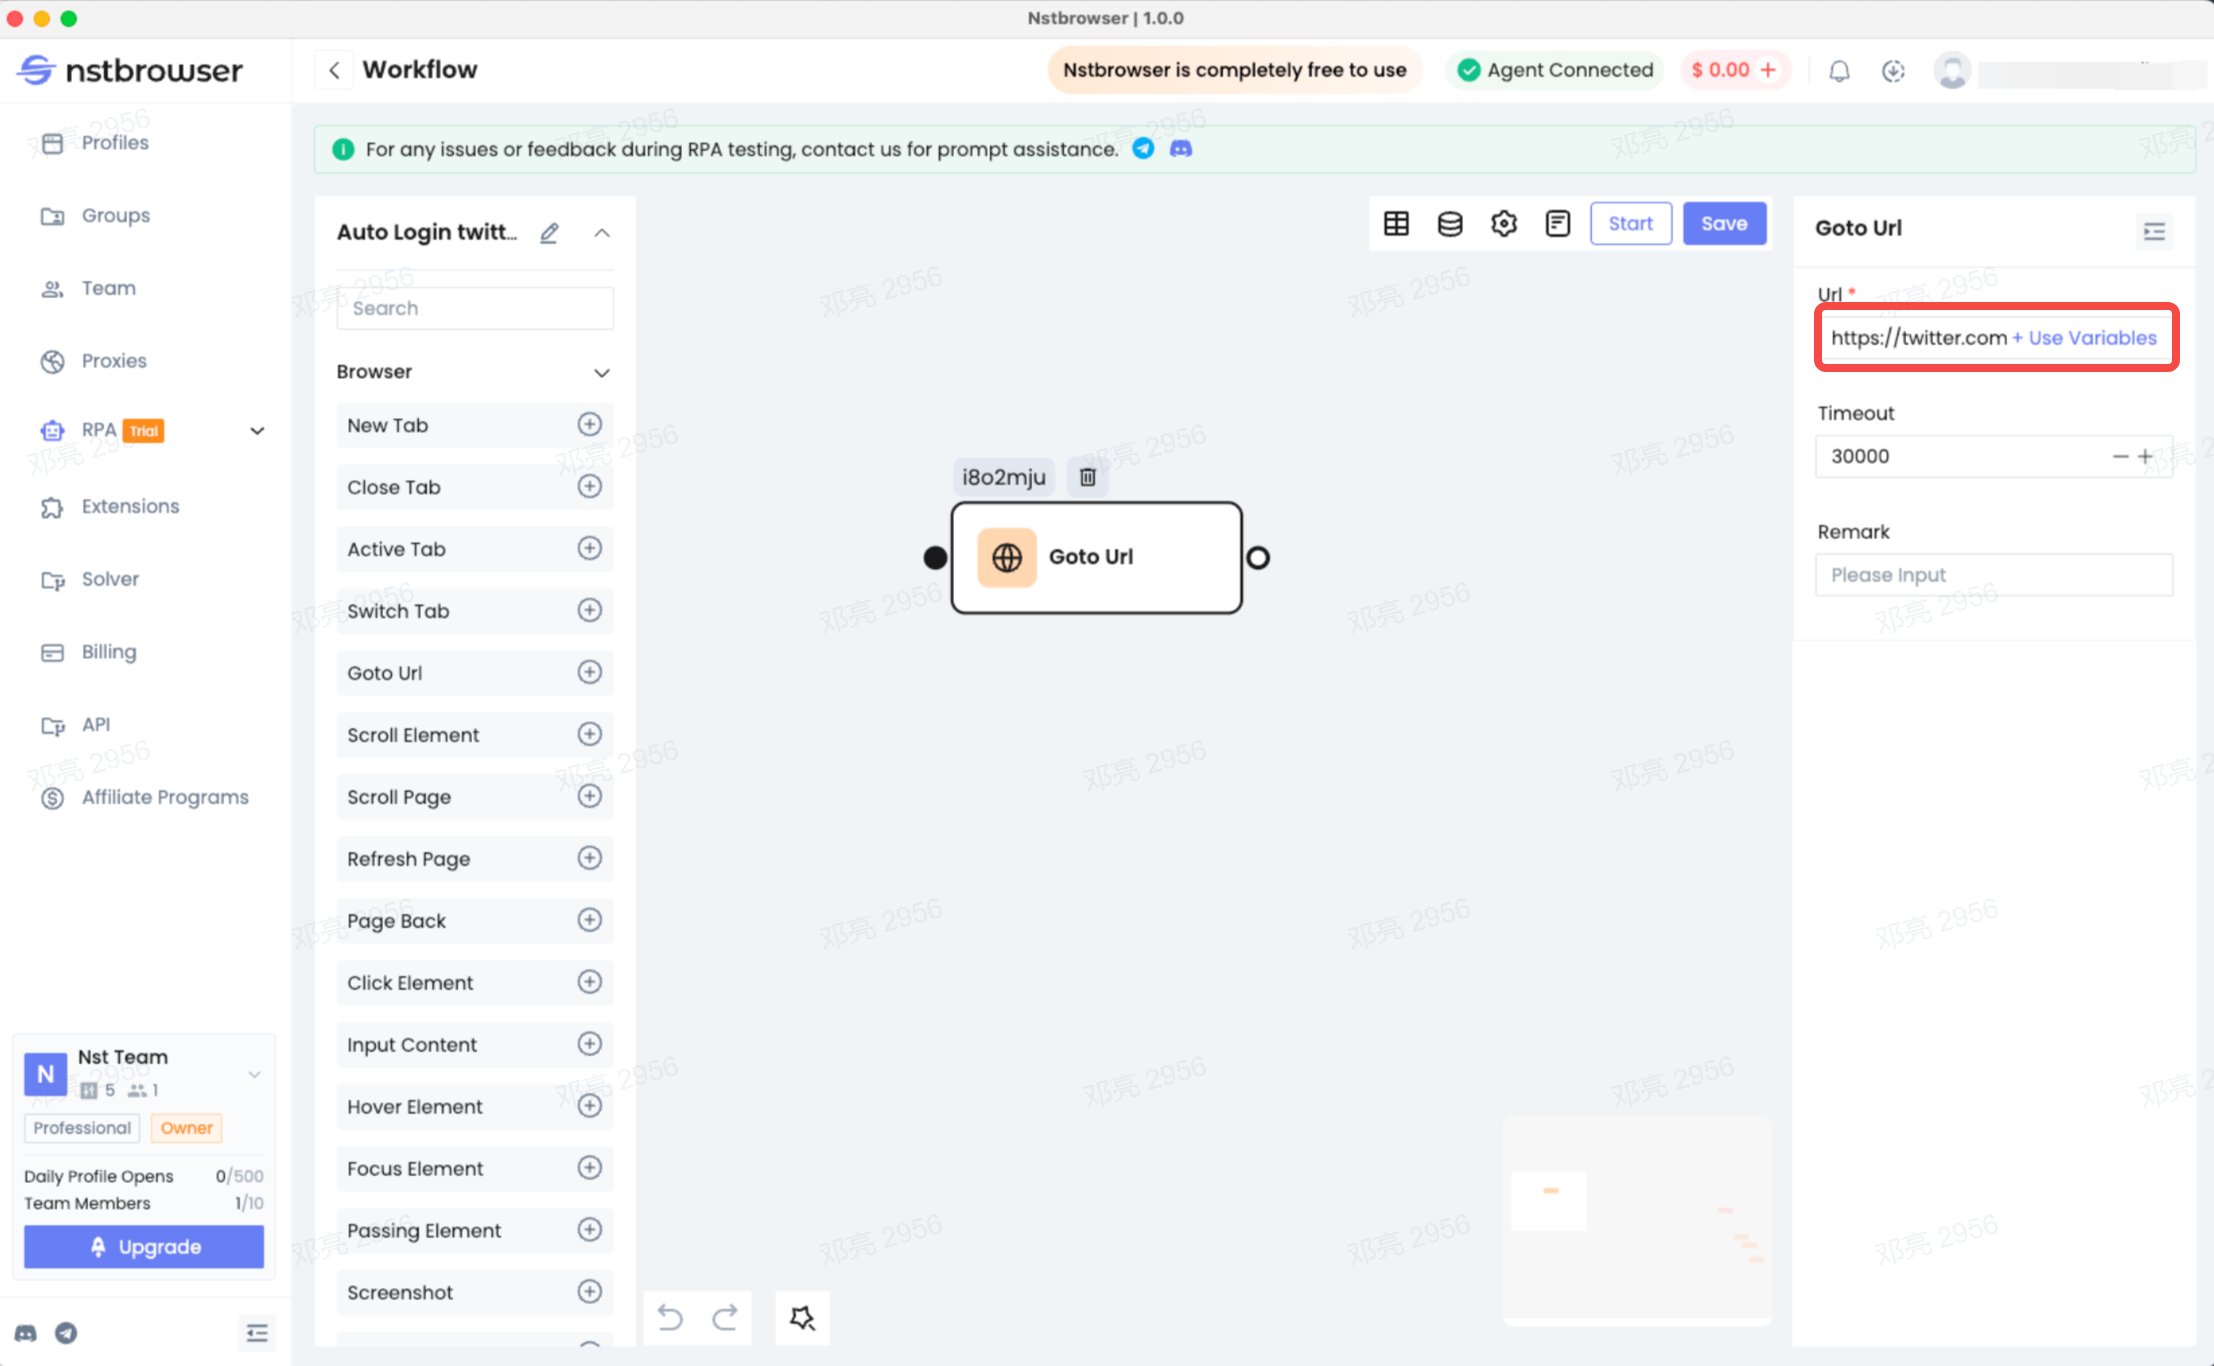
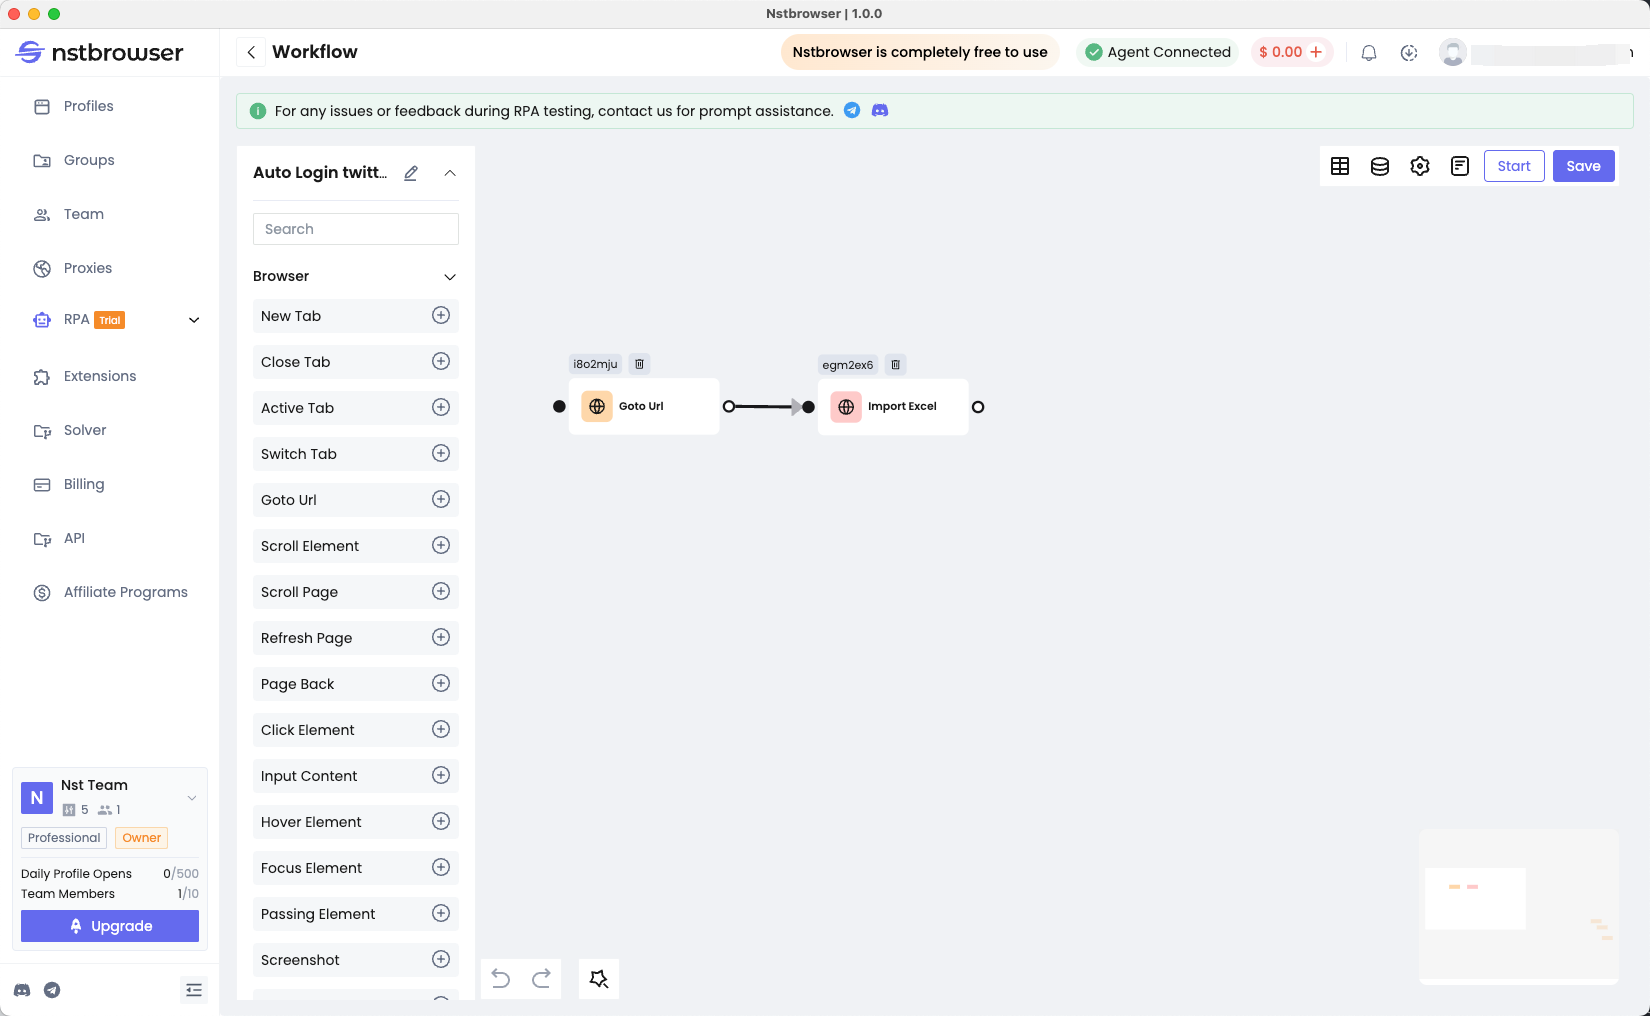
Step 2. Import account information
- Find the
Import Excelnode and add it to the canvas. Click it and the corresponding editing area will appear as well. Now the account and password Excel we configured earlier will come in handy!

- Click on the folder icon for the
File Pathitem and select our Excel, so that our account information has been imported into this Workflow. - After adding these nodes, you will need to connect the nodes with arrows and Nstbrowser will execute the nodes in the order that they are assigned.
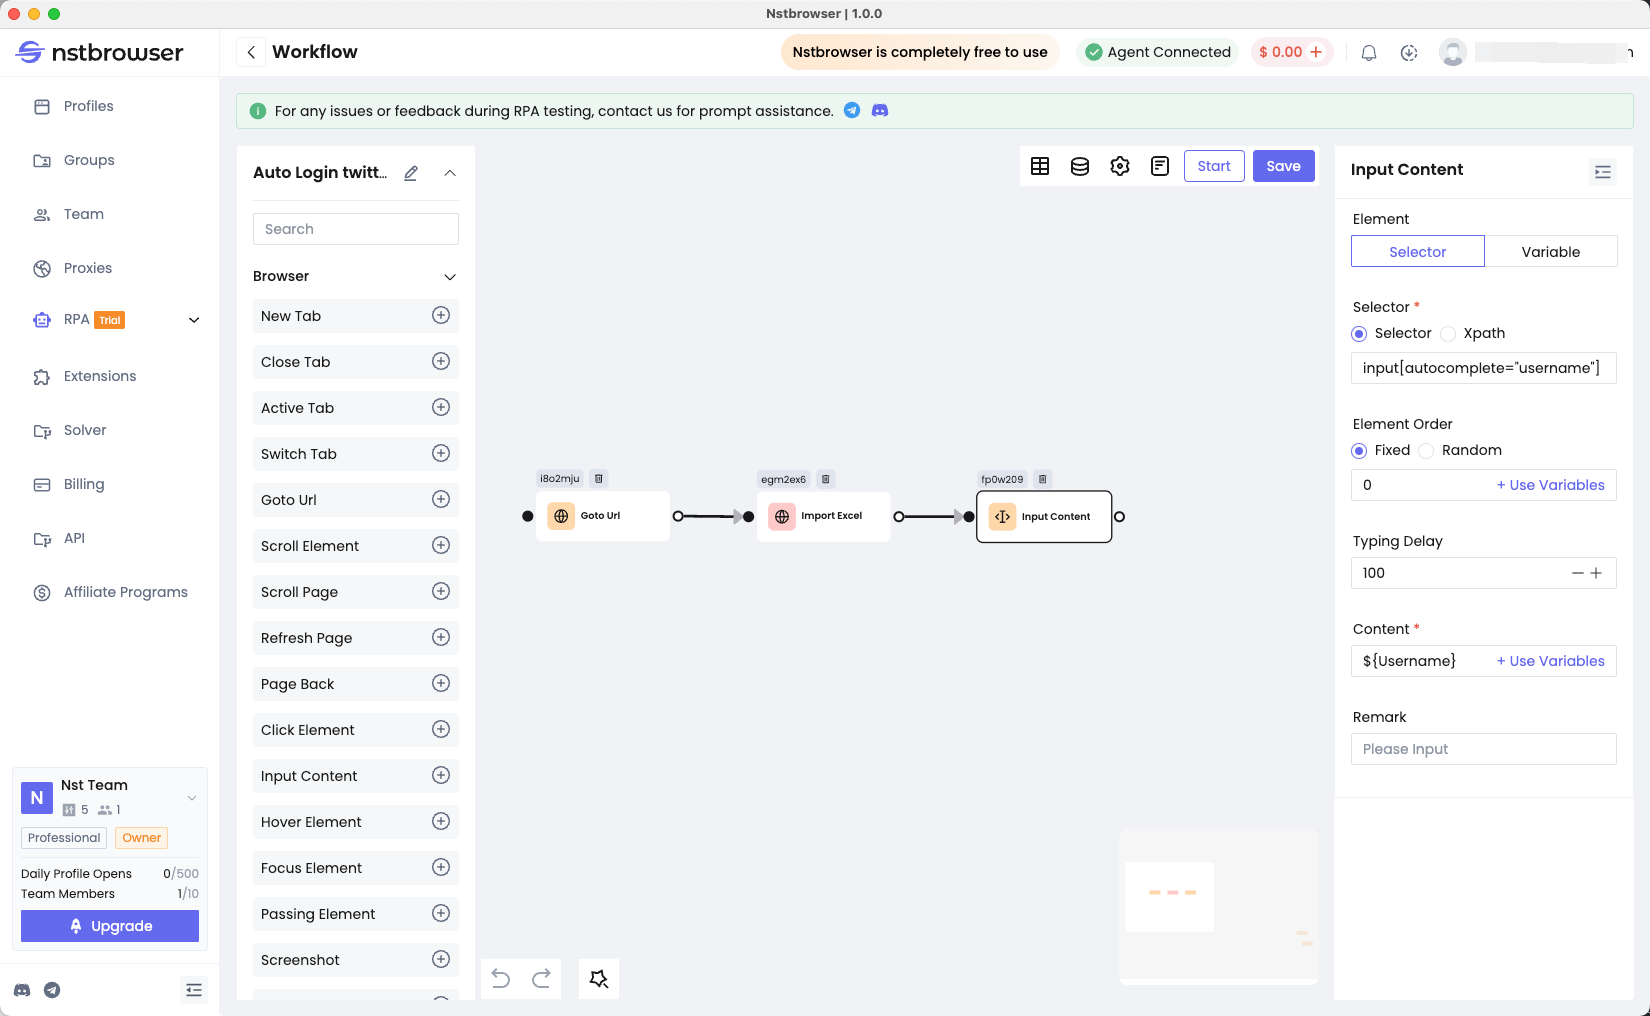
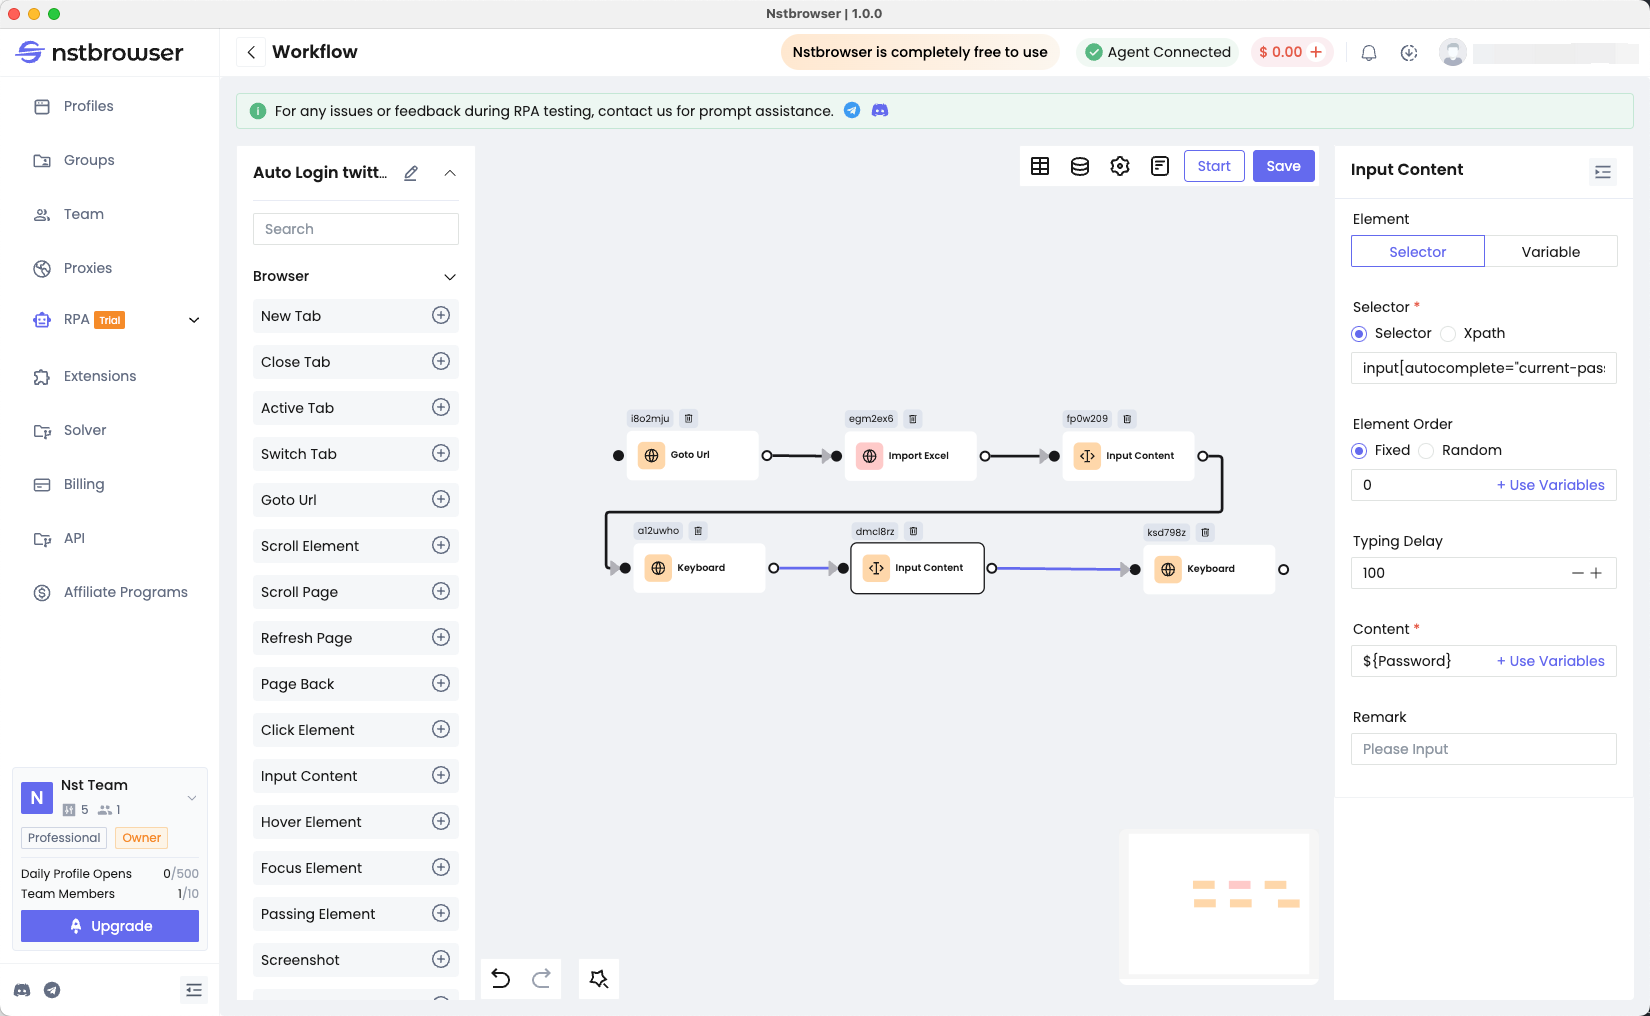
Step 3. Enter account and password
- Select the
Input Contentnode, add it to the canvas, and edit it.
As you can see, Nstbrowser requires you to fill in the Css selector or XPath selector of the target input box here, so we'll just do the Css selector example instruction here:
- Open your browser and visit the Twitter login page.
- Hover over the input box to enter your username.
- Right-click and select "Check", then open the Devtool tool.
In the Devtool tool, you can see the detailed structure of the page. Here we see the following structure of the username input box for Twitter login:
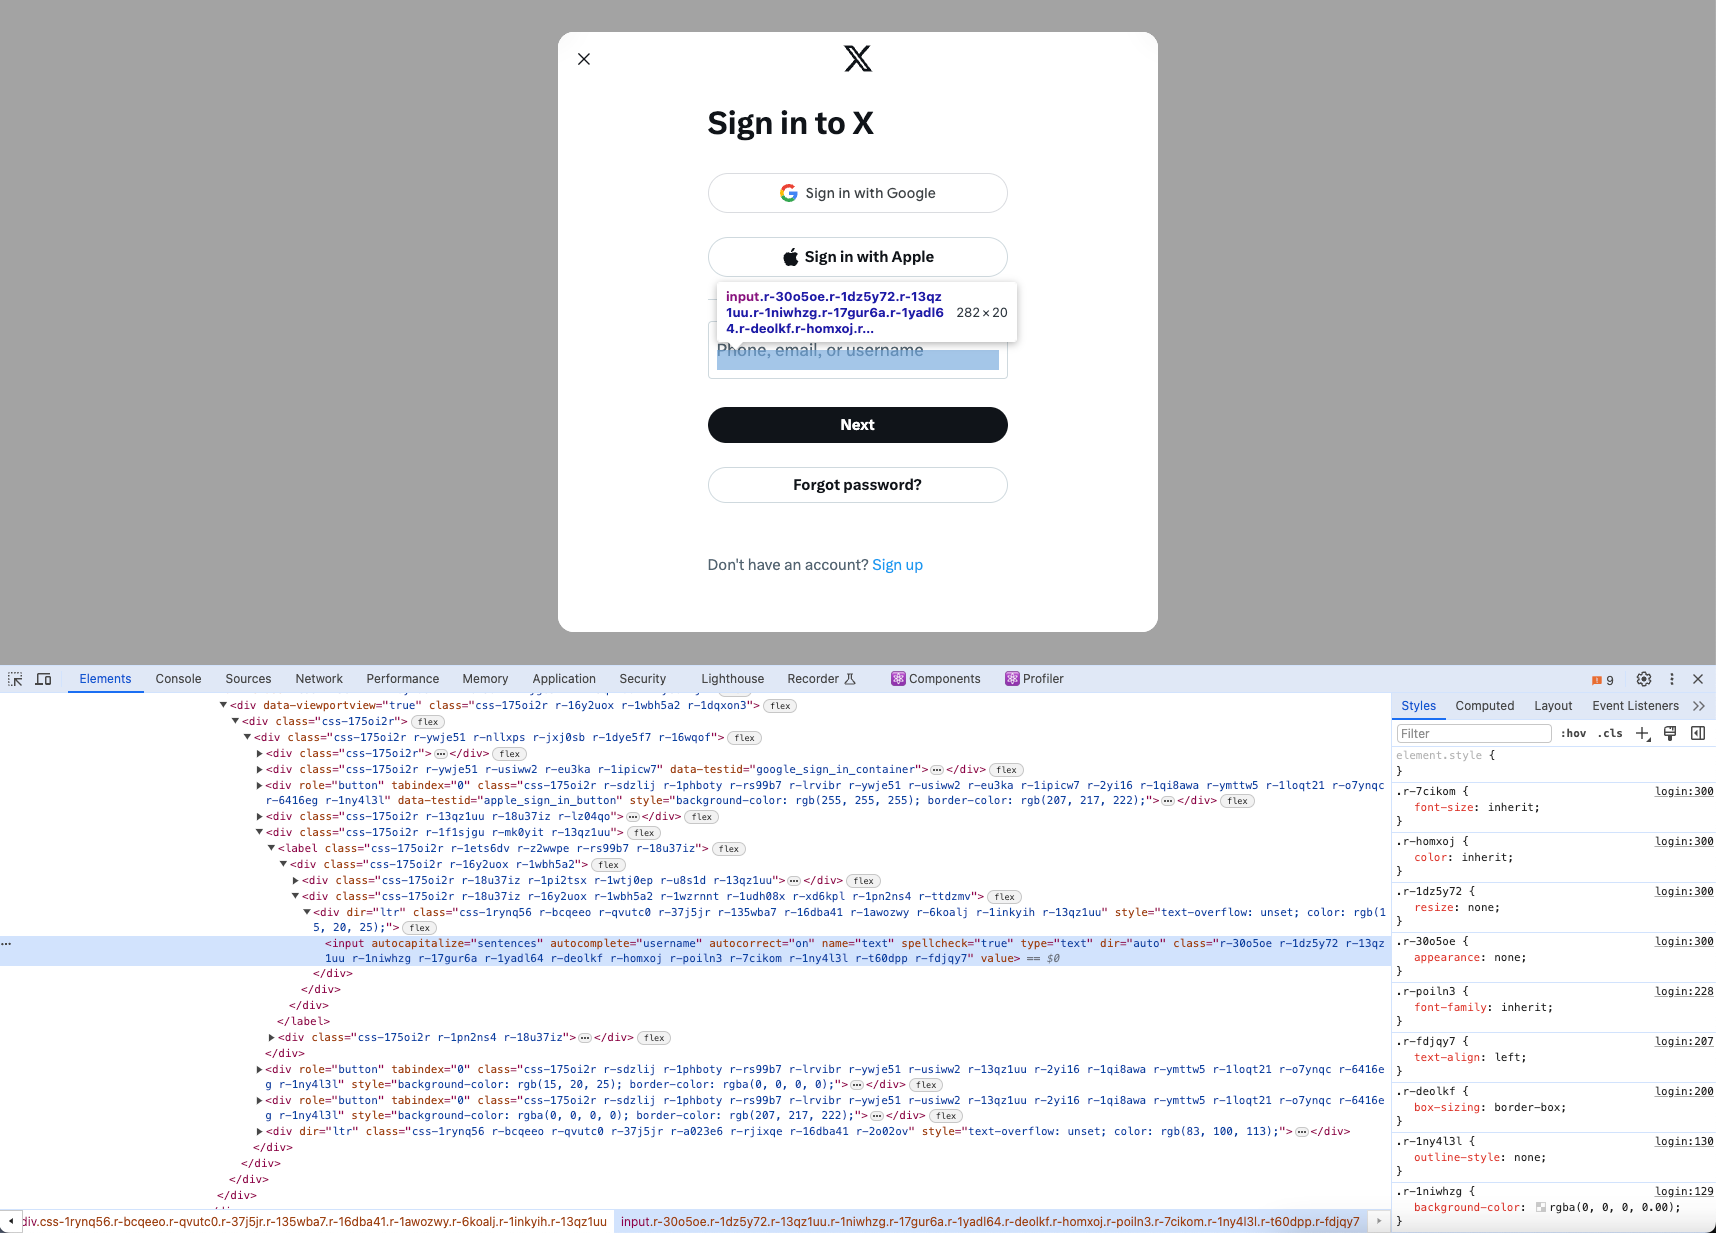
- We need to choose
input[autocomplete="username"]as the Css selector. - Populate its ID into the
Input Contentnode. - Select
+Use Variablesin the Content item, and click the "Username" column from Excel we just imported:
Step 4. Submit Form
- Find the
Keyboardnode on the left side and add it to the canvas. - Select
Enterin the "Key". - Connect it to the node where you entered your password, so you can successfully submit your account!
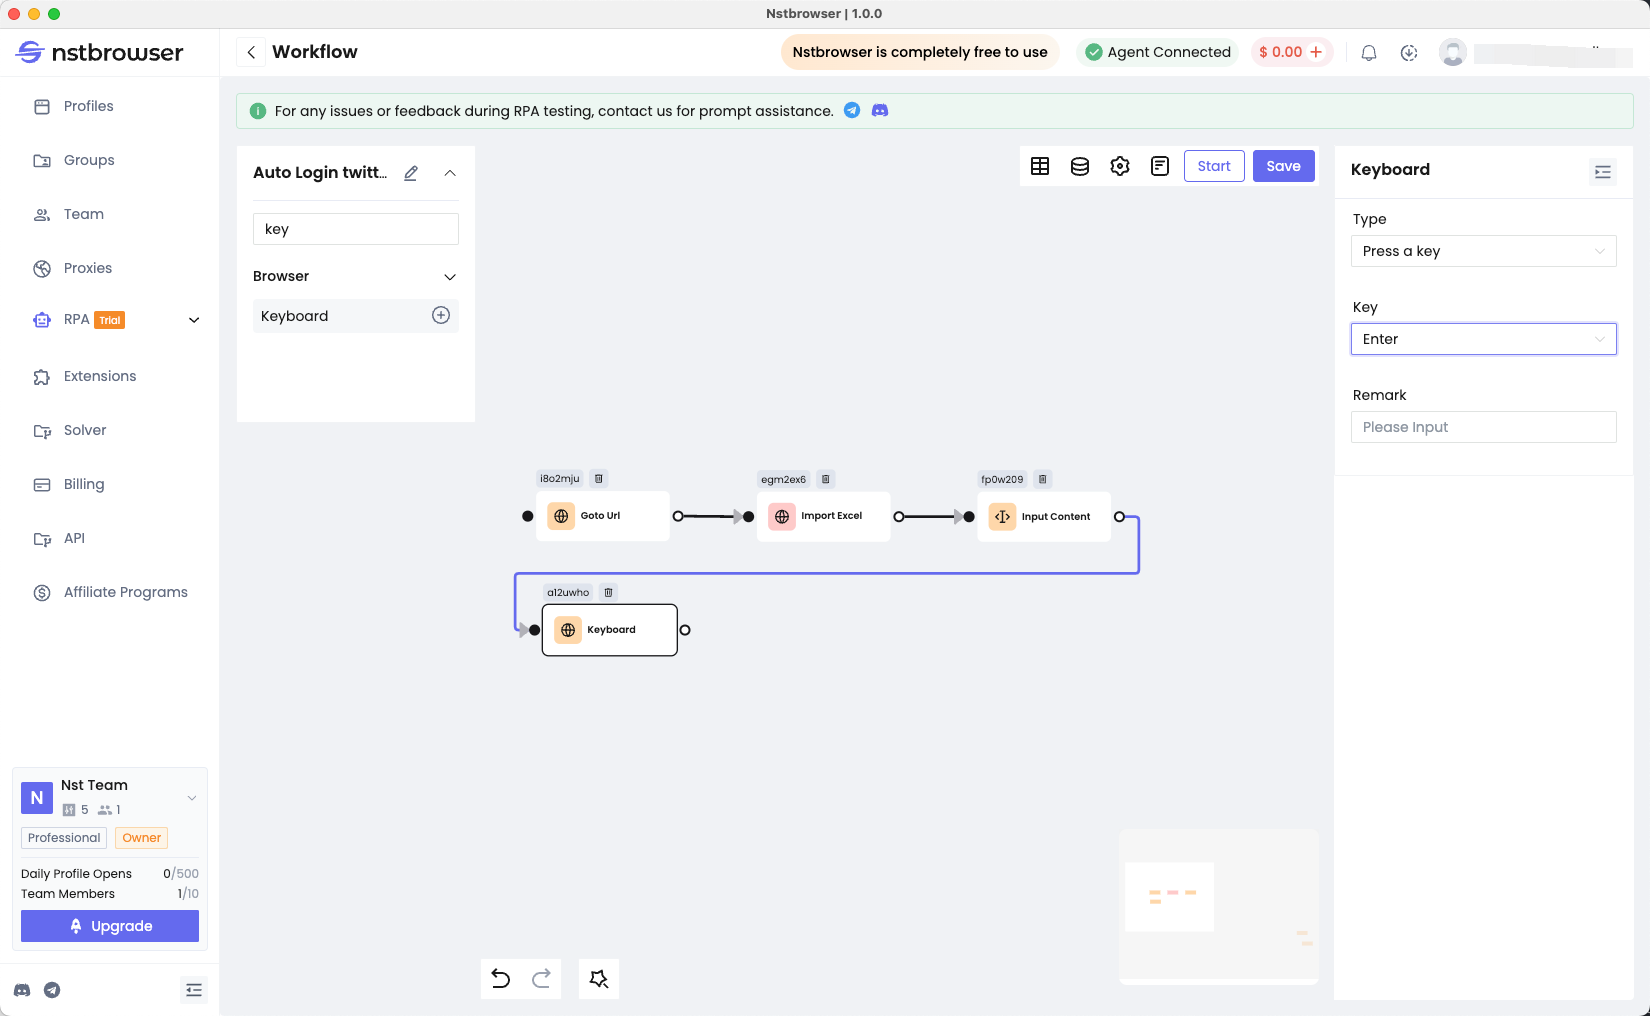
- Next, you will be required to fill in your password, and the process is almost the same as above:
With the configuration here, we have successfully logged into Twitter.
Let's celebrate together!
4. Configuring a Schedule
We need to create the Schedule in order to get RPA up and running now.
In the Workflow list, click the "+" button in the Actions to configure the Schedule.
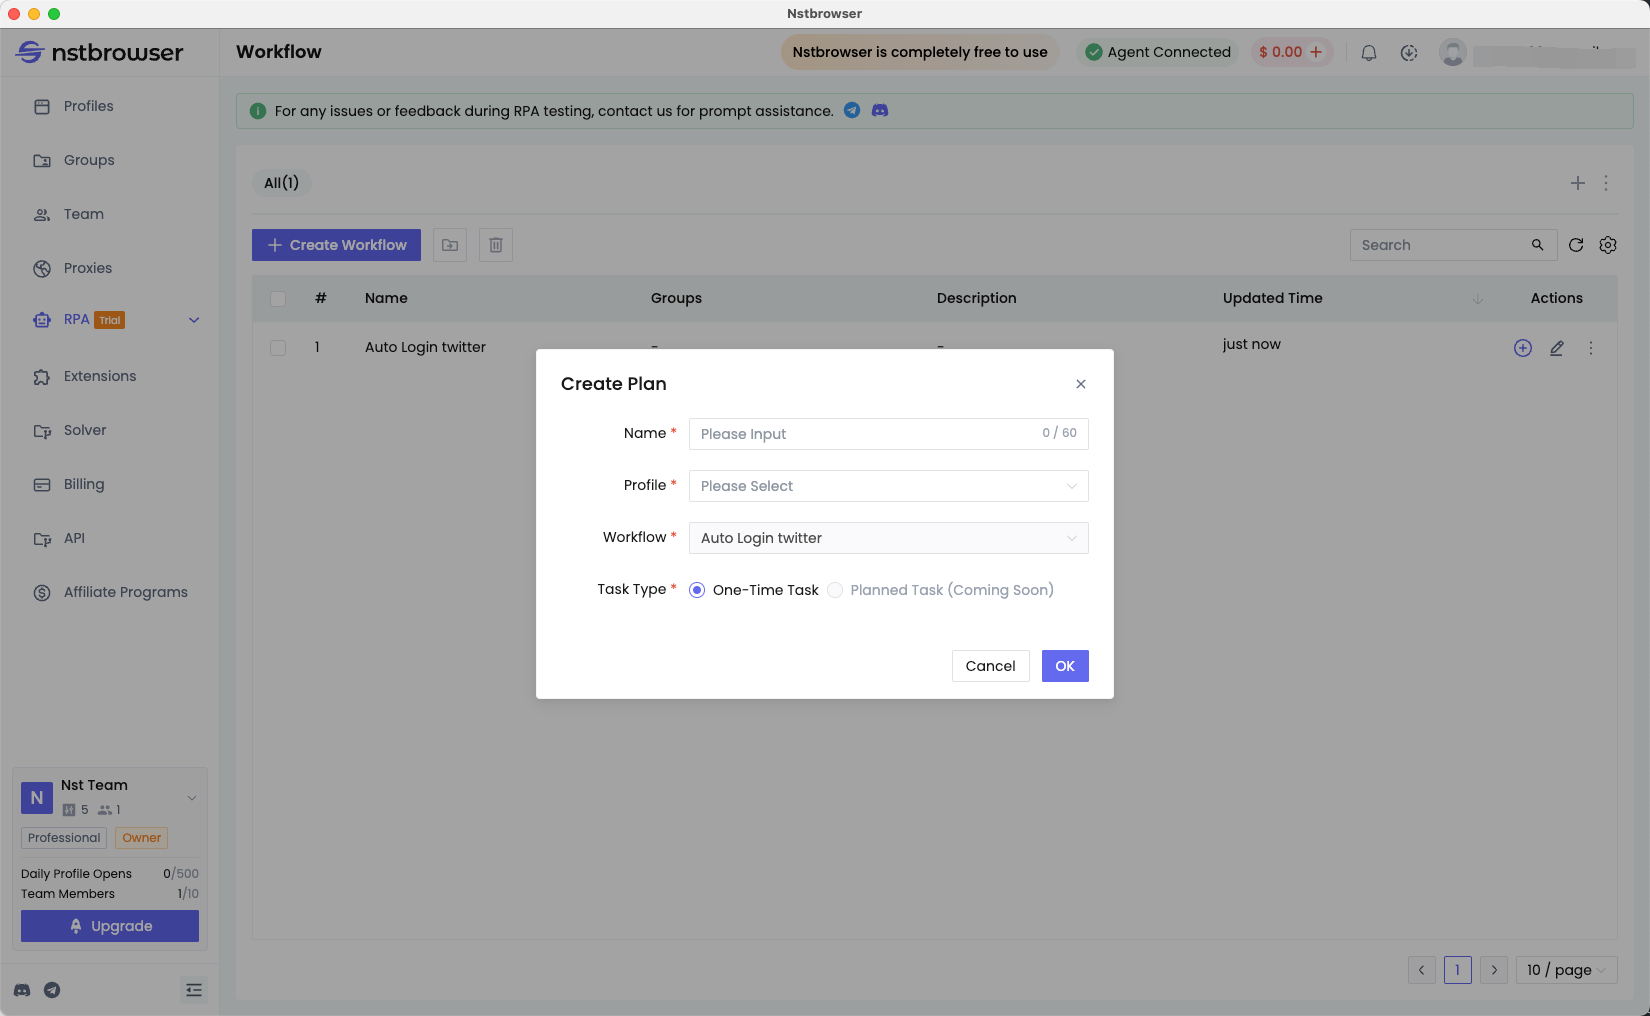
- Name: the name of the Schedule.
- Profile: the profile you want to run (it's available to select more than one).
5. Execute Schedule
After creating a Schedule successfully, click Scheduled in the left navigation bar to enter the Scheduled list page.
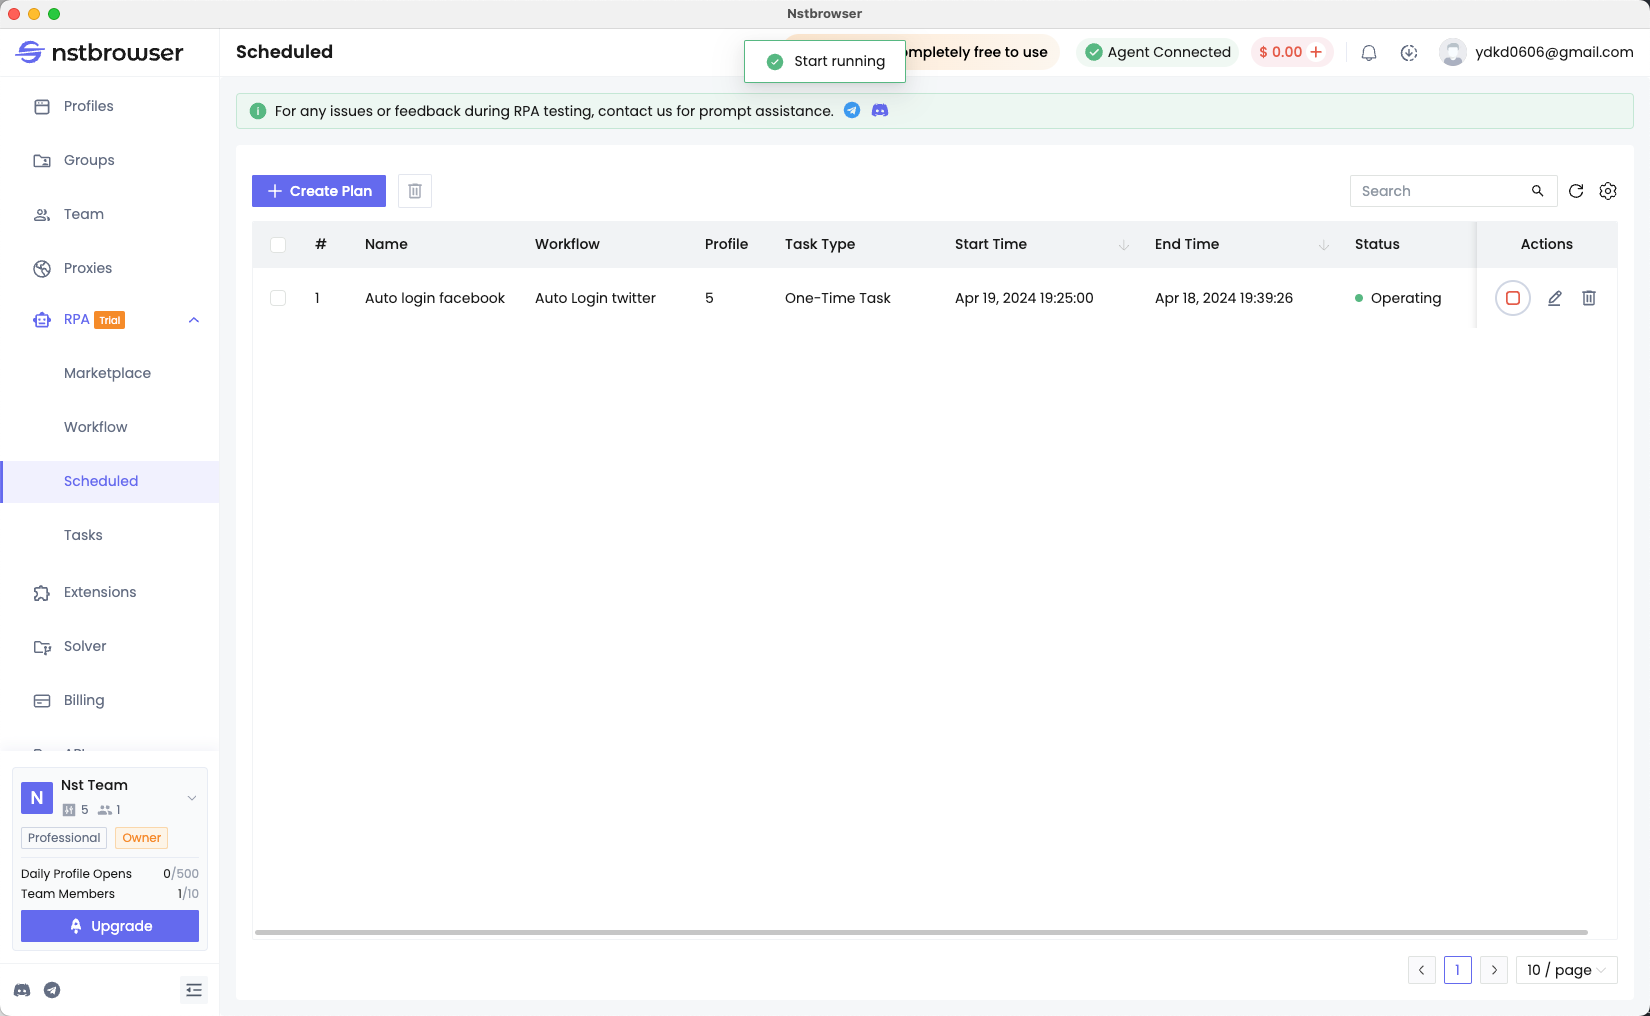
- Find the Schedule you just created.
- Click the "Run" button, and Nstbrowser will help you to automatically log into your Twitter account in the selected Profile!
The Bottom Lines
How to manage multiple accounts with Nstbrowser RPA? Just 5 effective steps you can say goodbye to your disgusting problems! The most essential tip is to be sure to follow all the tiny nodes in this blog. To get more useful techniques, don't forget to visit our official website!
More


